Festival season is here. You have your tickets, your outfits are planned, and now you need the perfect manicure to match the energy. Festival nails are more than just an accessory. They are a major part of your self-expression. You want a design that stands out in photos, glows under stage lights, and survives days of dancing.
Standard manicures often chip or fade before the headliner takes the stage. That is frustrating. You need designs that merge durability with high-impact style. This guide covers 15 playful festival nail ideas that will steal the show. We focus on bold visuals, practical longevity, and easy DIY options you can try at home or show your nail tech.
Key Takeaways
- Durability Matters: Gel and dip powder systems survive camping and crowds better than standard polish.
- Neon is Neutral: In the festival world, bright neon shades act as a base that matches every outfit.
- Texture Adds Depth: Using rhinestones, chrome powder, or glitter creates a multi-dimensional look that catches the light.
- Short Can Be Sweet: You do not need extra-long extensions to make a statement. Short nails are practical and hygienic for outdoor events.
- Mix and Match: Uniformity is out. Painting every nail differently adds a fun, chaotic vibe that fits the music festival atmosphere.
Table of Contents
- Neon Ombre Nails
- Rainbow Nails
- Glitter Gradient Nails
- Rhinestone Accents
- Chrome Nails
- Abstract Nail Art
- Tie-Dye Nails
- Palm Tree Nails
- Floral Nails
- Starry Sky Nails
- Funky Polka Dots
- Minimalistic Black Lines
- Butterfly Nails
- Geometric Neon Nails
- Holographic Nails
- Comparison: Gel vs Acrylic for Festivals
- Popular Asked Questions
- Conclusion
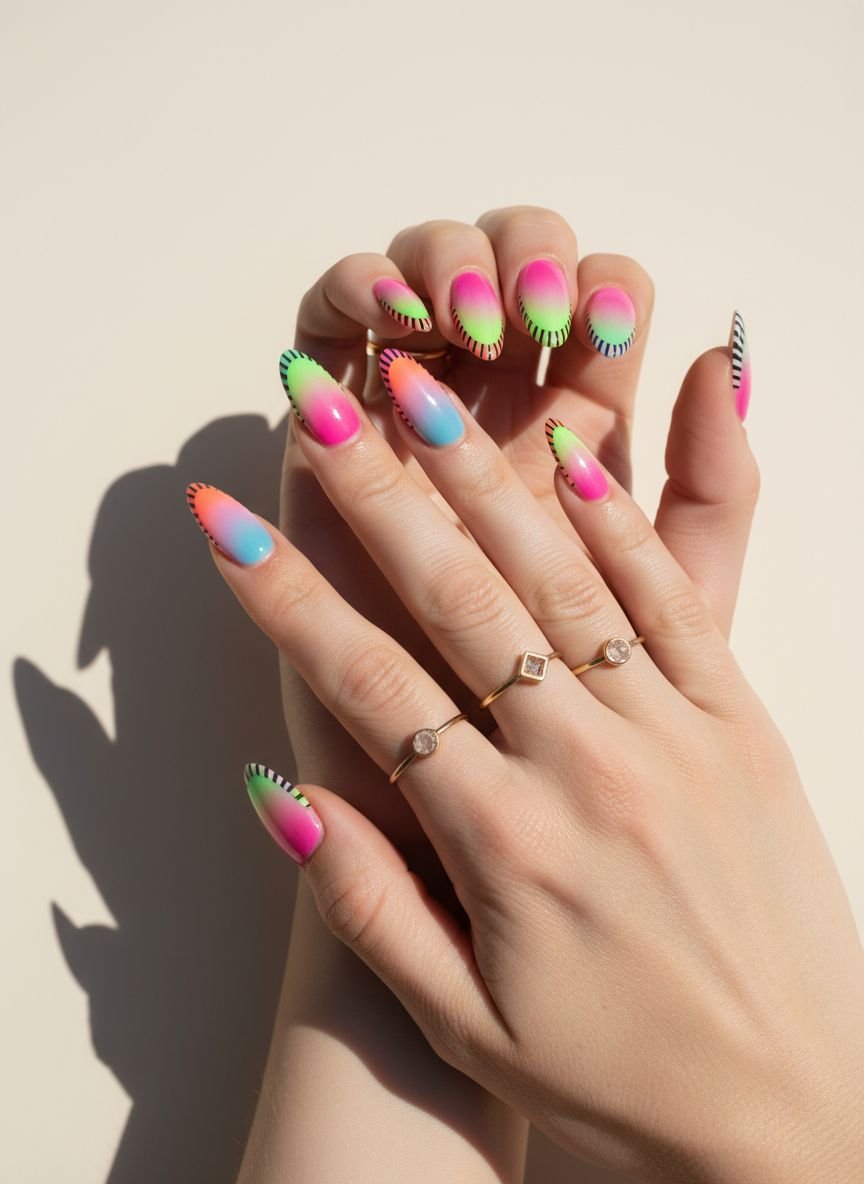
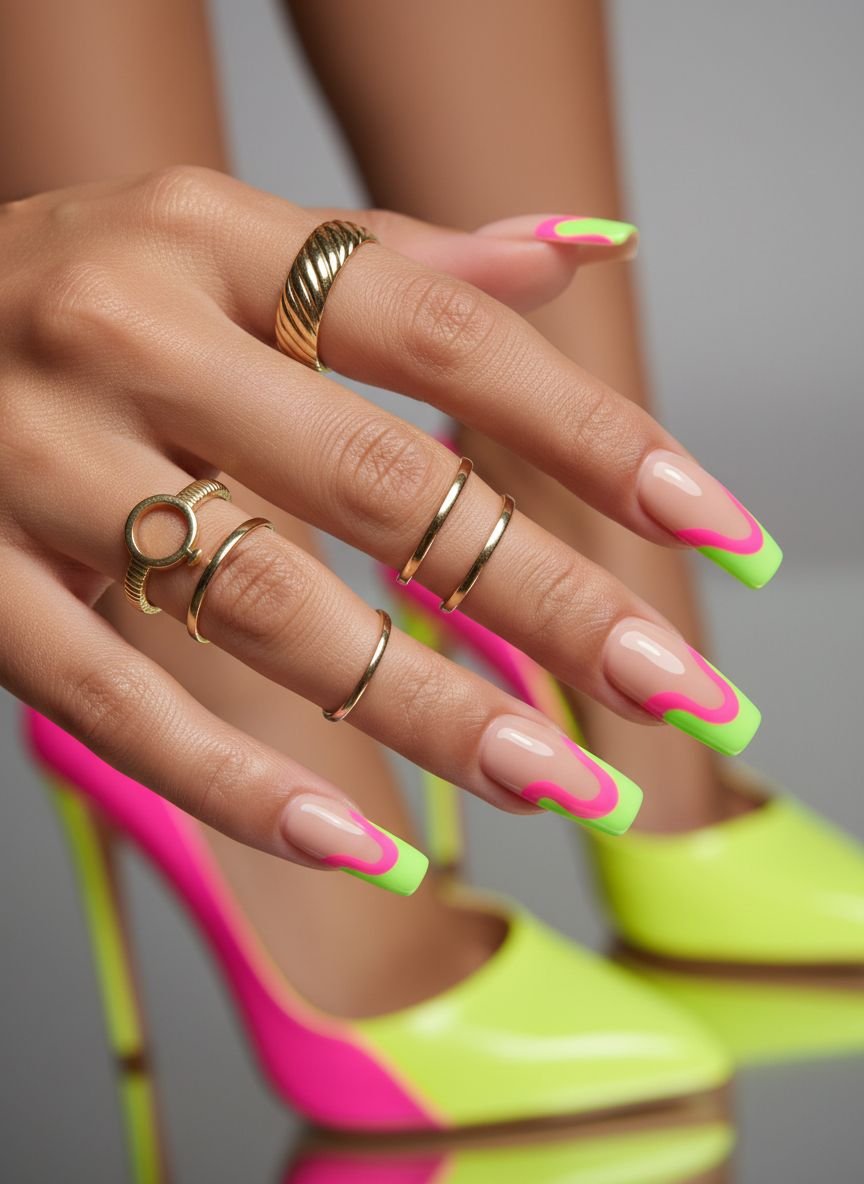
Neon Ombre Nails
Nothing screams summer festival quite like a blindingly bright gradient. Neon ombre combines two or more electric shades that fade seamlessly into one another. The most popular combinations often involve hot pink melting into tangerine orange, or lime green fading into electric blue. This style mimics the intensity of stage lights and sunset skies. It offers a high-contrast look that pops against denim shorts and white crochet tops.
To achieve this look, you need a makeup sponge and high-pigment polishes. You paint stripes of your chosen colors onto the sponge and dab it repeatedly onto the nail. The porous texture of the sponge blends the wet polish for a soft transition. You must apply a white base coat first. The white background makes the neon pigments appear true to color rather than translucent. Finish with a glossy top coat to smooth out the texture left by the sponge.
Pro Tip: Apply liquid latex around your cuticles before sponging to make cleanup instant and mess-free.
Rainbow Nails
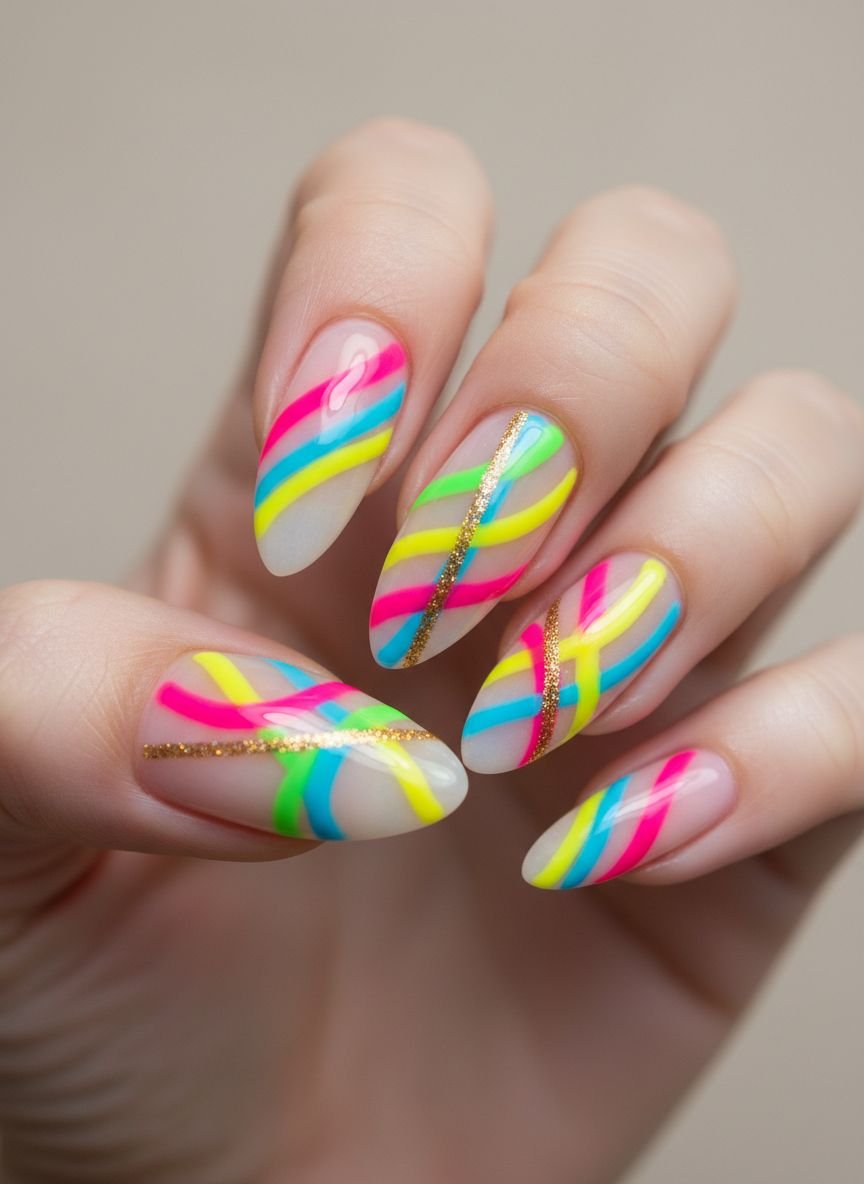
Rainbow nails offer a versatile approach to color. You can paint each nail a solid, different color of the spectrum, or you can paint a mini rainbow arc on a nude base. This trend is perfect for indecisive people who love every color. It signals inclusivity, joy, and high energy. The solid multi-colored manicure is easier to execute and touch up if a chip happens. The negative space rainbow arc looks more delicate and grows out gracefully without a harsh demarcation line.
For the solid look, choose five distinct shades. Start with a red or pink on the thumb and work your way to blue or purple on the pinky. If you prefer the arc design, use a thin liner brush. Dip the brush into your first color and draw a tiny arch near the cuticle or tip. Follow the curve with subsequent colors. Keep your hand steady by resting your pinky on a flat surface. This design looks incredible in photos when you are holding a cold drink or flashing a peace sign.
Pro Tip: Use pastel versions of rainbow colors for a softer, “fairycore” festival aesthetic.
Save this idea to your Pinterest.
Glitter Gradient Nails
Glitter gradient is the ultimate low-maintenance festival manicure. This design features a heavy concentration of glitter at the tip or cuticle that fades into a clear or nude base. It reflects light beautifully during daytime sets and sparkles under the lasers at night. The major advantage here is the grow-out. Since the base near the cuticle is often sheer or nude, new nail growth is barely visible. This means your manicure looks fresh even on day three of a camping festival.
You can use loose glitter or a glitter-packed polish. If using loose glitter, apply a clear coat and sprinkle the glitter where you want the highest density. Use a fan brush to lightly sweep the excess down the nail for the fade effect. If using polish, apply the first coat to the tip only. Apply the second coat starting slightly lower. Continue layering until the tip is opaque. Seal everything with a thick layer of top coat. Glitter can feel rough, so a thick top coat ensures a glass-like finish that won’t snag on your clothes.
Pro Tip: Use chunky holographic glitter mixed with fine shimmer for maximum light reflection.
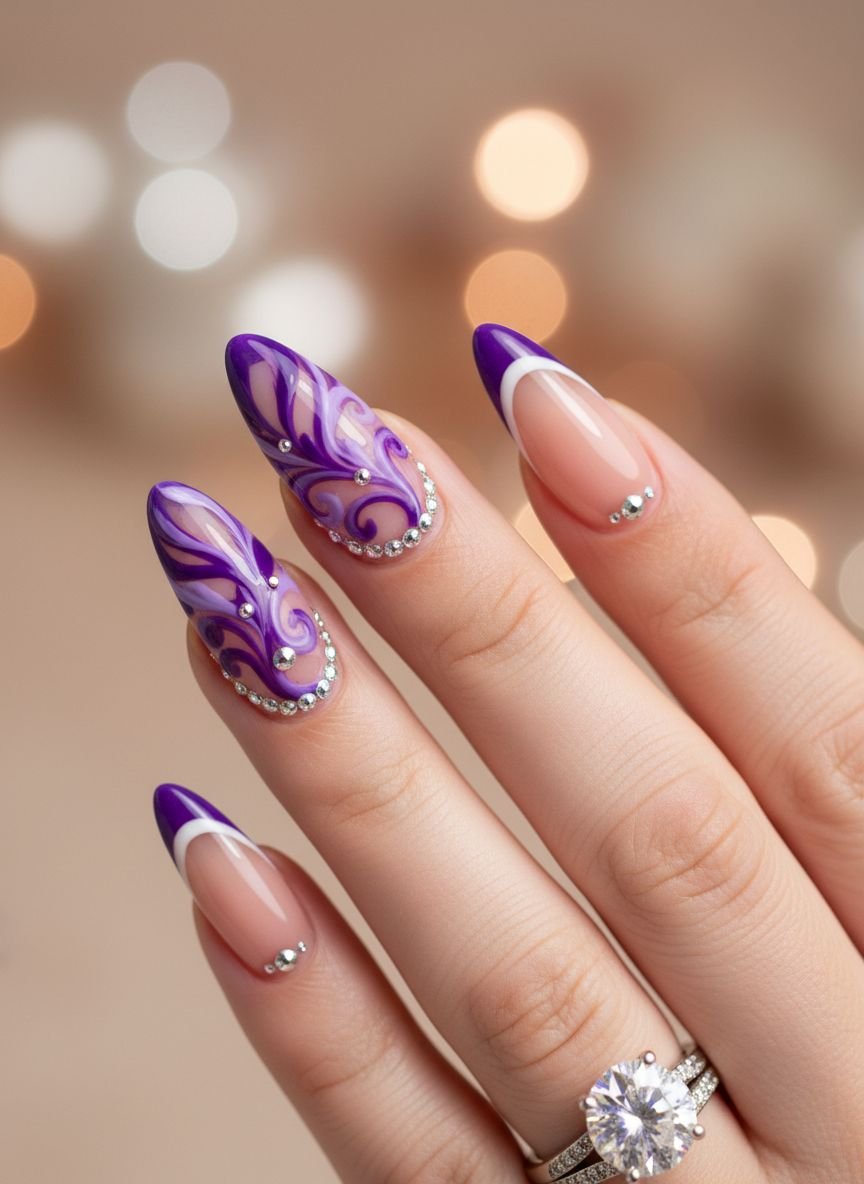
Rhinestone Accents
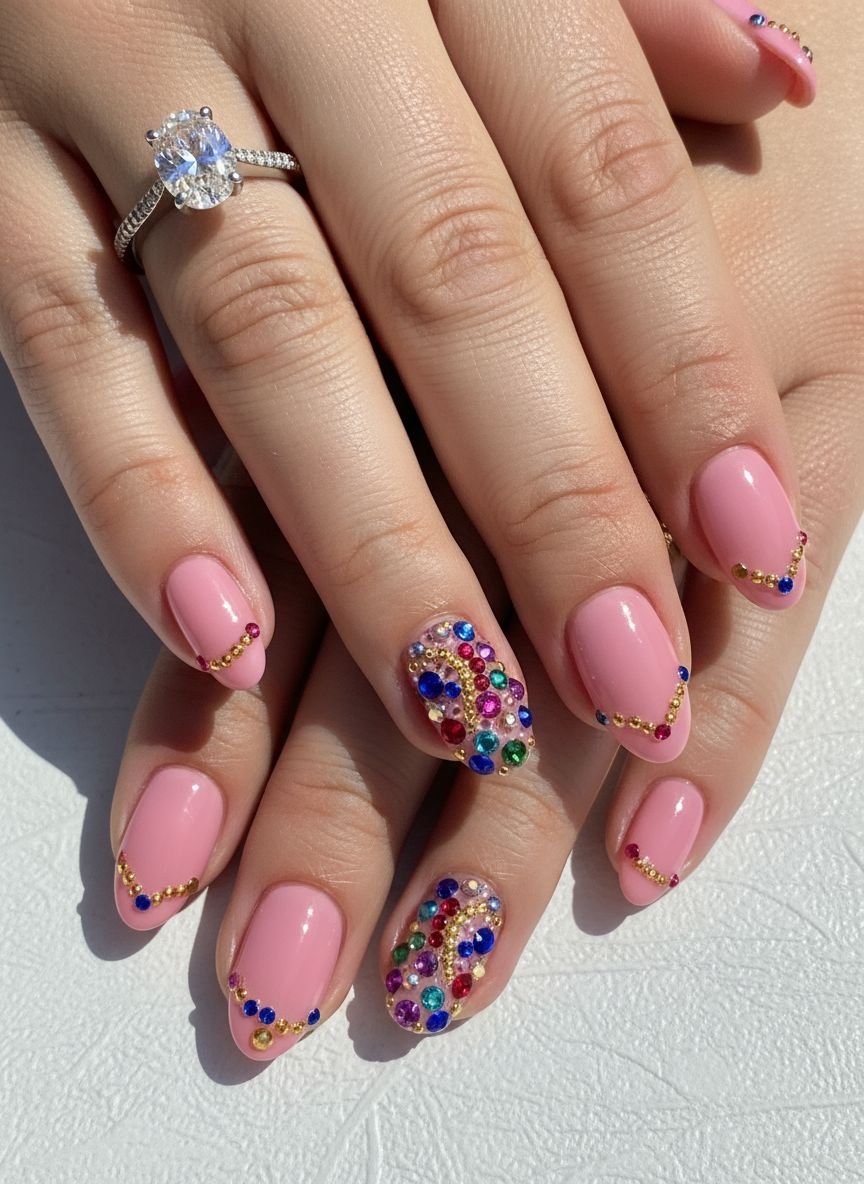
Rhinestones transform simple polish into jewelry for your hands. You can go subtle with a single gem near the cuticle or go bold with a full nail encrusted in crystals. This trend aligns with the “Euphoria” makeup aesthetic that dominates festival fashion. The stones catch sunlight and stage lights, creating tiny flashes of brilliance as you move your hands. It adds a luxurious, tactile element to your look.
Adhesion is the secret to success here. You do not want stones popping off in the middle of a crowd. Use a specific nail art glue or a thick builder gel to secure the gems. Place a dot of glue where you want the stone. Pick up the gem with a wax pencil and press it firmly into the glue. Cure it or let it dry completely. For extra security, apply a little extra top coat around the base of the stone, but do not paint over the top of it. Painting over the stone dulls the facets and ruins the sparkle.
Pro Tip: Mix different sizes of rhinestones (3mm, 5mm, and teardrop shapes) to create a professional, designed look.
Chrome Nails
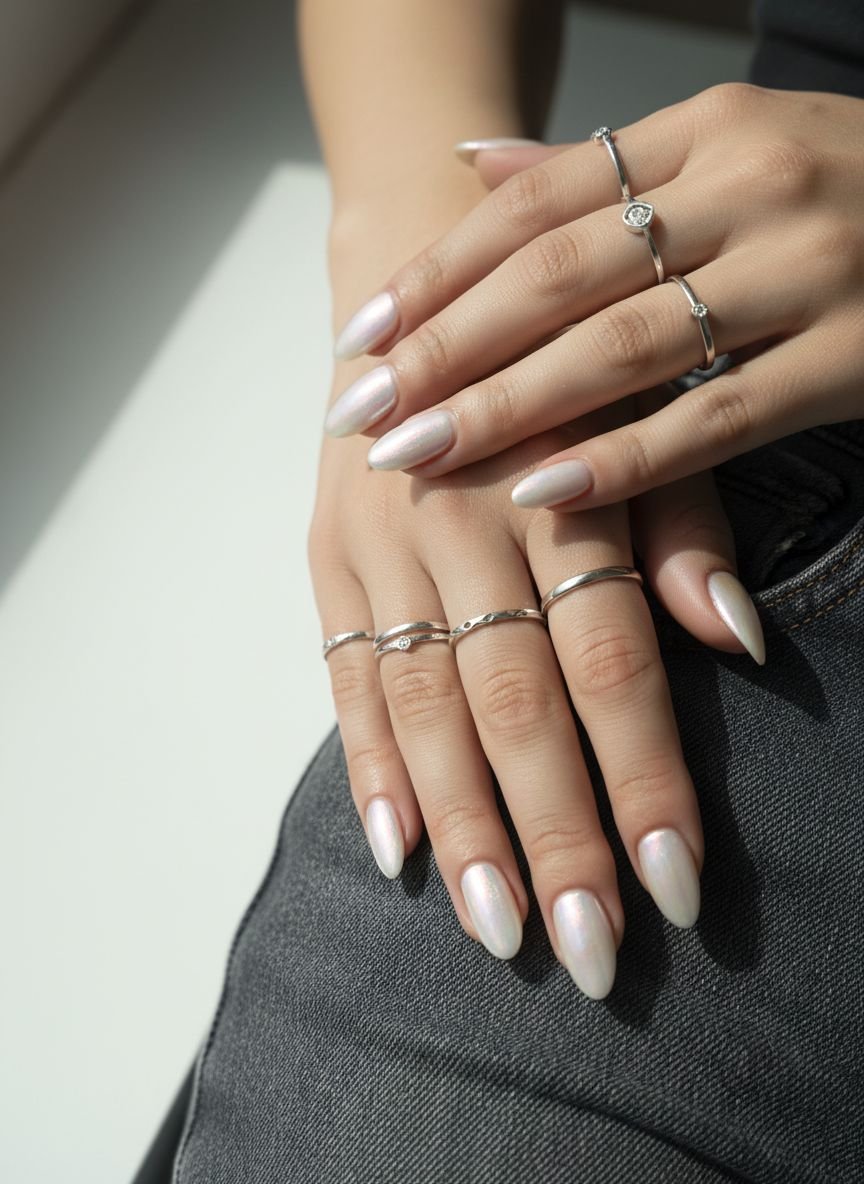
Chrome nails provide a futuristic, mirror-like finish that looks almost liquid. This trend has evolved from simple silver and gold to iridescent “aurora” powders that shift color depending on the angle. A pink chrome might shift to gold, while a blue chrome might flash purple. This shifting effect is mesmerizing and fits the psychedelic atmosphere of many music festivals. It is sleek, modern, and incredibly photogenic.
This look requires a no-wipe gel top coat and chrome powder. First, apply your base color and cure it. Apply the no-wipe top coat and cure it for about 30 seconds (it needs to be warm but fully cured). Rub the chrome powder onto the nail using a silicone tool or an eyeshadow applicator. Buff it until you see your reflection. The friction creates the mirror finish. Dust off the excess powder and seal it with another layer of top coat. Cap the free edge securely, as chrome tends to chip at the tips first.
Pro Tip: Use a black base color for the most intense, mirror-like chrome effect.
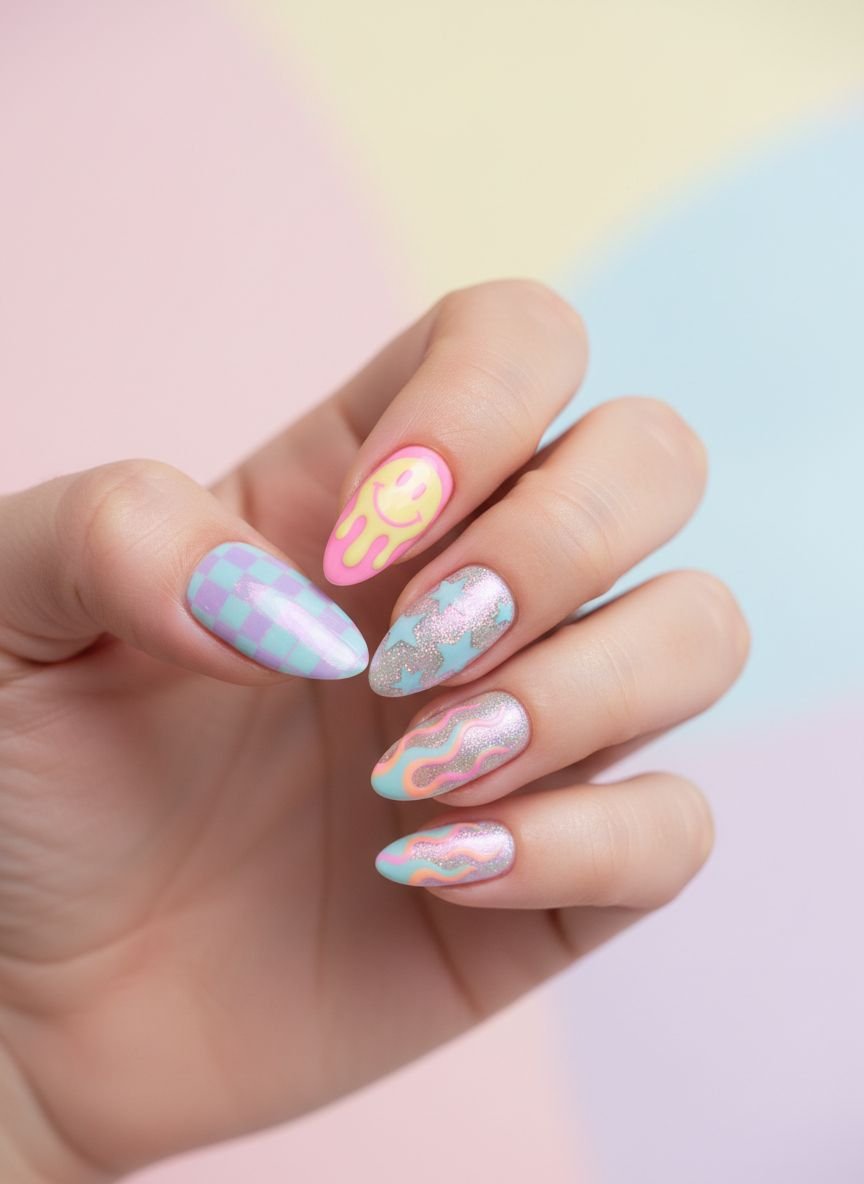
Abstract Nail Art
Abstract nail art is perfect for those who want a unique, artistic vibe without the pressure of perfection. This style uses random shapes, squiggles, dots, and blobs of color. There are no rules. It celebrates asymmetry and creative freedom. Because the design is intentional chaos, any mistakes you make during the application just look like part of the art. It is a stress-free way to wear bold colors and interesting patterns.
Start with a neutral base color like beige, milky white, or soft pink. Select a palette of 3-4 contrasting colors. Use a dotting tool or a brush to create organic shapes. You might paint a blue wave on one side and an orange circle on the other. Overlap the shapes slightly to create depth. You can add black or gold foil flakes to fill in negative spaces. This design works exceptionally well on short, natural nails. It turns your hands into a mini canvas of modern art.
Pro Tip: Matte top coat changes the vibe of abstract art completely, making it look like a gouache painting.
Tie-Dye Nails
Tie-dye is a staple of festival fashion, usually found on oversized t-shirts and bandanas. Bringing this pattern to your nails creates a cohesive, retro 60s look. The swirling colors mimic the psychedelic rock era and the carefree spirit of summer. You can opt for traditional primary colors or switch to a pastel or neon palette for a modern update. The result is a soft, marbled effect that looks intricate but is surprisingly easy to do.
The “blooming gel” technique is the easiest way to achieve this. Apply a coat of blooming gel (a clear gel that spreads out colored polish) but do not cure it yet. While it is wet, use a detail brush to drag lines of colored gel polish through the clear layer. Watch as the colors spread and blur into each other, creating the tie-dye effect. Once you are happy with the spread, cure it immediately to freeze the design. If you use regular polish, you can achieve a similar look using the water marble technique or by dragging a needle through wet drops of polish.
Pro Tip: Use a spiral motion with your brush to mimic the classic spiral tie-dye shirt pattern.
Palm Tree Nails
For festivals held in desert locations or coastal cities, palm tree nails set the scene perfectly. They evoke warm weather, vacations, and relaxation. The silhouette of a palm tree against a sunset gradient is a classic image. It brings a touch of California cool to your fingertips. Even if the festival is in a muddy field, your nails will channel tropical vibes.
You can hand-paint palm trees, but that requires a very steady hand. A specialized nail stamping plate or water decals are much faster and more consistent. Start with your background—a sunset ombre of pink and yellow works best. Apply a black palm tree decal or stamp over the dried background. If you are hand painting, use a very thin striper brush. Draw a curved line for the trunk and five or six quick, sweeping strokes for the fronds. Keep the leaves wispy at the ends.
Pro Tip: Only put the palm tree design on your ring finger (accent nail) to keep the look from becoming too busy.
Floral Nails
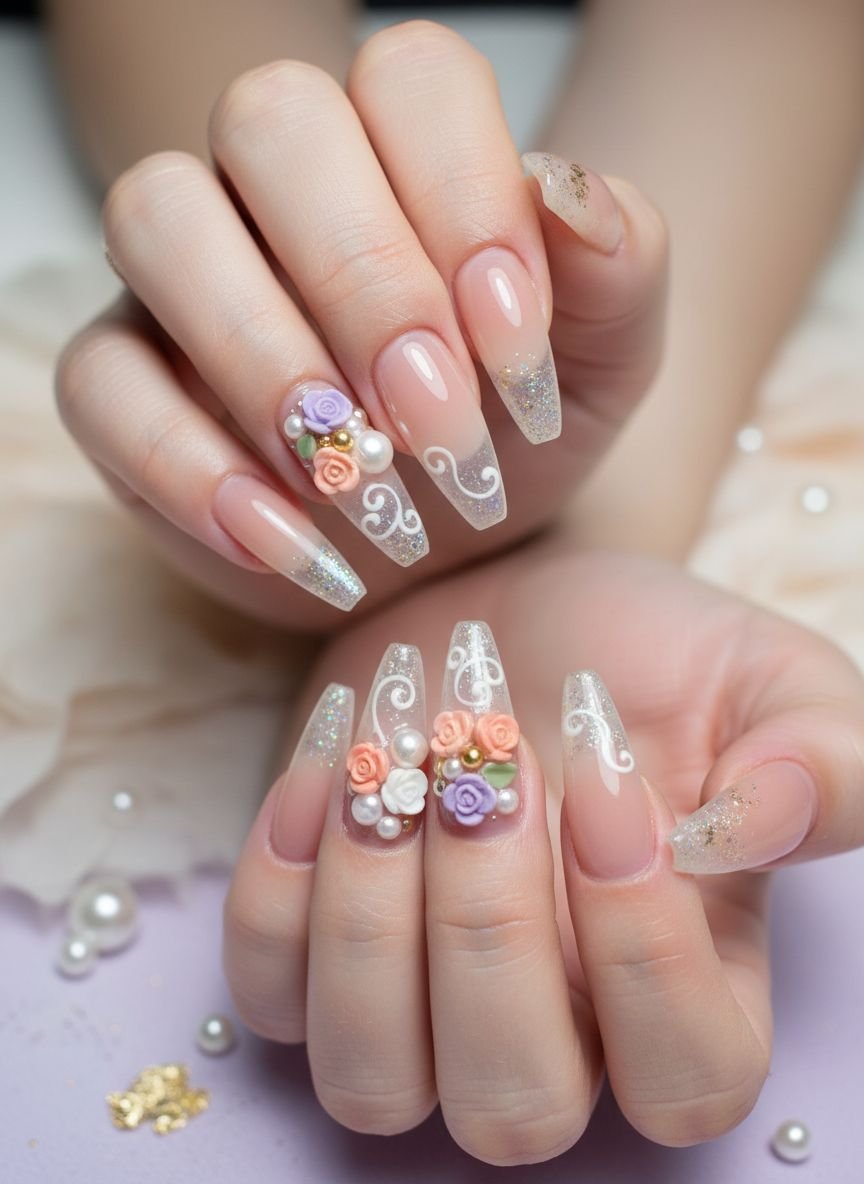
Floral patterns bring a touch of nature and femininity to the festival grounds. While often associated with spring, festival florals are bolder and brighter. Think 70s-inspired daisies with large centers and rounded petals. This “flower power” aesthetic pairs beautifully with crochet tops and denim bell-bottoms. It is a cheerful design that adds a pop of pattern without being aggressive.
To create the retro daisy, you need a dotting tool. Dip the tool in your petal color (white is classic) and place five dots in a circle. They should barely touch. Then, dip the tool in your center color (yellow) and place one dot in the middle. It is that simple. You can vary the size of the flowers or place them randomly on the nail. Some can be cut off at the edge to look like a printed fabric pattern. A bright background color like sky blue or mint green makes the white daisies pop.
Pro Tip: Add a tiny rhinestone to the center of each flower for a glam 3D effect.
Save this idea to your Pinterest.
Starry Sky Nails

Festivals often go late into the night, making starry sky nails a thematic choice. This design features a dark blue or black base speckled with white stars, moons, and constellations. It captures the magic of camping under the open sky. It feels mystical and witchy, appealing to the boho-chic crowd. The contrast between the dark base and the bright white or gold details is striking.
Start with a navy blue or black polish. To create depth, sponge a little purple or teal in the center to look like a nebula. For the stars, you can flick a toothbrush dipped in white paint for a spray of tiny stars. Use a fine brush to draw larger four-point stars or crescent moons. Gold metallic paint works wonderfully for the moon details. If drawing is too difficult, small star-shaped glitter pieces can be placed into wet polish.
Pro Tip: Apply a coat of glow-in-the-dark top coat so your stars actually glow when the lights go down.
Funky Polka Dots
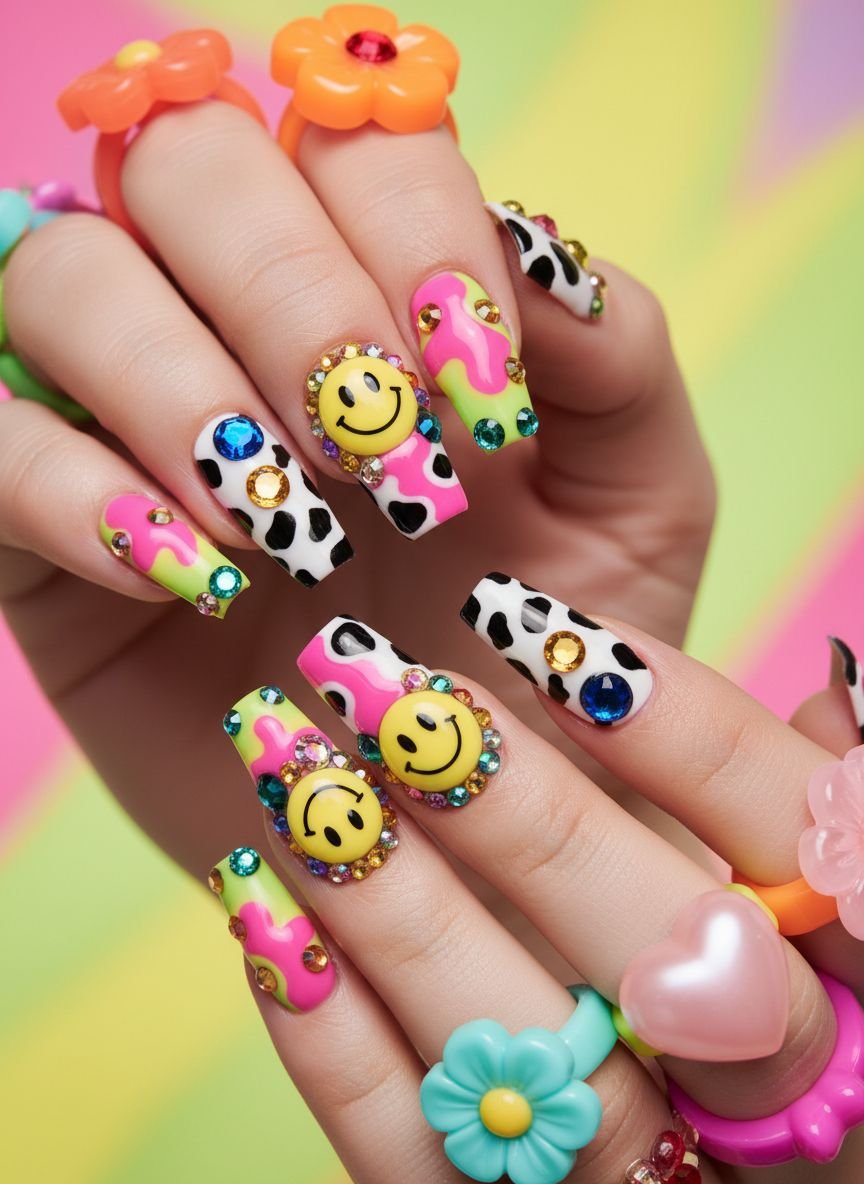
Polka dots are playful, retro, and incredibly easy to execute. For a festival twist, forget the uniform grid. Vary the size and color of the dots. Place them randomly. Use neon colors on a nude base or metallic dots on a matte black base. This design is high energy and fun. It adds texture and visual interest without requiring advanced artistic skills. It is a great option for a last-minute DIY manicure before you head out the door.
Select three or four colors that match your festival wardrobe. Use different sized dotting tools (or the end of a bobby pin and a toothpick). Dip and dot. Ensure you leave enough negative space so the design breathes. You can cluster dots at the cuticle for a “bubble” effect or scatter them like confetti. The key to crisp dots is to let the tool just barely touch the nail surface—do not press down hard.
Pro Tip: Create “bullseye” dots by placing a smaller dot of a different color inside a larger dot once it dries.
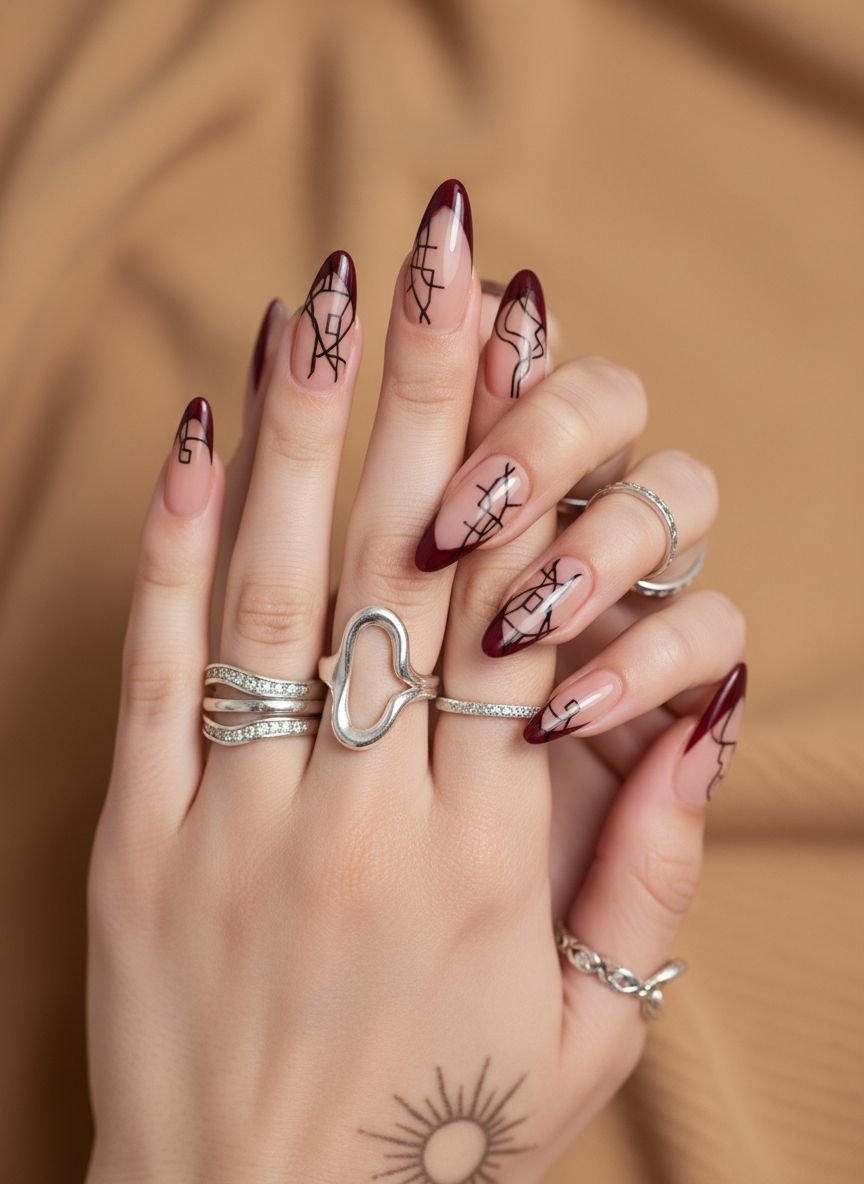
Minimalistic Black Lines
Not every festival look needs to be neon. Minimalistic black lines offer an edgy, graphic alternative. This style uses negative space (your natural nail or a sheer nude) with sharp, geometric black lines. It is cool, sophisticated, and matches absolutely everything. It is the graphic eyeliner of the nail world. If your outfit is very loud and patterned, these nails provide a chic balance.
You need a high-quality, opaque black gel or polish and a long, thin liner brush. Painting straight lines takes practice. Move your whole arm rather than just your fingers to get a smoother stroke. Designs can include a single vertical line down the center, a horizontal line across the tip, or a grid pattern. Clean up any mistakes immediately with a brush dipped in acetone. A matte top coat makes the black lines look like ink on paper, enhancing the graphic quality.
Pro Tip: Use black striping tape if you cannot paint a straight line. Stick it on and seal it with two layers of top coat.
Butterfly Nails
The Y2K revival has brought butterfly motifs back in a big way. Butterfly wings painted on nails symbolize transformation and freedom. You can paint a whole butterfly on one nail, or paint the close-up pattern of a monarch wing across all nails. The intricate black veining over an orange, blue, or purple gradient is stunning. It is a nostalgic nod to the early 2000s pop culture that influences current festival fashion.
The monarch wing effect is the most dramatic. Start with a gradient base (like orange to yellow). Use black paint to draw thick lines separating the nail into sections, mimicking the veins of a wing. Fill the outer edges with black. Finally, use a dotting tool to place tiny white dots along the black edges. This adds the realistic detail that makes the design recognizable. It takes patience, but the payoff is huge.
Pro Tip: If you are short on time, use butterfly stickers. They have become very high quality and look hand-painted when sealed with gel.
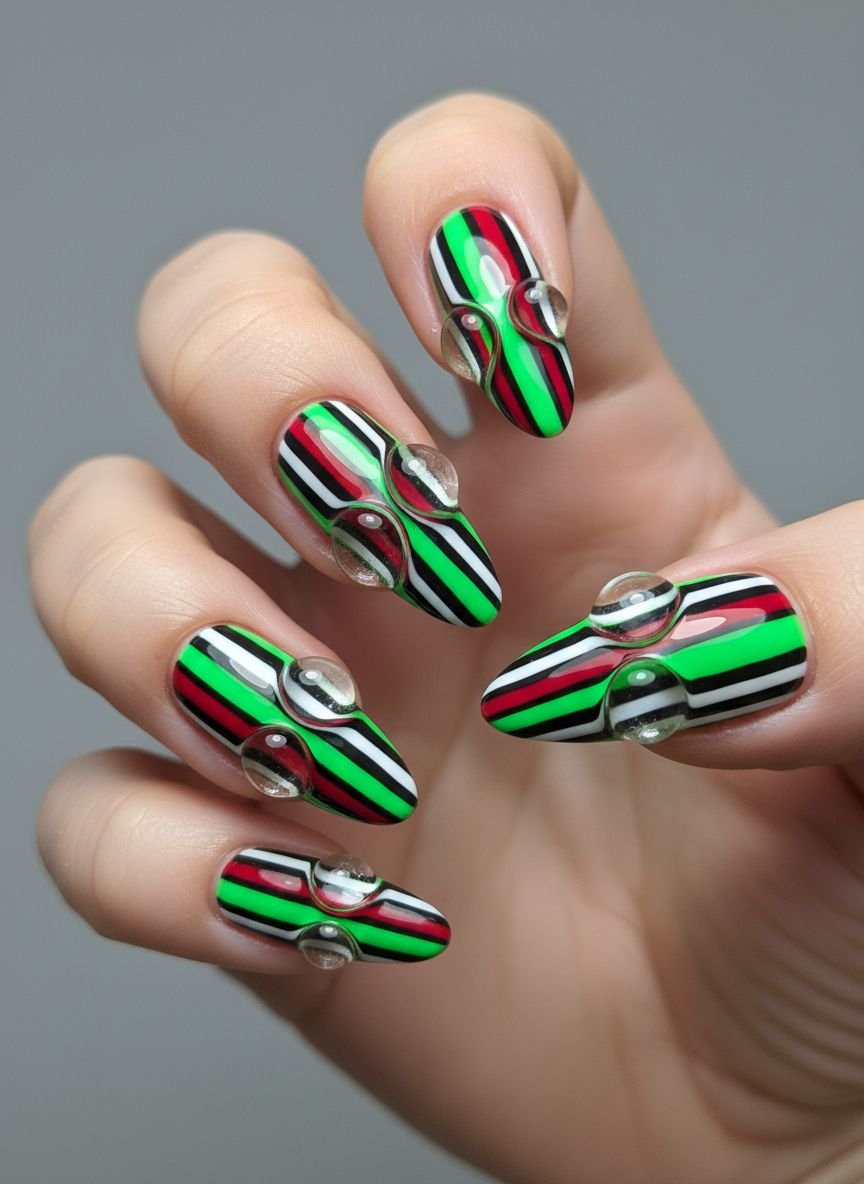
Geometric Neon Nails

Geometric neon nails combine the brightness of festival colors with the structure of sharp shapes. This design uses triangles, squares, and chevrons to create a bold, blocked look. It feels sporty and modern. The sharp lines contrast with the organic flow of the crowds and music. This is a power look for someone who wants their nails to look precise and architectural.
Tape is your best friend for this design. Paint your base color (white or nude). Once it is 100% dry, apply striping tape or scotch tape to block off sections. Paint your neon colors into the open spaces. Peel the tape off immediately while the polish is still wet to get crisp lines. If you wait until it dries, the tape might pull up the polish. You can outline the shapes in black or silver for extra definition.
Pro Tip: Use a white base under the neon sections to ensure the geometry pops against the neutral background.
Holographic Nails
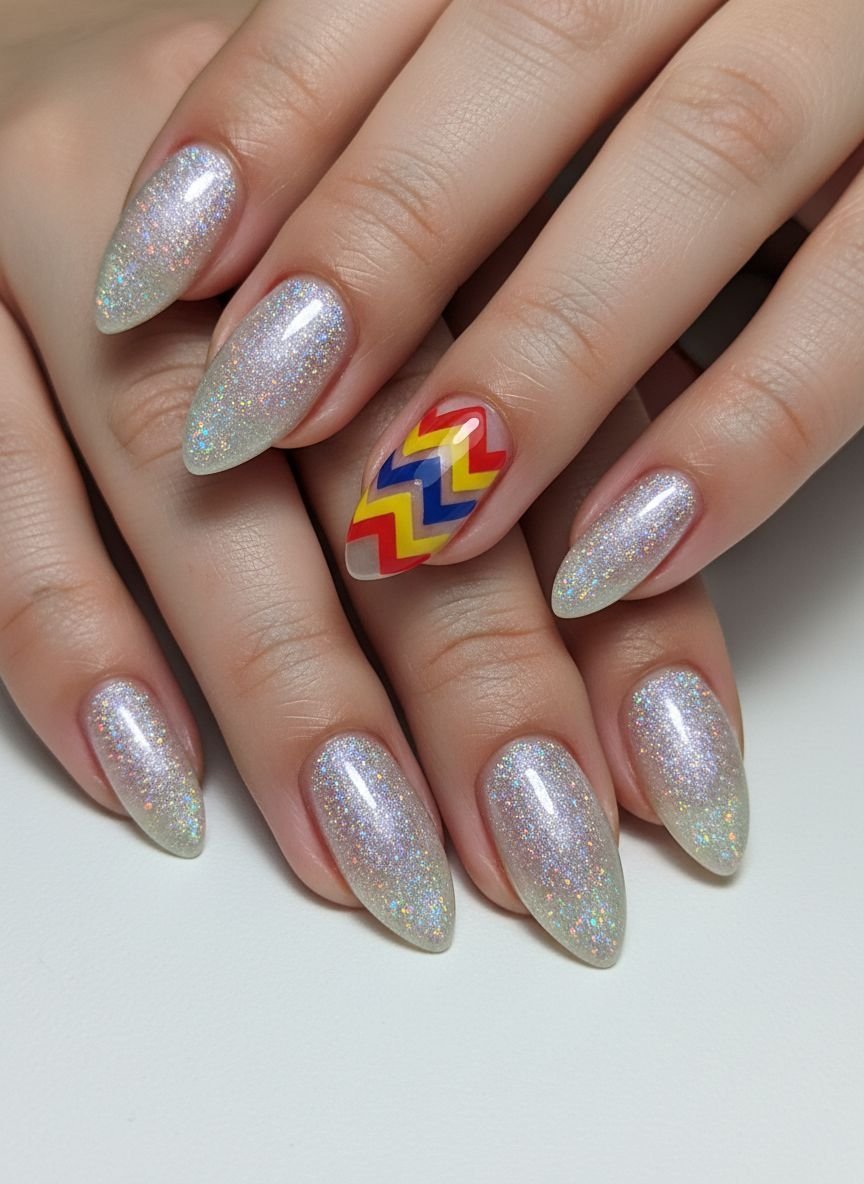
Holographic (holo) nails differ from chrome. While chrome is a mirror, holo refracts light into a full rainbow spectrum. It looks like crushed diamonds or a CD surface. Under the intense sun of an outdoor festival, holographic nails are blindingly beautiful. They shift and sparkle with every movement. This is a high-impact look that requires zero nail art skills—the polish does all the work.
You can achieve this with linear holographic polish (which forms a solid rainbow arc) or scattered holographic polish (which looks like rainbow glitter dust). Linear holo is smoother and more intense. Simply apply two coats of a high-quality holographic lacquer. No special base is needed, but a glossy top coat enhances the depth of the rainbow effect. Water-based top coats are best for holo polishes as they don’t dull the rainbow effect like some quick-dry top coats can.
Pro Tip: Use a holographic powder over gel polish for the smoothest, most intense rainbow finish possible.
Save this idea to your Pinterest.
Comparison: Gel vs Acrylic for Festivals
| Feature | Gel Manicure | Acrylics |
|---|---|---|
| Durability | High. Lasts 2-3 weeks. Flexible, so it resists cracking. | Very High. Lasts 3-4 weeks. Hard and sturdy. |
| Damage Risk | Low, if removed correctly. | Moderate. Can damage natural nail bed if ripped off. |
| Festival Suitability | Excellent for camping. Won’t chip easily. | Good for long lengths and 3D art. |
| Repair | Hard to fix a chip without a UV lamp. | Difficult to fix a break on the go. |
| Best For | Natural nail lovers who want long-lasting color. | Those wanting added length and dramatic shapes. |
Related posts :
- 17 Stunning Fall Nail Designs and Nail Art Trends That Look Expensive
- 15 Cute What To Wear To An Amusement Park Outfits That Are Actually Comfortable
Popular Asked Questions
How do I keep my festival nails from breaking?
To prevent breaks, choose a shorter, rounded shape like “squoval” or almond. These shapes have no sharp corners that can snag on clothes or tents. Applying a thick layer of gel top coat adds strength. Also, use your fingertips, not your fingernails, to open cans or latches.
What is the best nail color for a festival?
Neon colors like lime green, hot pink, and electric orange are the best choices. They stand out in photos and match the high energy of the event. Glow-in-the-dark polish is also a top contender because it looks cool during evening concerts.
Can I do my own festival nails at home?
Yes, you can. Designs like “Funky Polka Dots,” “Glitter Gradient,” and “Abstract Nail Art” are very beginner-friendly. Using high-quality press-on nails is another easy way to get a salon-quality look at home in minutes.
How do I remove festival glitter polish easily?
Glitter is hard to remove. Soak a cotton ball in acetone, place it on your nail, and wrap your fingertip in aluminum foil. Let it sit for 10 minutes. The foil traps body heat, helping the acetone break down the glitter glue. The polish should slide right off.
Conclusion
Your festival nails are the finishing touch that pulls your entire weekend look together. Whether you choose the blinding shine of holographic polish or the retro vibes of tie-dye, the most important thing is that you have fun with it. These 15 playful festival nail ideas that will steal the show offer something for every style and skill level. Pick a design that makes you feel confident, secure it with a good top coat, and get ready to dance.


Leave a Comment