

Loose curls define modern bridal romance. You want a look that feels soft yet survives dancing until midnight. This guide creates the ultimate mood board for brides seeking effortless elegance. We break down exactly how to achieve these styles and the specific products needed for hold.
Key Takeaways
- Prep Matters Most: Clean, dry hair with a high-quality mousse foundation ensures your loose curls survive humidity and movement.
- Barrel Size is Critical: A 1.5-inch iron creates soft waves, while a 1-inch wand allows for tighter spirals that drop perfectly over time.
- Accessory Placement: Pearls, vines, and veils need secure anchor points hidden beneath the top layer of curls to prevent slipping.
- Extensions Add Longevity: Clip-ins provide the necessary grit and volume to hold a curl longer than natural fine hair can on its own.
Table of Contents
- The Classic Hollywood Wave
- The Twisted Crown Half-Up
- The Soft Boho Wave
- The Princess Tiara Curl
- The Side-Swept Stunner
- The Fairy-Tale Braided Crown
- The Vintage Bouffant Half-Up
- The Deep Part Drama
- The Beachy Goddess Twist
- The Pearl-Scattered Curl
- The Elevated Half-Pony
- The Whimsical Waterfall Braid
- The Romantic Low Bun
- The Twisted Side Braid
- The Boho Baby Braid
- The Veil-Ready Wave
- The Red Carpet Volume
- The Effortless Headband Look
- Popular Asked Questions
- Conclusion
The Classic Hollywood Wave
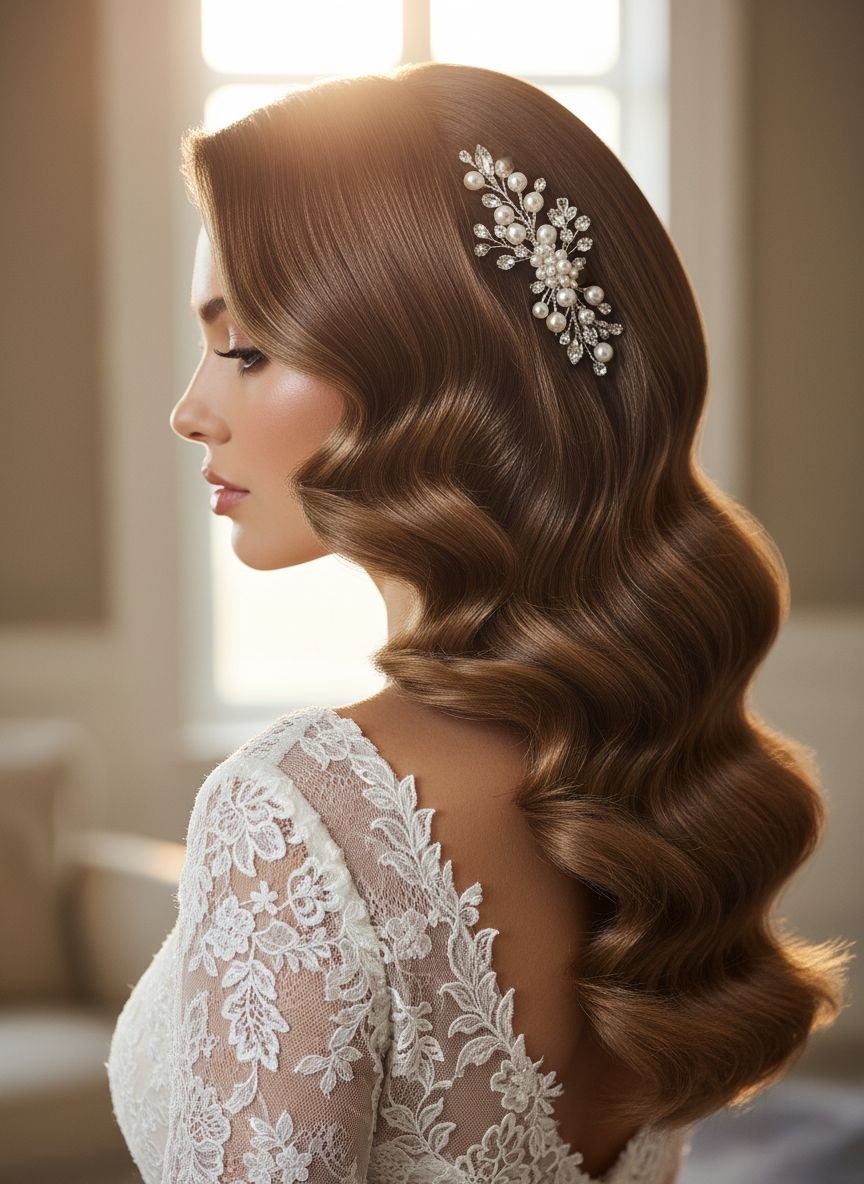
Old Hollywood glamour relies on precision and high shine. This style differs from standard beachy textures because the hair moves as one single unit. The visual impact comes from the uniform S-pattern that frames the face and cascades over one shoulder. Light reflects off the smooth ridges, making this an ideal choice for flash photography. Darker hair colors benefit immensely from this style as the shine becomes the main focal point. Achieving this requires a consistent curling direction. Every section must be wrapped around the iron the exact same way.
Stylists typically use a smaller barrel curling iron, around 1 inch, to create the initial tight shape. Once the hair cools completely, a boar bristle brush smooths the curls into that signature continuous wave. A high-shine pomade or gloss spray tames flyaways. The structure here is rigid enough to hold up against wind but looks incredibly soft. You need a strong-hold hairspray that does not crunch. The goal is fluid movement that snaps back into place.
Pro Tip: Ask your stylist to set the waves with silver flat clips while you do your makeup. This cooling period “locks” the S-shape in for hours.
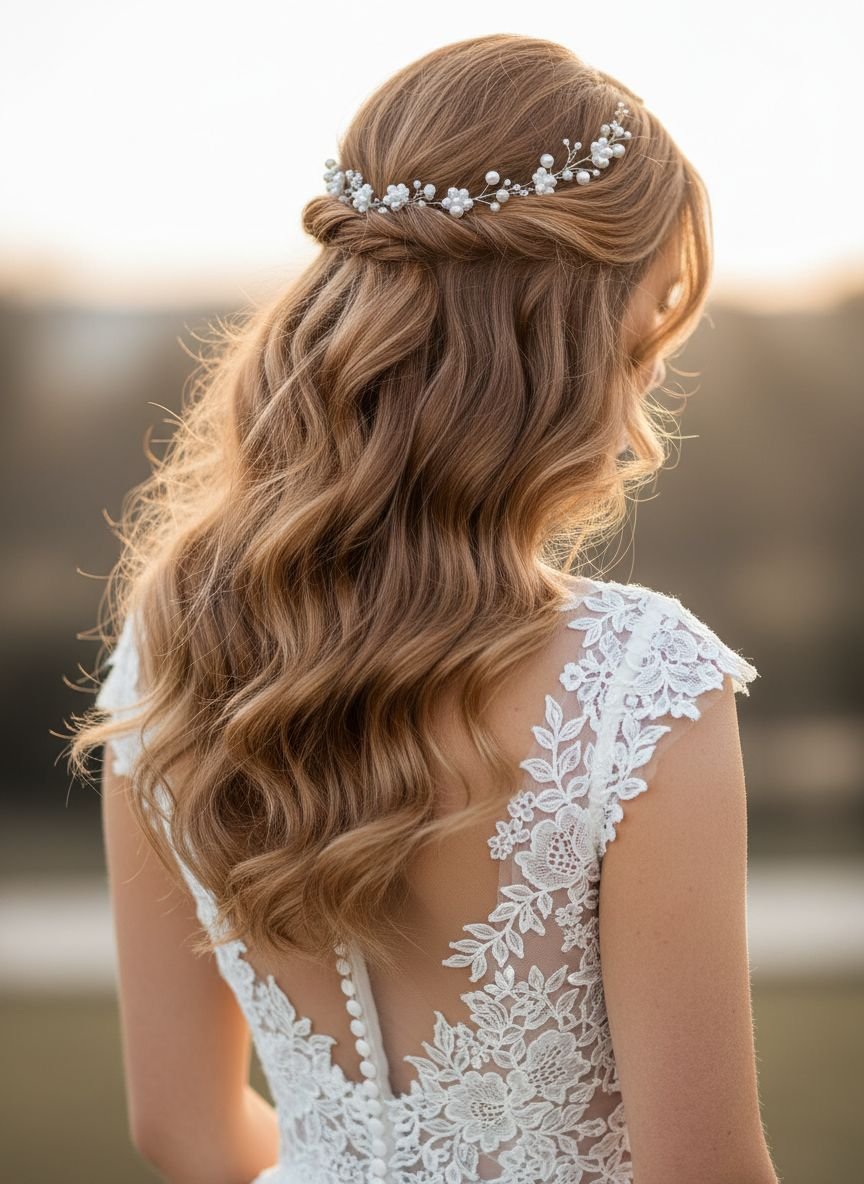
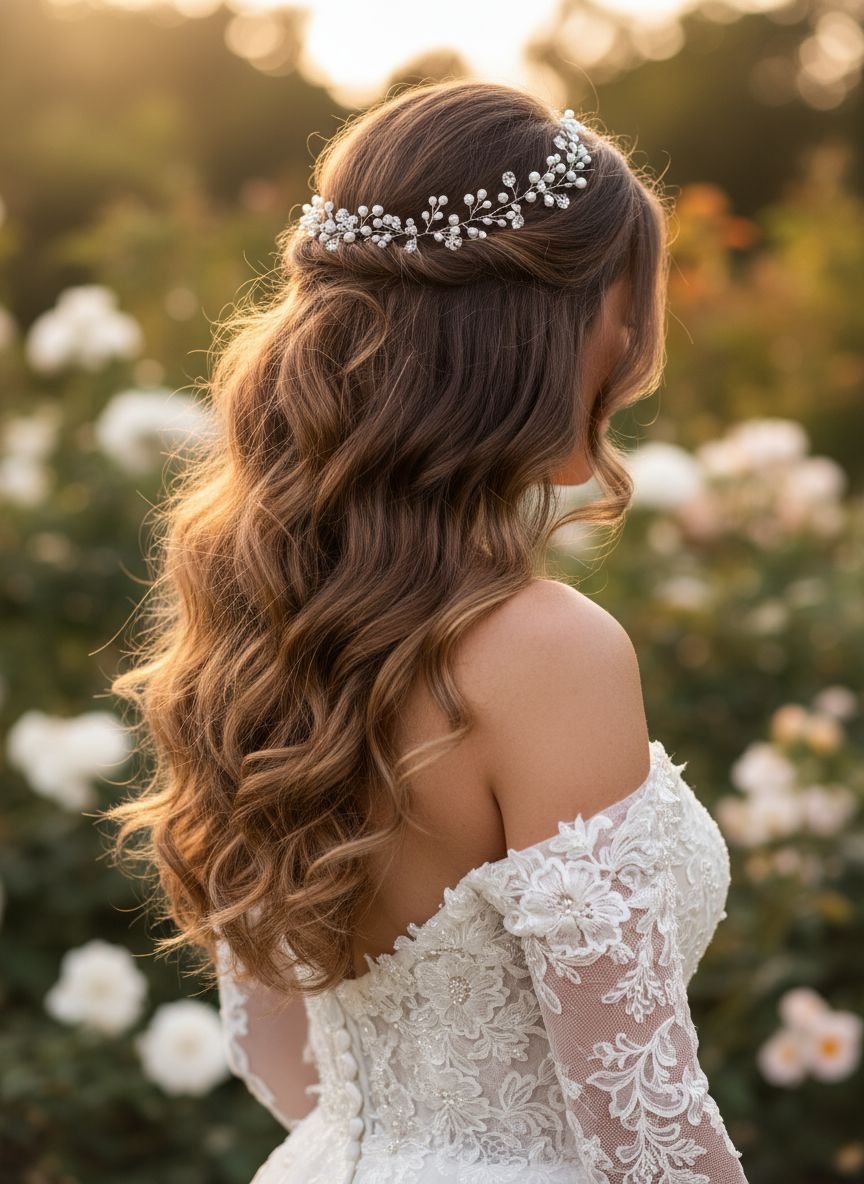
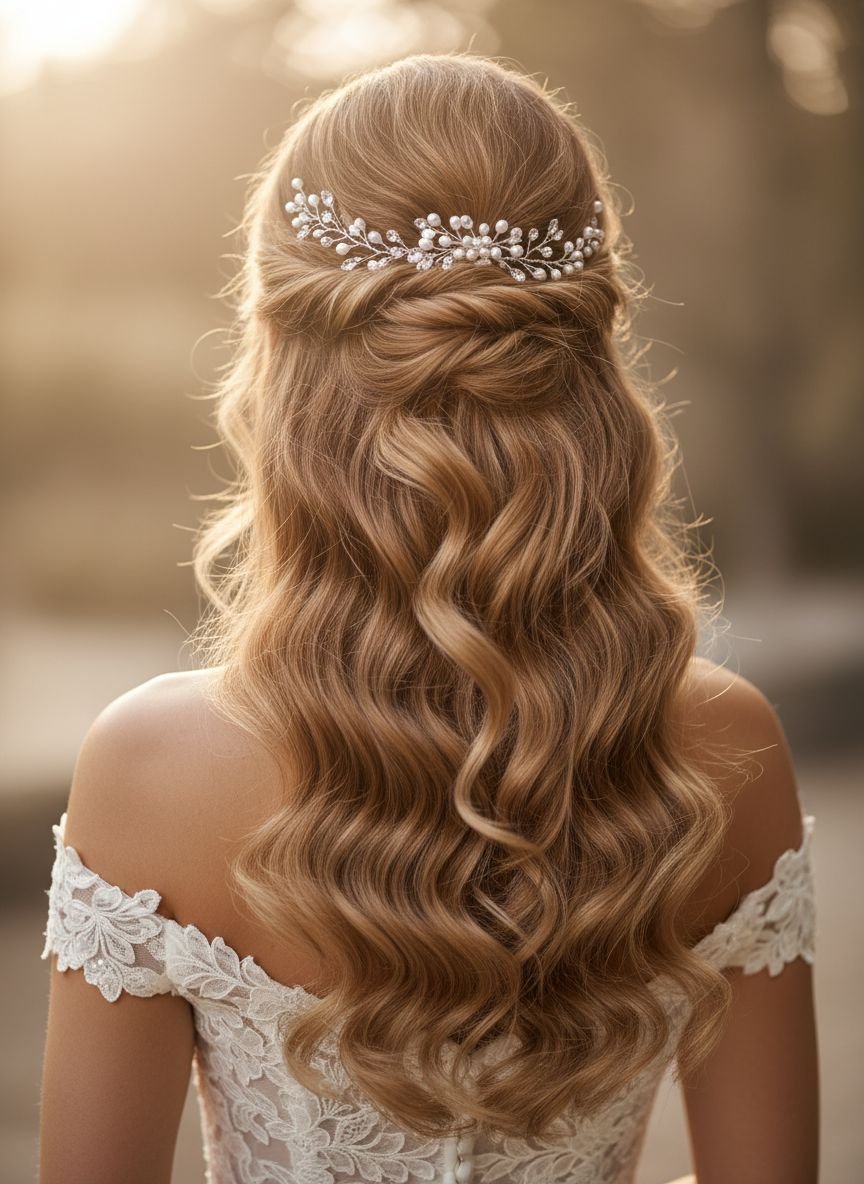
The Twisted Crown Half-Up
This look balances the security of an updo with the romantic flow of loose hair. Two sections from the front temples twist backward and meet at the occipital bone. The twisting technique adds dimension and highlights dimensional hair color or balayage. It keeps strands out of your eyes during the vows while allowing the length to flow freely down the back. The loose curls underneath should be voluminous. A 1.25-inch barrel creates the perfect width for the bottom section.
Volume at the crown is the secret to making this style look bridal rather than casual. Gentle backcombing at the roots before pinning the twists creates a subtle lift. This prevents the style from looking flat in photos. The meeting point of the two twists serves as a perfect anchor for a small floral comb or a jeweled clip. It creates a focal point at the back of the head, which your guests will see during the ceremony.
Pro Tip: Use clear elastic bands to secure the ends of the twists before pinning them. This ensures the style won’t unravel even if a bobby pin slips.
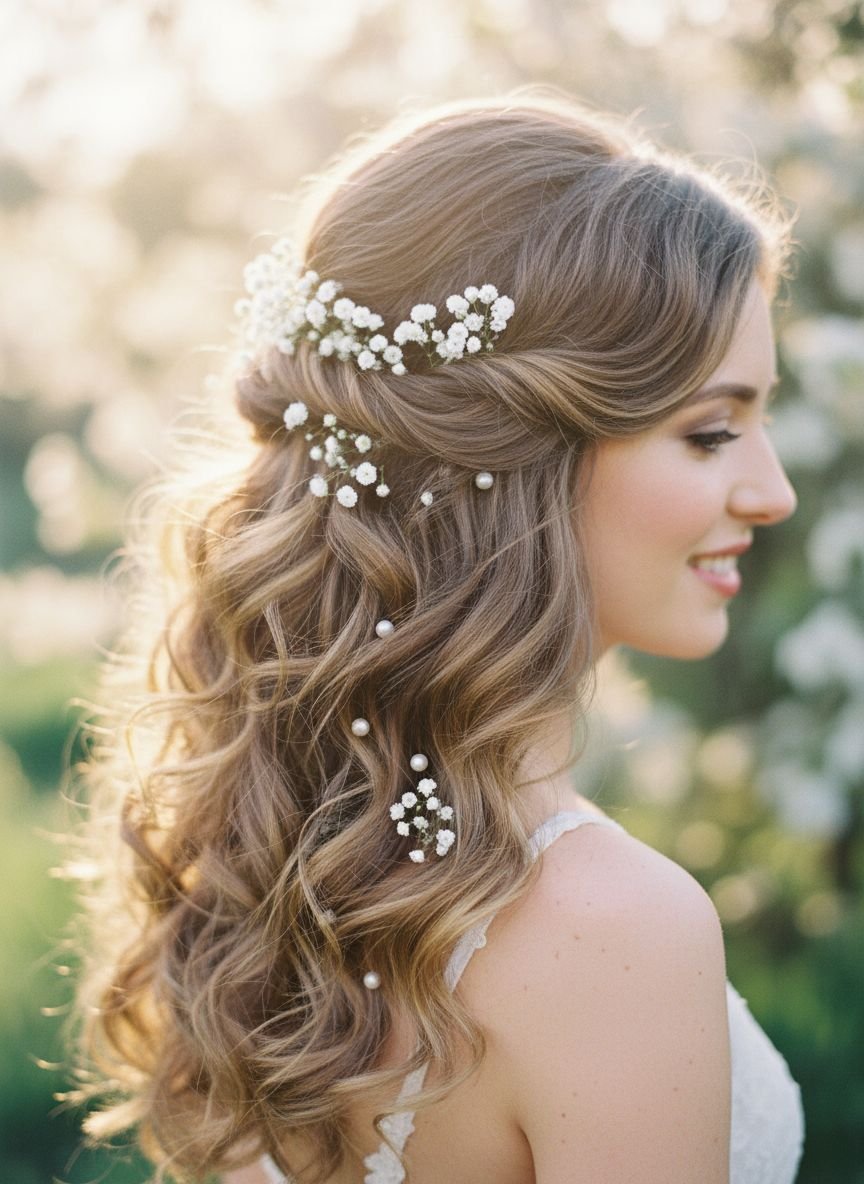
The Soft Boho Wave
Bohemian styles prioritize texture over perfection. The soft boho wave looks lived-in and organic. It mimics the natural pattern of hair after a day at the beach but with a polished, wedding-ready finish. The curls are alternating. One strand curls away from the face, the next curls toward it. This prevents the hair from clumping together and creates maximum volume. Matte texture sprays replace shiny serums here. You want the hair to look airy and effortless.
Brides planning outdoor or garden weddings often choose this style. It pairs beautifully with lace dresses and flower crowns. The lack of rigid structure means wind is less of an enemy. If a few strands fly out of place, it only adds to the charm. Extensions are often necessary to get that full, thick look at the ends. The ends of the hair are usually left straight for the last inch to modernize the curl and avoid a “prom ringlet” appearance.
Pro Tip: Salt sprays can be drying. Use a sugar spray instead to get that gritty texture without stripping moisture from your strands on the big day.
The Princess Tiara Curl
A tiara demands a specific hair foundation to sit correctly. This style focuses on creating volume at the top of the head to support the accessory. The curls themselves are usually large, bouncy, and polished. A 1.5-inch curling iron creates these wide, romantic loops. The hair is brushed back from the hairline to allow the tiara to rest securely without gaps. The curls cascade down the back, creating a curtain of hair that looks regal and sophisticated.
The placement of the tiara is vital. It should sit at the highest point of the head, angled slightly forward. The hair immediately behind the tiara needs slightly more teasing to act as a cushion. This prevents the metal band from digging into the scalp and keeps the accessory upright. The curls should start from the ear level down, keeping the top smooth. This contrast draws the eye upward to the crown and the face.
Pro Tip: Sew the tiara into the hair using a needle and thread matching your hair color for absolute security that pins cannot provide.
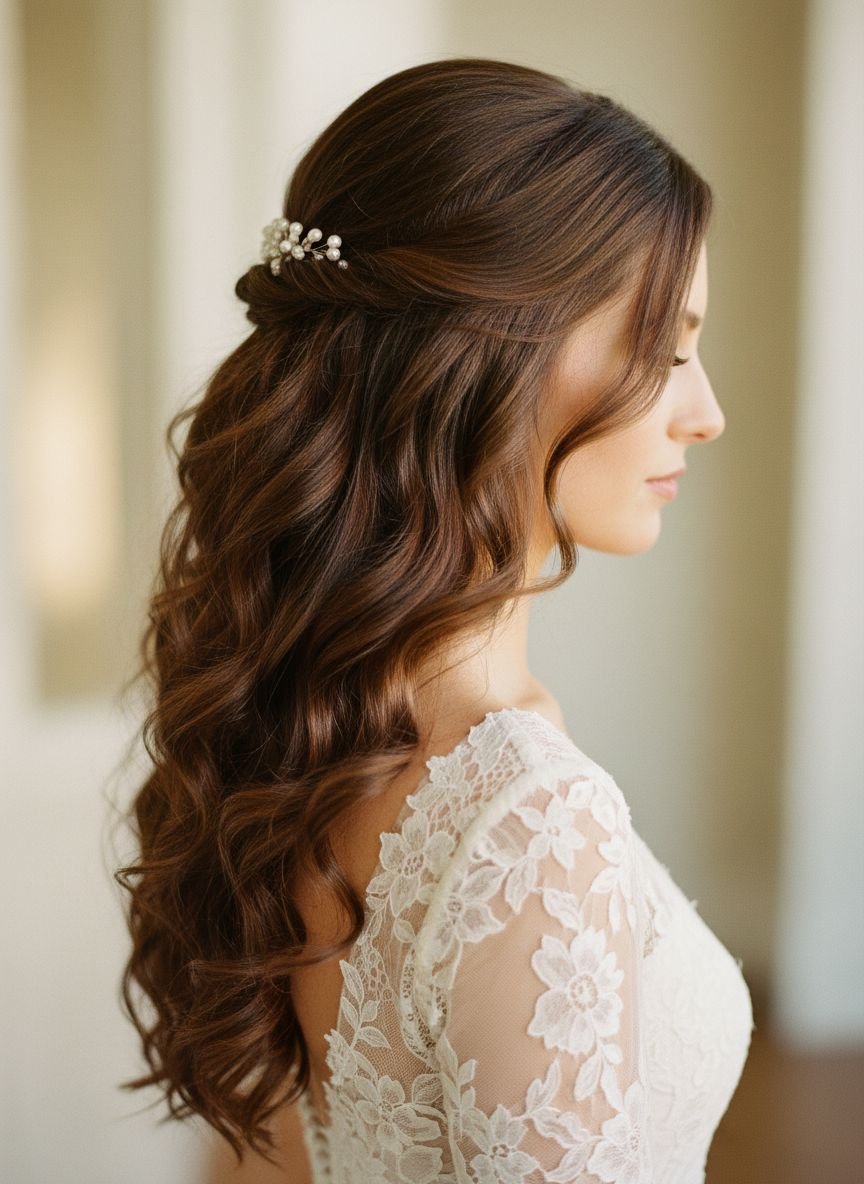
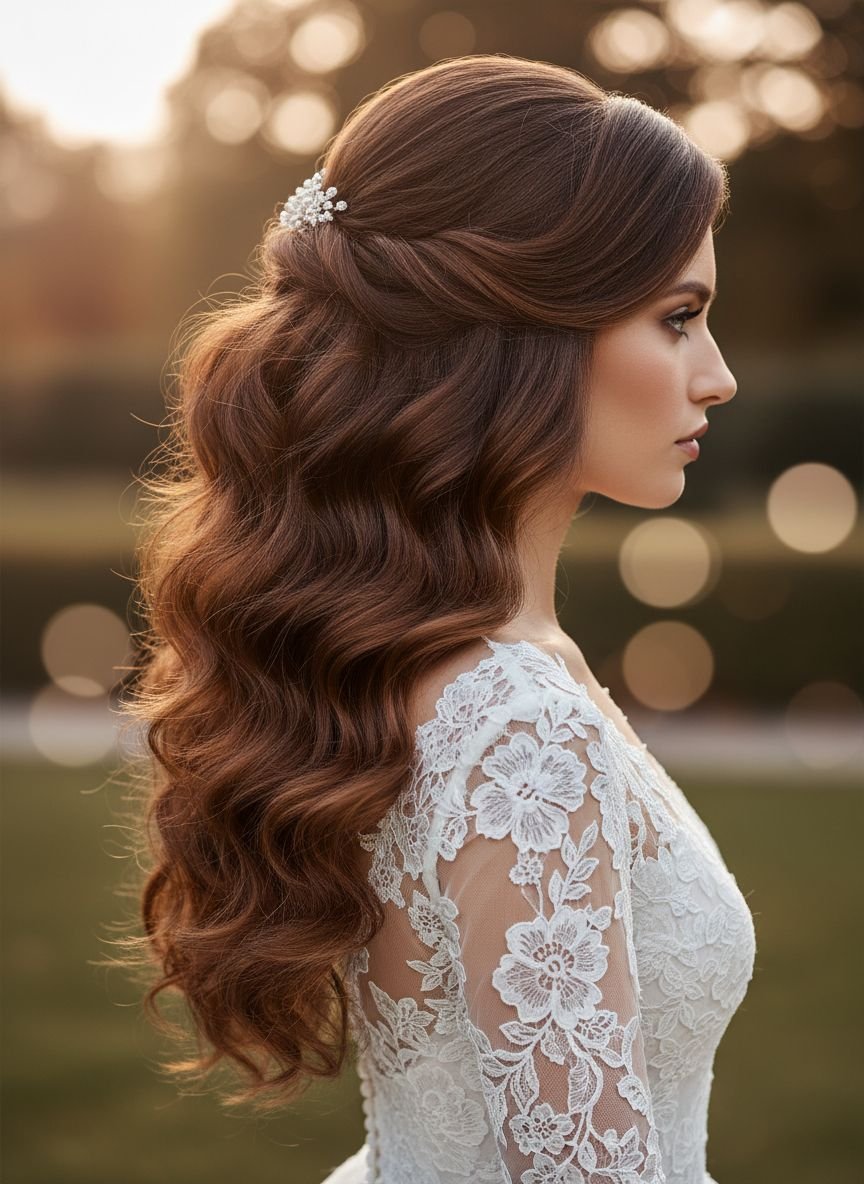
The Side-Swept Stunner
Asymmetry creates immediate visual interest. The side-swept look pulls all the hair to one shoulder, exposing the neck and jawline on the opposite side. This is perfect for dresses with interesting back details or asymmetrical necklines. It also allows you to showcase statement earrings. The hair is deeply parted and swept around the nape of the neck. Secure pinning at the nape is essential to keep the heavy mass of curls on one side.
The curls in this style need to be robust. Because all the hair is grouped together, they can weigh each other down. Using a lightweight mousse before blow-drying helps build a foundation. The side that is pulled back should be sleek and smooth, creating a strong contrast with the tumbled volume on the other shoulder. Decorative combs or pins often cover the structural bobby pins at the back, adding a touch of sparkle to the functional anchor point.
Pro Tip: Save this idea to your Pinterest. Use a small amount of lash glue to secure the hair to your skin behind the ear if you have shorter layers that tend to pop out.
Comparison: Hairspray Types for Wedding Curls
| Hairspray Type | Best For | Pros | Cons |
|---|---|---|---|
| Flexible Hold | Boho Waves | Natural movement, brushable | May drop in high humidity |
| High Gloss | Hollywood Waves | Reflective shine, photo-ready | Can look greasy on fine hair |
| Freeze Hold | Updos/Structure | Wind resistance, total security | Can look stiff or crunchy |
| Texture Spray | Beachy Styles | Volume, grit, matte finish | No shine, can feel dry |
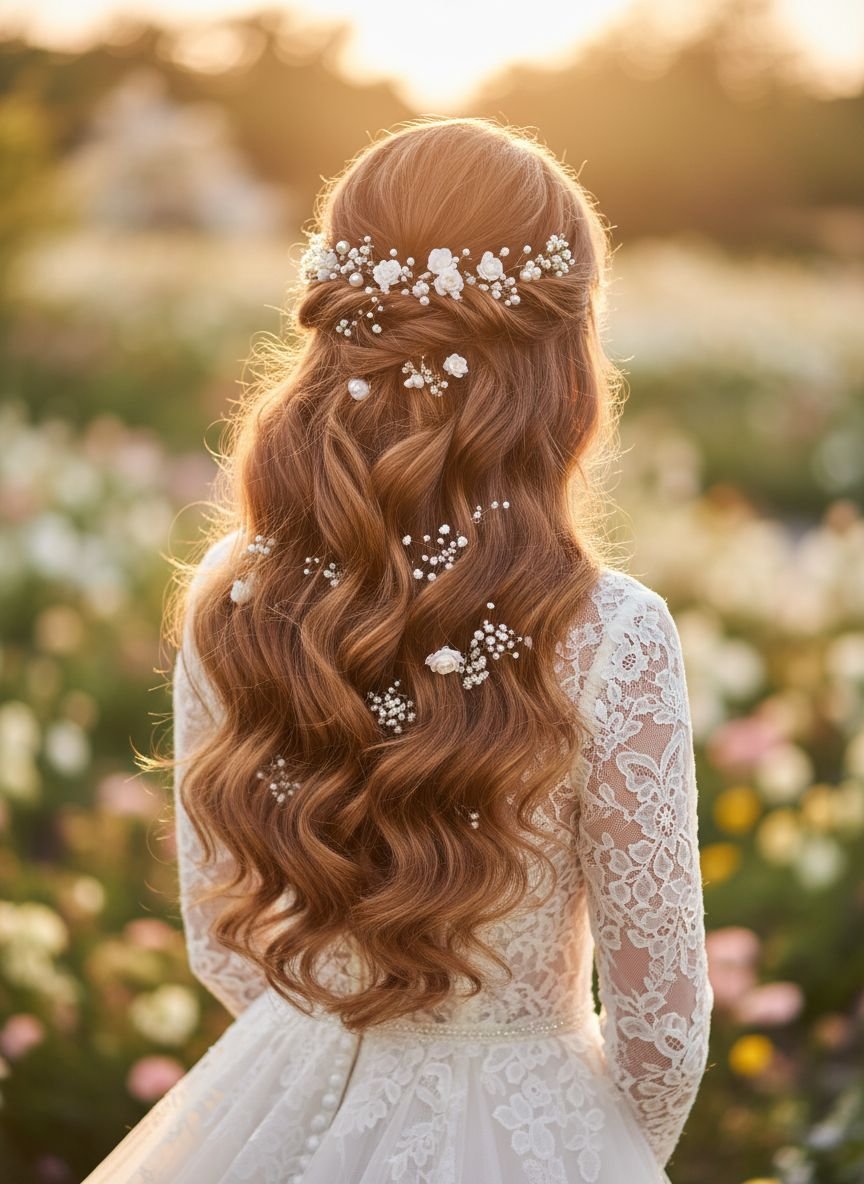
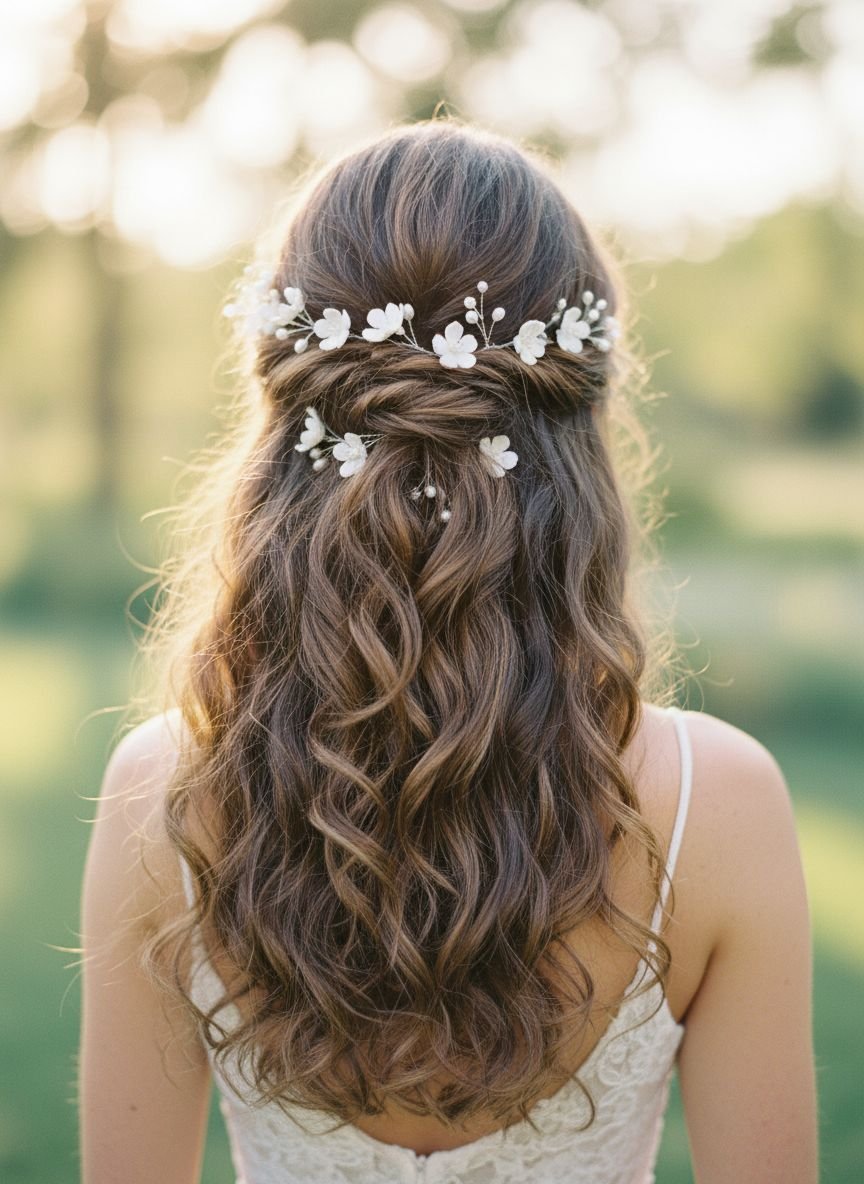
The Fairy-Tale Braided Crown
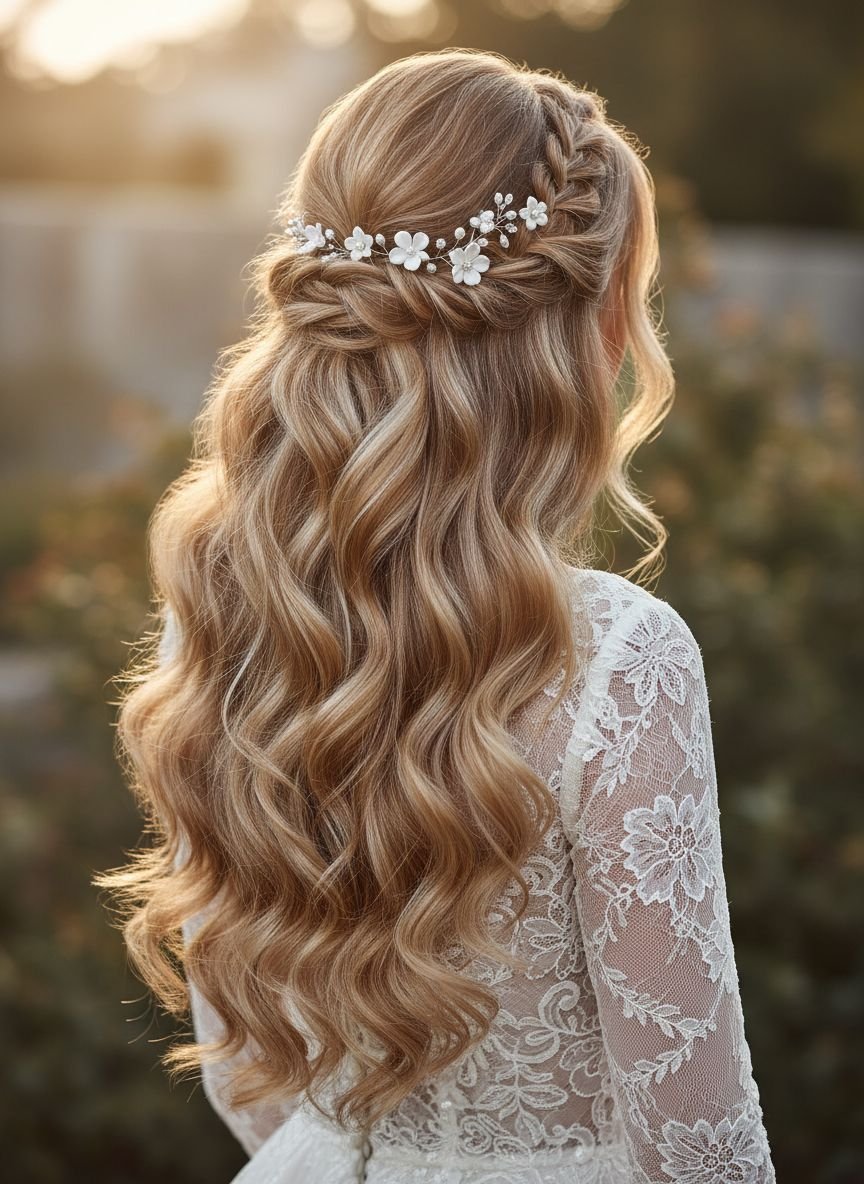
This style merges the structure of a braid with the freedom of loose hair. A large, loose Dutch or French braid wraps around the head like a halo. Unlike a full updo, the bottom layers remain loose and curled. This gives you the ethereal vibe of a woodland fairy. The braid adds significant height and texture to the crown area. It works exceptionally well for brides who want to keep hair off their face but still want to feel like they have long hair.
Pancaking the braid is the secret technique here. After braiding, gently pull at the loops to widen them. This makes the braid look twice as thick and much softer. The loose curls beneath should be soft and flowing. A wand works best to create irregular waves that match the organic feel of the braid. Small flowers or baby’s breath tucked into the braid loops complete the fantasy aesthetic.
Pro Tip: If your hair is fine, crimp the roots before braiding. The crimped texture hides inside the braid but provides massive volume and grip.
The Vintage Bouffant Half-Up
Channeling the 1960s, the bouffant offers dramatic height and retro appeal. This look is characterized by significant teasing at the crown, creating a rounded dome shape. The top section is smoothed over this teasing and pinned at the back. The rest of the hair falls in loose, tumbled curls. This style elongates the face and adds inches to your height. It pairs wonderfully with winged eyeliner and mod-style wedding dresses.
The key to a modern bouffant is keeping the texture imperfect. A stiff, helmet-like bouffant looks dated. Use a texture powder at the roots to build volume that looks airy rather than matted. The curls at the bottom should be loose and brushed out, not tight ringlets. This balances the heavy top section. A satin ribbon or bow often covers the pin site, reinforcing the vintage feminine vibe.
Pro Tip: Use a teasing brush with natural bristles rather than a plastic comb. It packs the hair tighter at the root without breaking delicate strands.
The Deep Part Drama
Changing your part can completely alter your face shape. A deep side part creates instant volume on top without any teasing. It brings a sultry, red-carpet energy to the bridal look. One side of the face is obscured slightly by a “peek-a-boo” wave, adding mystery and allure. The other side is usually tucked behind the ear or pinned sleekly back. This style works with any curl pattern but looks best with large, voluminous waves.
To keep the deep part in place, you need to train the hair. Blow-dry the hair in the direction of the new part while it is wet. If you try to flip dry hair, it will constantly fall back to its natural center part. Use a root lifting spray on the heavy side of the part to prevent it from falling flat against the scalp. This look is fantastic for highlighting cheekbones and works well with strapless gowns.
Pro Tip: Use a tail comb to create a crisp, clean line for the part. A jagged part can look messy in close-up photos.
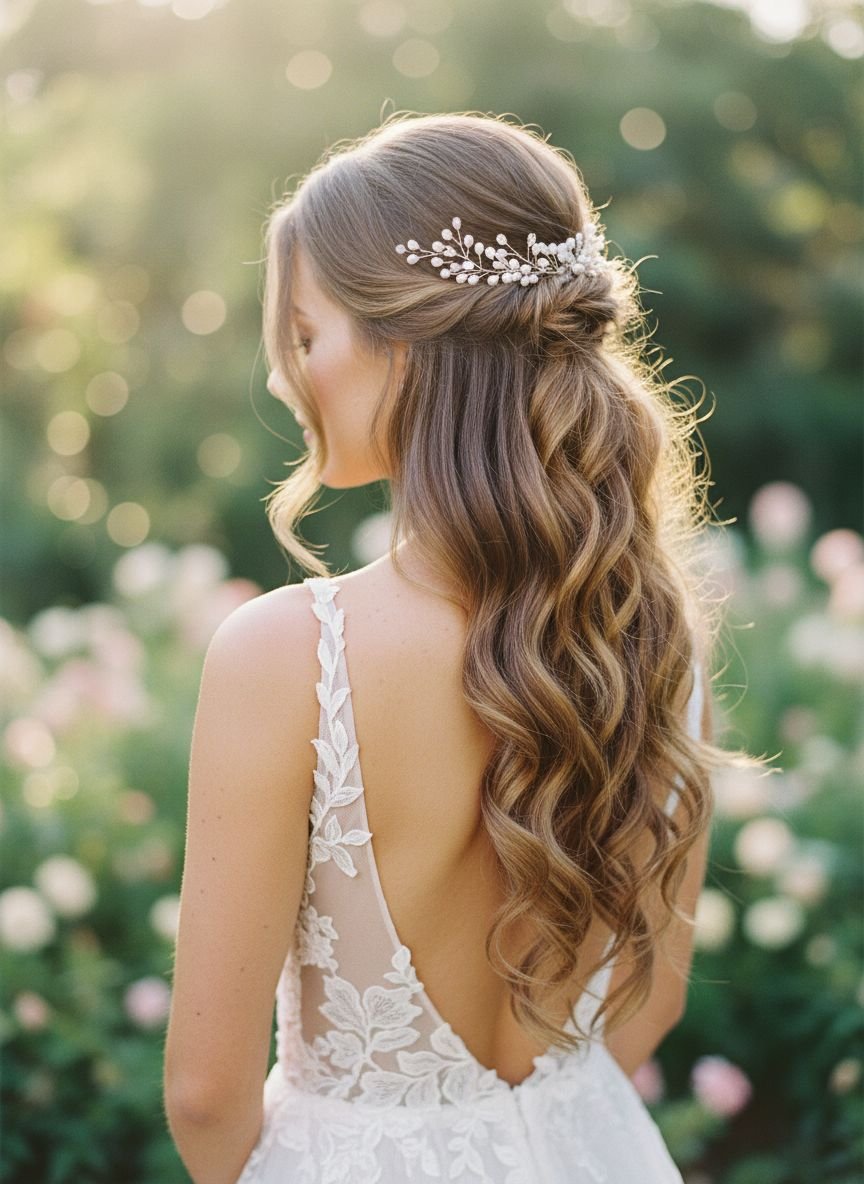
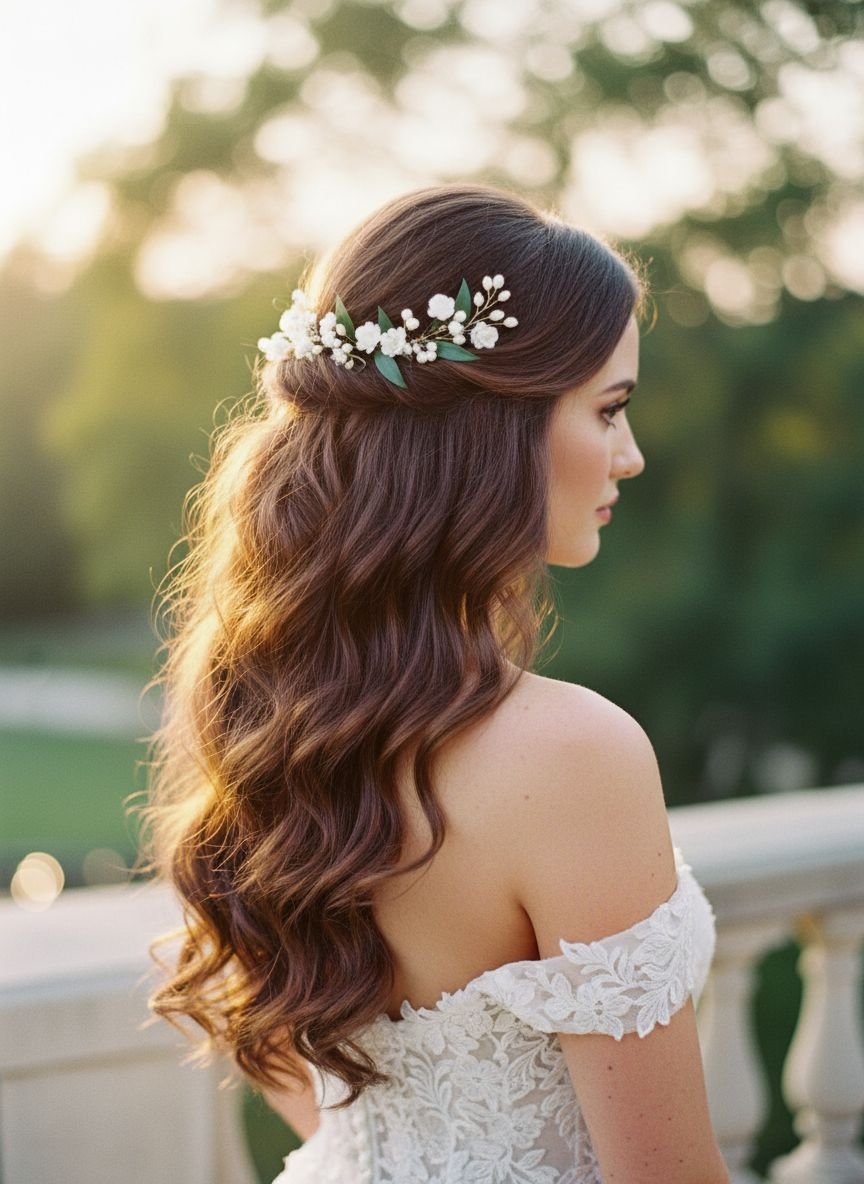
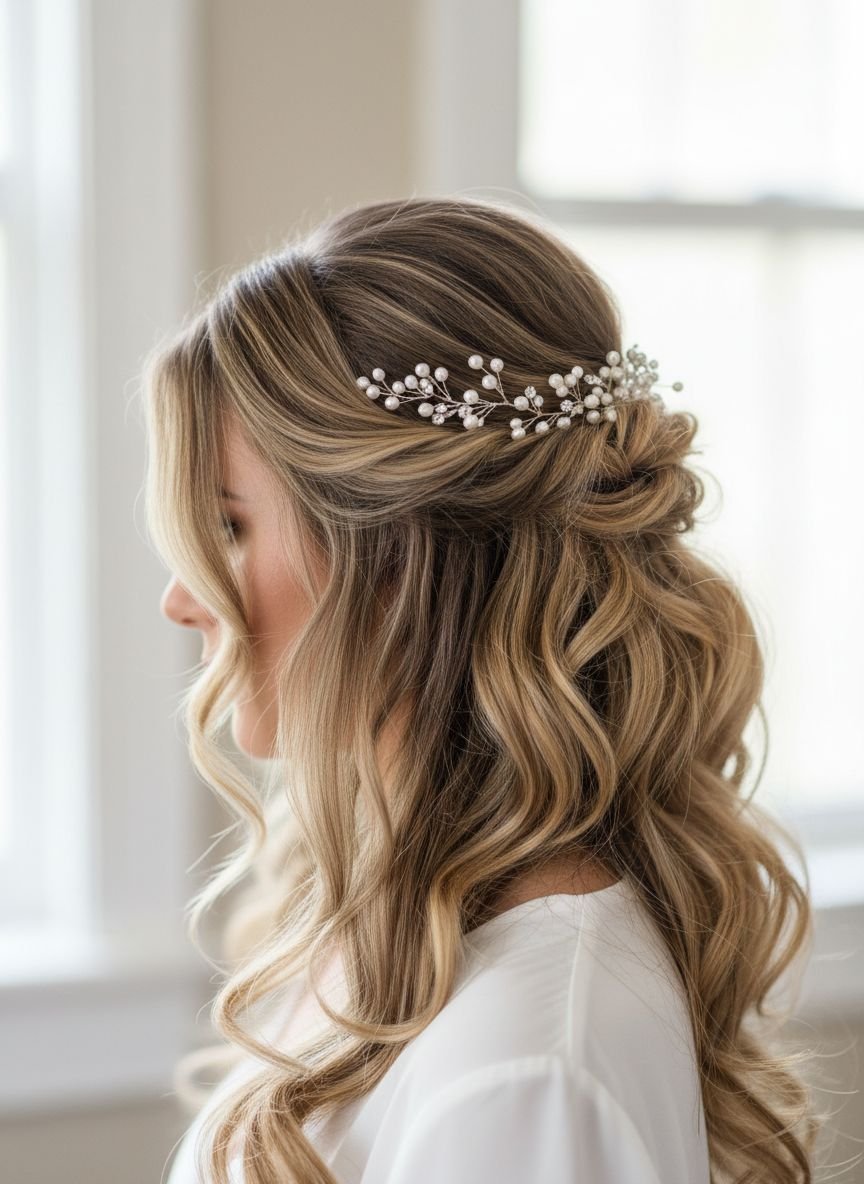
The Beachy Goddess Twist
Destination weddings call for hair that can handle sea breezes. The Beachy Goddess Twist takes sections from the front and twists them loosely back, intertwining them with the lower curls. It is less structured than the crown twist and sits lower on the head. The texture is key: it should look like you just emerged from the ocean, but with better volume. Sea salt sprays and diffusers are the tools of choice here.
The curls should start closer to the root to give body throughout the length. However, the ends should remain fairly straight. This prevents the look from becoming too formal. Incorporating a tropical flower or a simple gold vine adds to the goddess aesthetic. This style is incredibly low maintenance. If the wind blows it around, it simply adds to the texture. It relieves the bride of worrying about perfect placement.
Pro Tip: Mix a leave-in conditioner with your salt spray. This keeps the curls hydrated and glossy despite the drying effects of the sun and wind.
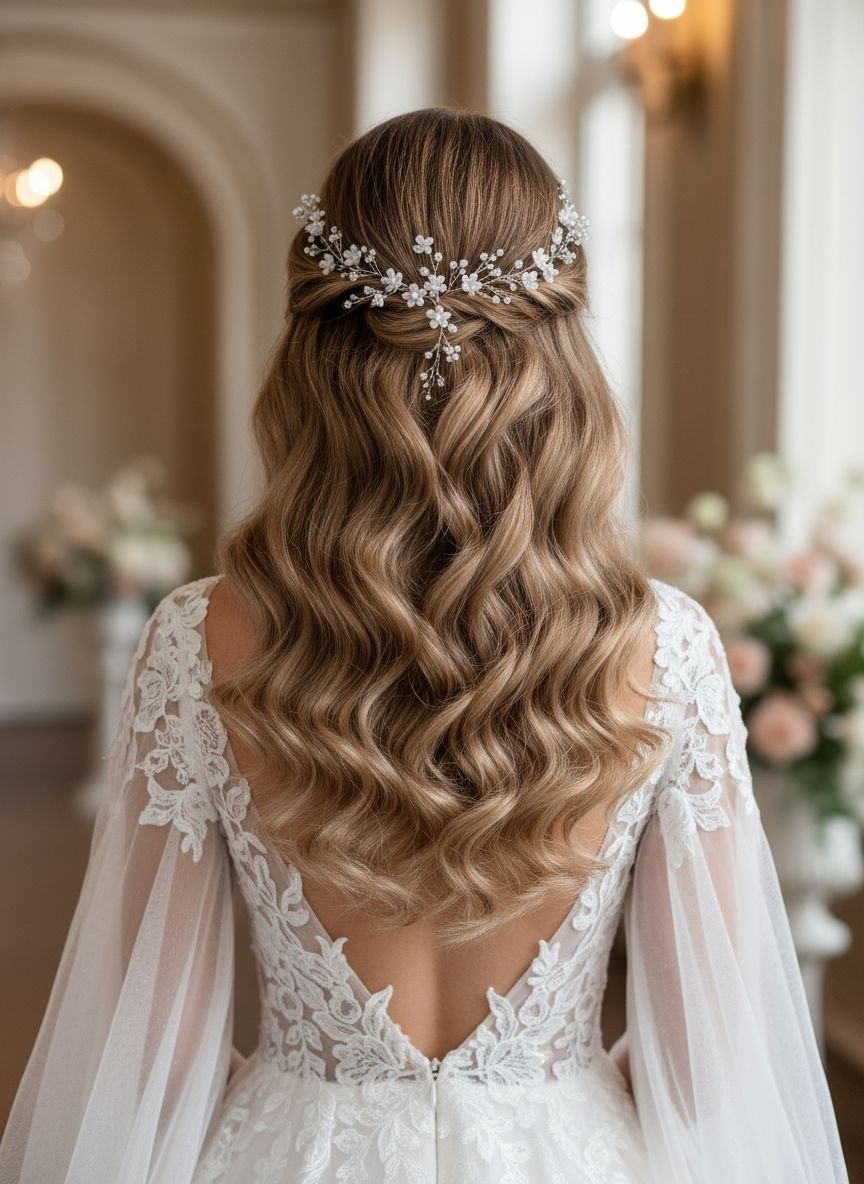
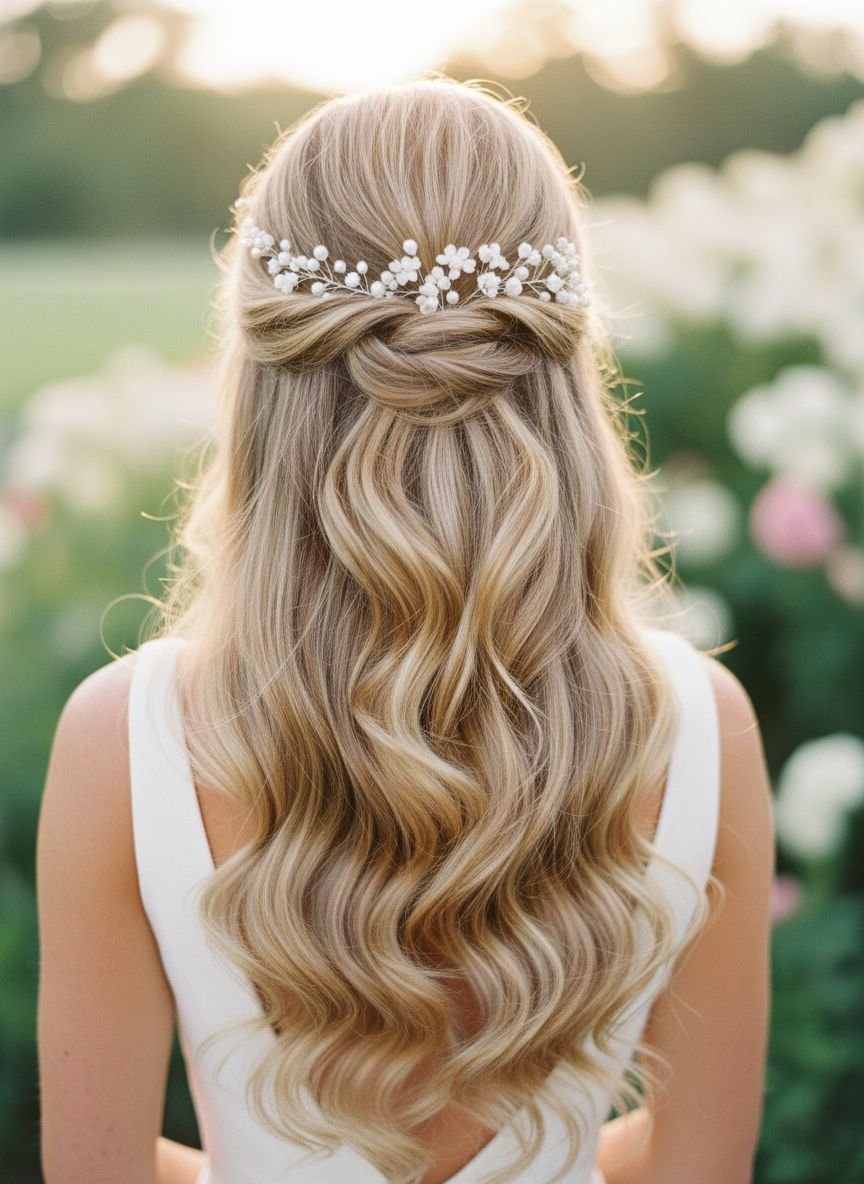
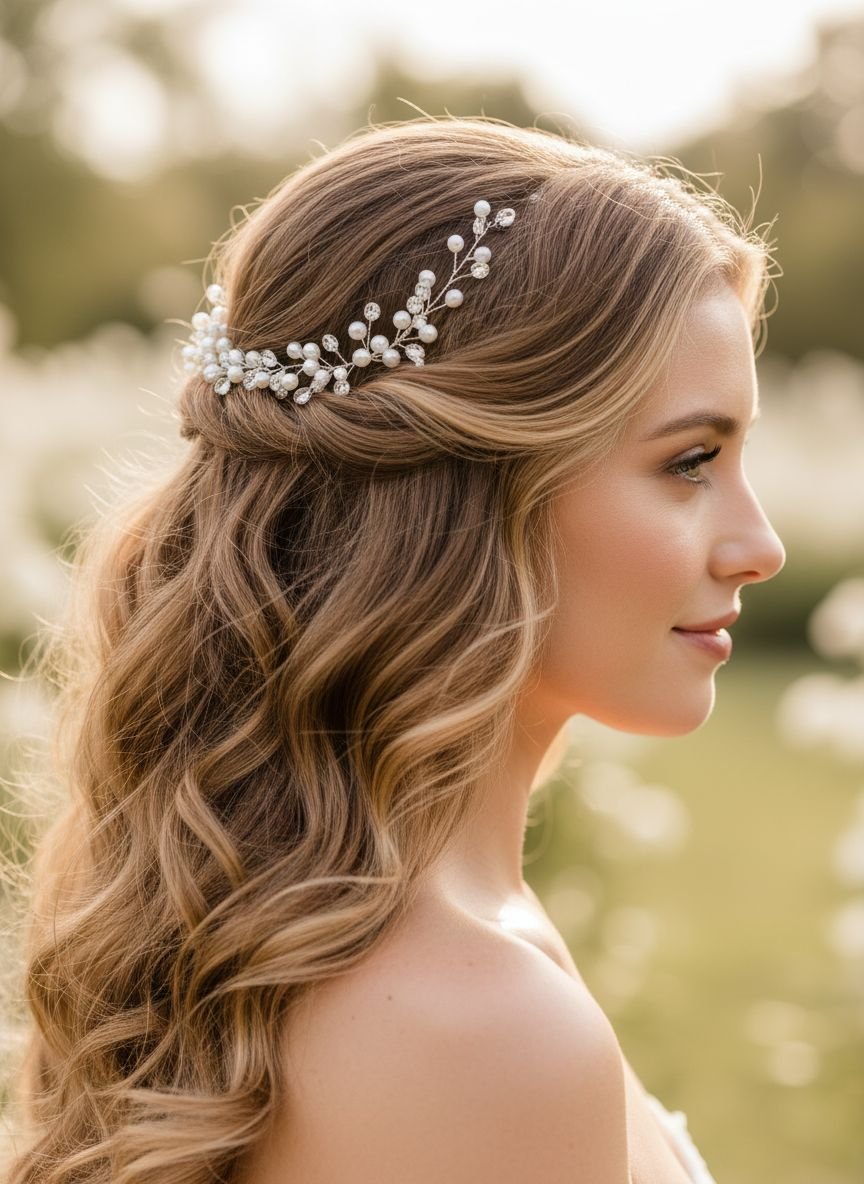
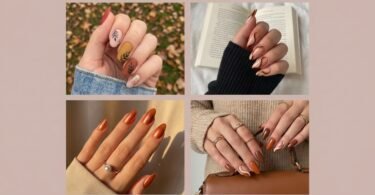
The Pearl-Scattered Curl
Pearls are a major trend in bridal fashion. Scattering them throughout loose curls creates a magical, floating effect. The hair itself is styled in soft, uniform waves to provide a clean canvas. The pearls are then placed randomly or in clusters throughout the lengths. This look turns the hair itself into jewelry. It is delicate, feminine, and incredibly photogenic. The pearls catch the light as you move, creating a subtle shimmer.
There are two main ways to attach the pearls. Some come on hairpins, which are easy to slide in but can fall out of silky hair. The more secure method for loose curls is using hair-specific adhesive or Velcro-backed pearls. These stick directly to the strands. The curls need to be set with hairspray before applying the pearls to ensure the adhesive grips properly. Avoid brushing the hair once the pearls are in place.
Pro Tip: Use pearls of varying sizes. Mixing small, medium, and large pearls creates depth and looks more organic than using a single size.
Get The Look: Essential Tools
- Tools: 1.25-inch Ceramic Curling Wand, Teasing Brush, Pin curl clips.
- Products: Thermal Heat Protectant, Volumizing Mousse, Shine Spray.
- Accessories: Pearl pins, Clear elastics, Hair padding (for bouffant).
The Elevated Half-Pony
The half-pony lifts the face while maintaining length. By gathering the top half of the hair into a high ponytail, you create a cascading fountain effect. This style keeps hair completely off the face, which is ideal for windy days or vigorous dancing. The height of the pony draws the eye upward, giving a youthful and energetic appearance. The bottom section of loose curls adds width and background to the ponytail.
Wrap a small section of hair around the elastic band to hide it. This small detail makes the style look finished and professional. The pony itself can be teased for extra volume. This style works exceptionally well with veils, as the comb can slide securely into the base of the ponytail. The curls in the ponytail should be tighter than the bottom section, as they will drop slightly due to gravity and movement.
Pro Tip: Use two elastic bands for the ponytail. The extra support keeps the pony high and perky, preventing it from sagging halfway through the reception.
The Whimsical Waterfall Braid
The waterfall braid is a weaving technique that allows strands to drop through the braid, creating a cascading effect. It looks intricate and difficult, which adds a “wow” factor. The braid typically runs diagonally or horizontally across the back of the head. It blends seamlessly into the loose curls below. This style shows off highlighted hair beautifully, as the weaving pattern contrasts light and dark strands.
The dropped strands are curled to match the rest of the hair. This integration is crucial; otherwise, the braid looks like a separate entity. This style is best for medium to thick hair. Fine hair may look sparse in the gaps left by the dropped strands. It is a very romantic look that pairs well with soft tulle dresses and garden settings. The braid acts as a natural crown, reducing the need for heavy accessories.
Pro Tip: Apply a styling wax to your fingertips before braiding. This keeps the small sections clean and prevents frizz from ruining the intricate pattern.
The Romantic Low Bun
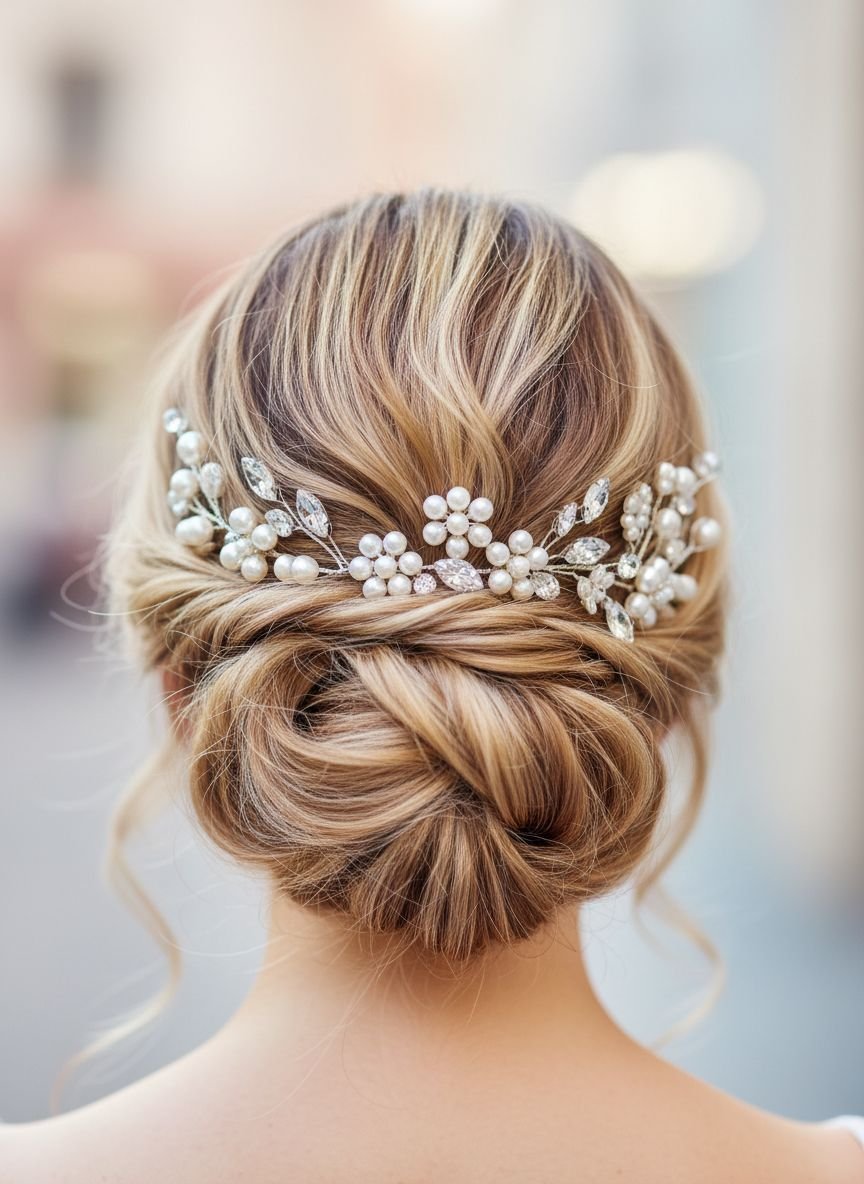
While technically an updo, a loose low bun often incorporates so many escaping tendrils and soft pieces that it feels like a down style. The bun sits at the nape of the neck, anchored loosely. The magic lies in the face-framing pieces and the soft texture of the bun itself. It shouldn’t look like a tight ballerina bun. It should look like you gathered your curls effortlessly. This is the epitome of “perfectly imperfect.”
Start by curling the entire head of hair. This ensures that every piece pulled back has movement and texture. The bun is formed by twisting and pinning sections loosely. Pulling small pieces out around the ears and neck softens the profile. This style is very comfortable to wear and doesn’t pull on the scalp. It is a classic choice that never goes out of style.
Pro Tip: Use U-shaped pins instead of standard bobby pins for the bun. They hold more hair and allow for a softer, looser grip that maintains the volume.
The Twisted Side Braid
This style is a hybrid of a braid and loose curls. The hair is swept to one side and loosely twisted or braided down the shoulder. However, unlike a tight plait, this style is pulled apart significantly. Large sections of hair are left loose to weave in and out of the main structure. It gives the impression of a massive, thick braid but retains the flow of loose hair. It’s often called a “mermaid braid.”
Extensions are almost always required to achieve the volume needed for this look. The braid needs to be thick enough to be the main event. The loose curls at the end of the braid should be bouncy and full. This style keeps the neck cool while still providing the security of long hair. It photographs beautifully from the side and back.
Pro Tip: Save this idea to your Pinterest. Texturizing powder is your best friend here. Sprinkle it generously over the braid before pulling it apart to get massive volume that holds its shape.
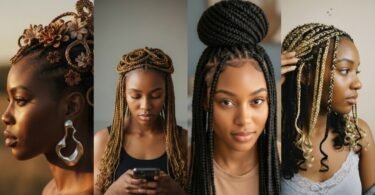
The Boho Baby Braid
The 90s influence has brought baby braids into bridal fashion. These are tiny, delicate braids placed in the front framing layers of the hair. The rest of the hair is left in loose, flowing waves. The braids add a playful, youthful texture to the look. They break up the uniformity of the curls and add a touch of boho chic. This is a subtle detail that makes a big impact up close.
You can incorporate gold thread or small rings into the baby braids for extra sparkle. The braids should not be secured with bulky elastics. Instead, tease the ends or use tiny clear bands. The rest of the hair should be styled in messy, beachy waves to match the relaxed vibe of the braids. This style is perfect for brides who want to look like themselves, just elevated.
Pro Tip: Don’t braid all the way to the end. Leave the last two inches loose and curl them to blend seamlessly with the rest of the hair.
The Veil-Ready Wave

Many brides forget that the veil needs a place to live. Loose curls can be slippery, making it hard for a veil comb to stay put. This style incorporates a hidden structure specifically for the veil. A small horizontal section at the crown is backcombed and pinned. This creates a “shelf” for the comb to grip. The hair over it is smoothed, and the rest falls in perfect waves.
The waves in this style should be directed away from the face to keep the look open. The back of the hair needs to be relatively flat where the veil sits to avoid a bulky silhouette. Once the veil is removed for the reception, the hidden anchor point disappears into the curls. It is a practical style that prioritizes the ceremony look without sacrificing the party look.
Pro Tip: If you have a heavy cathedral veil, cross two bobby pins over the teeth of the comb once it is inserted. This locks it onto the anchor section.
The Red Carpet Volume
This is the ultimate blowout look. It focuses on massive volume at the roots and large, round curls at the ends. It looks expensive and luxurious. The key is lifting the hair away from the scalp during the drying process. Velcro rollers are often used at the crown to set the volume while the hair cools. The result is hair that moves and bounces with every step.
This style is less about defined ringlets and more about body. It requires a lot of product to maintain the lift. Root lifting mousse, volumizing spray, and a light-hold hairspray are essential. It works best on layered hair, as the layers allow the curls to stack on top of each other, creating width and fullness. It is a power look for the confident bride.
Pro Tip: Flip your head upside down when spraying the final coat of hairspray. This coats the underside of the layers and provides internal support for the volume.
The Effortless Headband Look
Headbands are making a huge comeback in bridal wear. Whether it is a padded velvet band, a pearl-encrusted arch, or a simple satin ribbon, the headband changes the hair dynamic. The hair is usually styled in loose, brushed-out waves. The headband pushes the hair back from the face, opening up the features. It provides a preppy, polished finish that is very modern.
The placement of the headband is crucial. It should sit just behind the ears, leaving a few tendrils loose in front if desired. The hair behind the headband should be teased slightly to prevent the accessory from slipping backward. This style is incredibly secure and requires zero maintenance throughout the night. It is perfect for the bride who wants to dance without worrying about her hair.
Pro Tip: Choose a headband that is flexible. Rigid bands can cause headaches after a few hours. Test wear your headband for an hour before the wedding day.
Popular Asked Questions
How do I keep my wedding curls from dropping?
The secret is cooling. When you curl a section of hair, catch the hot curl in your hand or pin it against your head until it is completely cold. Hair sets as it cools. If you drop a hot curl, gravity pulls it straight immediately. Also, avoid heavy conditioners on the roots the day of the wedding.
Should I wash my hair the morning of the wedding?
Generally, no. “Day-old” hair holds style better because the natural oils provide grip. Wash your hair the night before and apply a mousse. If you have extremely oily hair, wash it the morning of, but use a texturizing spray to add the necessary grit for the pins and curls to hold.
Are loose curls good for outdoor weddings?
Loose curls can be risky for windy or humid outdoor weddings. If you choose loose curls outdoors, ensure your stylist uses humidity-resistant products. A half-up style is often a safer compromise, as it keeps the hair out of your face while maintaining the look of loose locks.
How do I sleep on my hair if I have a rehearsal dinner blowout?
Use a silk scrunchie to tie your hair in a very loose, high bun (pineapple style) on top of your head. Sleep on a silk pillowcase. This reduces friction and prevents frizz. In the morning, shake it out and refresh with a little dry shampoo at the roots.
Conclusion
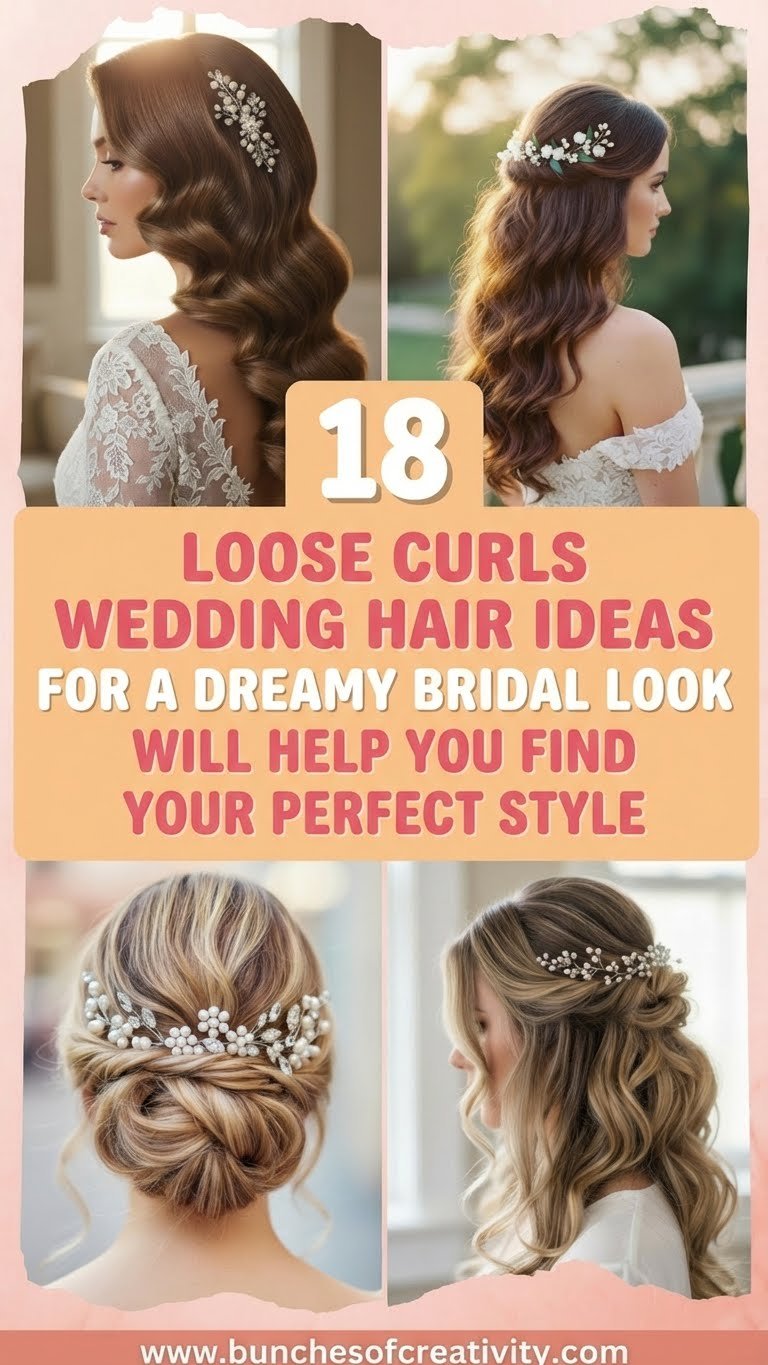
Your wedding hair is the crown you never take off. Whether you choose the structured glamour of Hollywood waves or the free-spirited vibe of boho twists, the goal is to feel like the most beautiful version of yourself. These 18 loose curl ideas offer a spectrum of styles to match any dress and any venue.


Leave a Comment