
You spend hours counting stitches, carefully decreasing, and stuffing your latest amigurumi project until it is perfectly squishy. It sits there on your desk, technically finished, but something is missing. It looks… blank. Generic. It lacks that spark of life that makes handmade toys so special.
We have all been there. You want your crochet creation to have personality, but you are terrified of ruining it with a messy face or uneven details. The good news is that embroidery is the secret weapon that transforms a simple ball of yarn into a cherished keepsake. It is easier than you think, and you do not need to be a master seamstress to get started.
This ultimate guide is your resource hub for adding those magical finishing touches. From sleepy eyes to floral bellies, we have curated a massive list of ideas that will elevate your amigurumi game instantly. Grab your tapestry needle and let’s get stitching.
Key Takeaways
- Personality Over Perfection: Simple stitches like a V-shaped mouth or sleepy eyes instantly add character without requiring advanced skills.
- Texture is King: Using contrasting threads, such as embroidery floss against chunky yarn, creates a high-end, boutique look.
- Safety First: Embroidered eyes are the safest option for toys intended for babies, eliminating the choking hazard of plastic safety eyes.
- Stash Busting: These small details are the perfect way to use up those tiny scraps of colorful yarn you have been saving.
Table of Contents
- Embroidered Mini Bunny Amigurumi
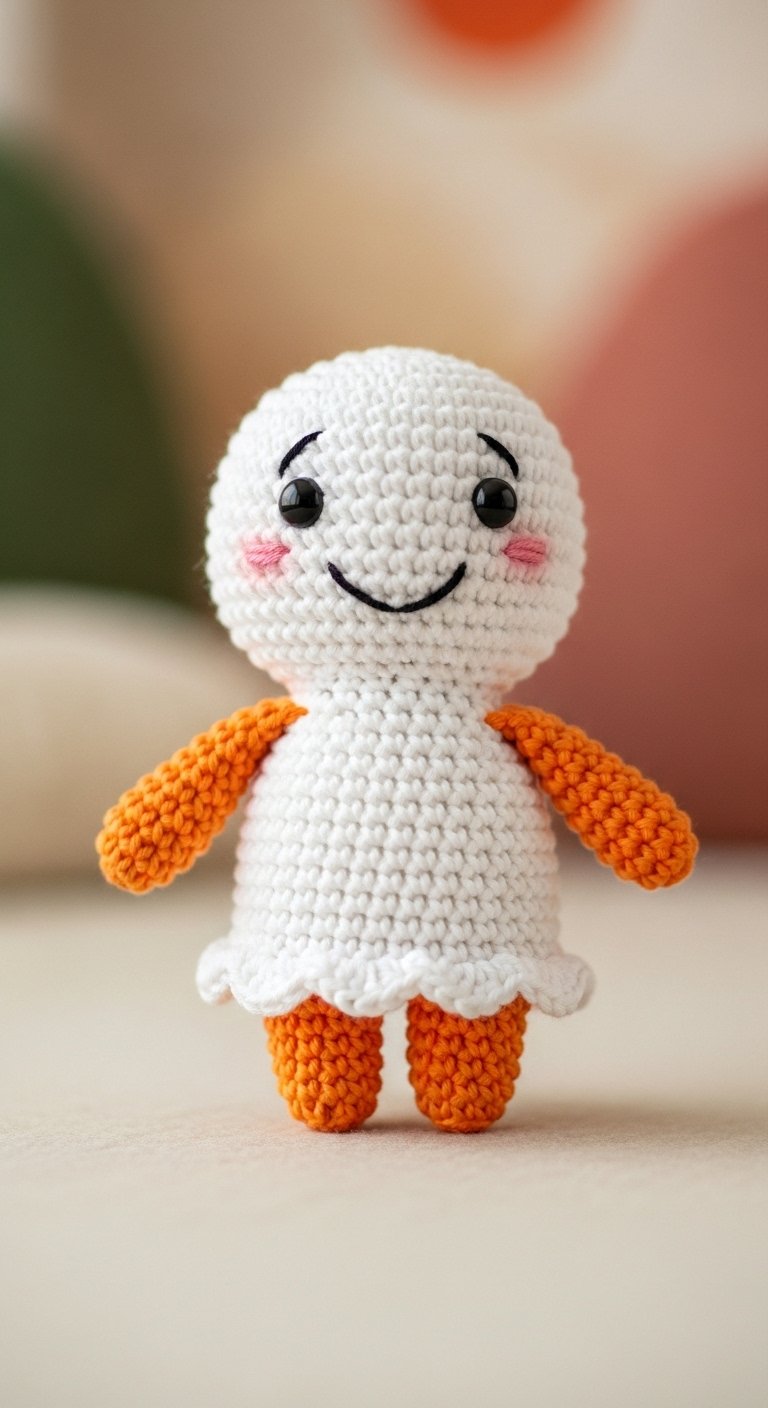
- Amigurumi Bunny with Embroidered Dress
- Mini Lucky Bear Amigurumi Crochet
- Plush Floral Amigurumi Bunny
- Knit Totoro-Style Amigurumi Plush
- Floral Embroidered Amigurumi Deer
- Knit Floral Bear Amigurumi
- Embroidered Floral Amigurumi Bunny
- Succulent Amigurumi Doll
- Amigurumi Crochet Bunny with Dress
- Amigurumi Bunny Holding Rose
- Embroidered Amigurumi Cat
- Garden Bird Amigurumi
- Mini Grey Cat Amigurumi
- Embroidered Floral Hedgehog Amigurumi
- Embroidered Bunny Amigurumi
- Handheld Totoro-Style Amigurumi Crochet Toy with Flower
- Amigurumi Girl Doll Pattern
- Mini Horned Amigurumi in Yellow Sweater
- Teal Floral Amigurumi Bunny
- Horned Floral Cow Amigurumi
- Mini Crochet Frog Amigurumi with Floral Crown
- Amigurumi Bunny with Leafy Carrot
- Kawaii Ghost Amigurumi
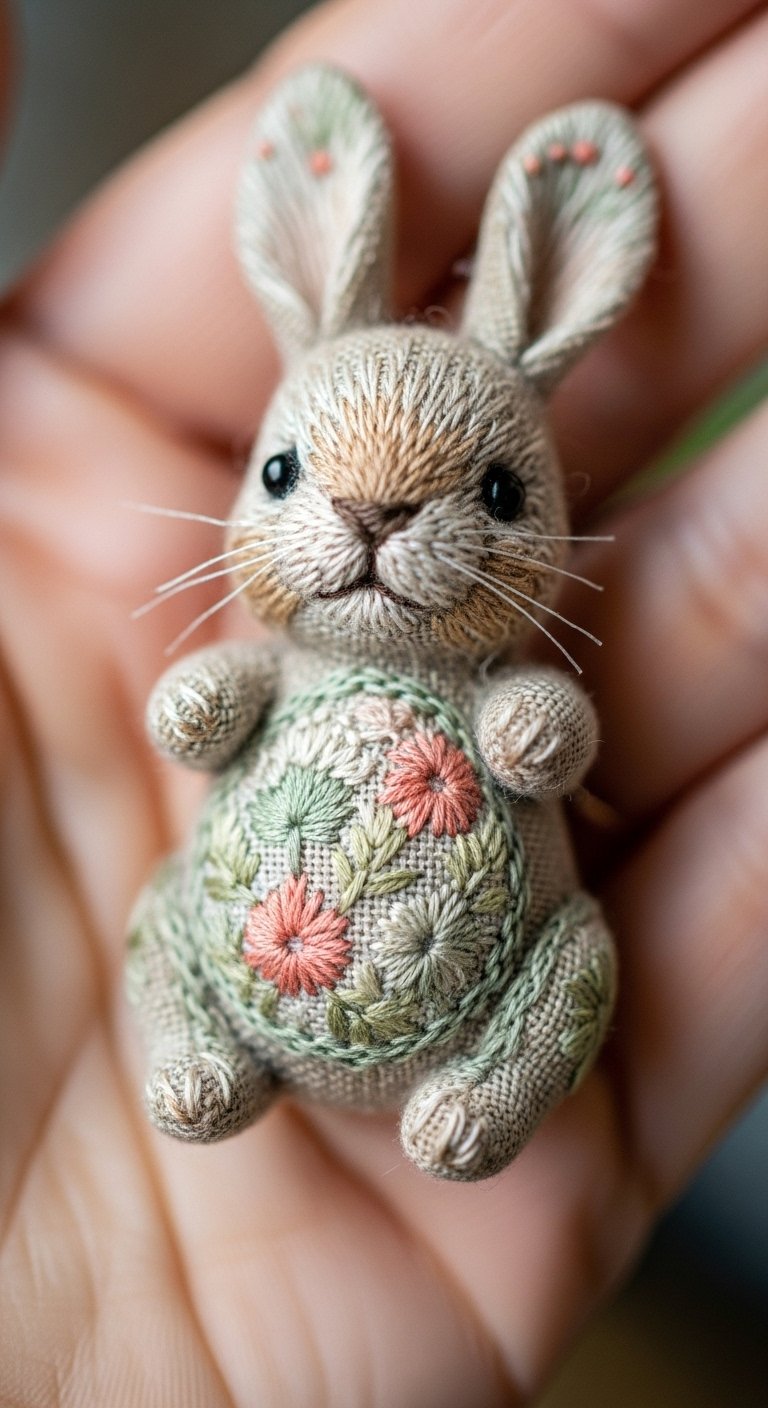
- Mini Embroidered Amigurumi Bunny
- Mini Sheep Amigurumi Crochet Pattern with Rainbow
- Mini Bunny Amigurumi Handheld Knit Plush
- Mini Amigurumi Elephant
- The Secret Tools You Actually Need
- Popular Asked Questions
- Conclusion
28+ Patterns That Will Blow Your Mind
Embroidered Mini Bunny Amigurumi
This project is the definition of “less is more.” By keeping the base crochet simple and white, you create a blank canvas for your needlework. The magic here lies in the contrast. Use a single strand of pink embroidery floss to stitch tiny “V” shapes on the inner ears to mimic fur or fabric lining.
This technique transforms a basic shape into a boutique-quality toy. If you are struggling to choose the right color palette for your bunny’s accessories, check out our guide on 10 Cozy Living Room Ideas Featuring Warm Colors That Instantly Transform Your Home for inspiration on how warm tones can create a comforting vibe.
Amigurumi Bunny with Embroidered Dress

Instead of changing yarn colors every few rows to create a pattern, crochet a solid-colored dress and embroider the details later. This saves you from weaving in a million ends. The “Lazy Daisy” stitch is perfect here; it creates adorable petal shapes with just one loop of thread.
It is a quick way to add a floral motif that looks complex but takes seconds to execute. This approach allows you to customize the dress for seasons or holidays without redoing the entire toy.
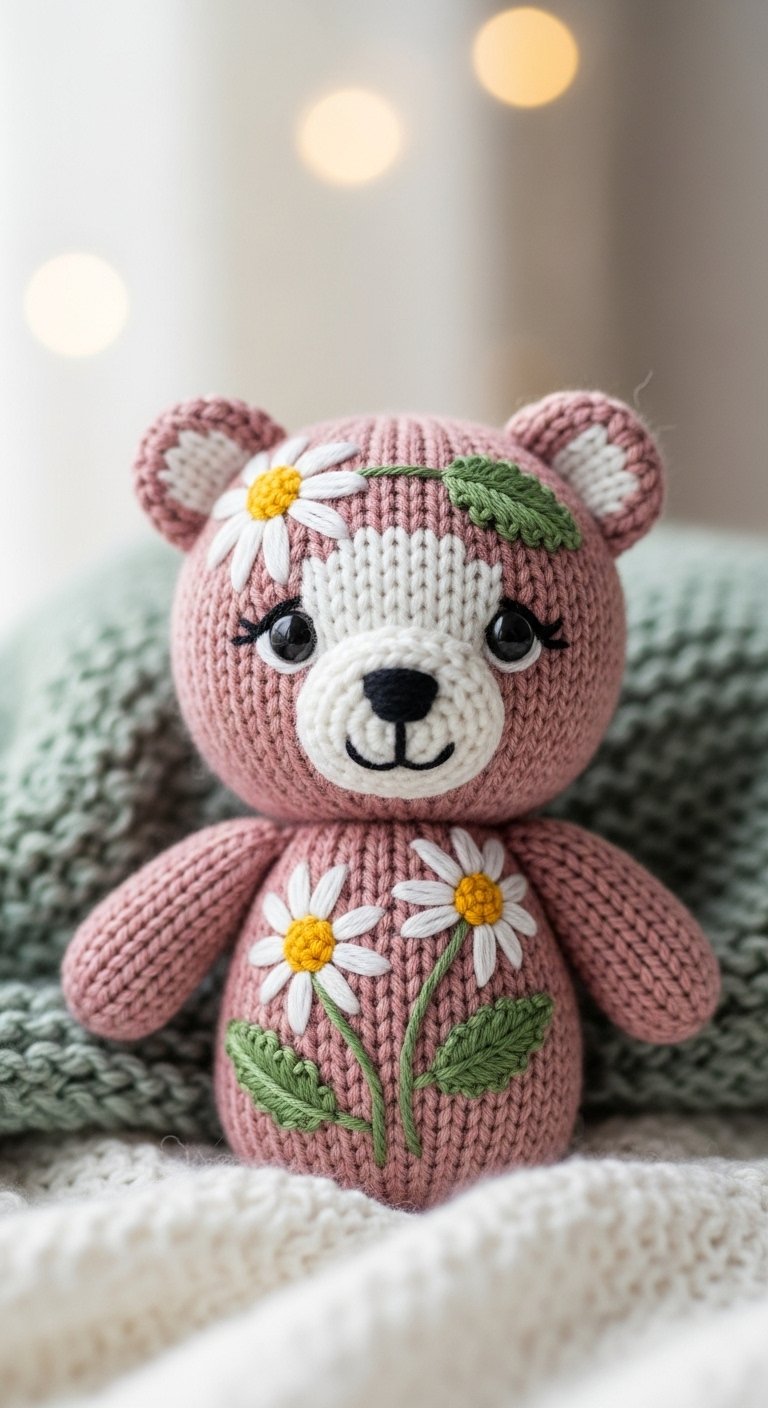
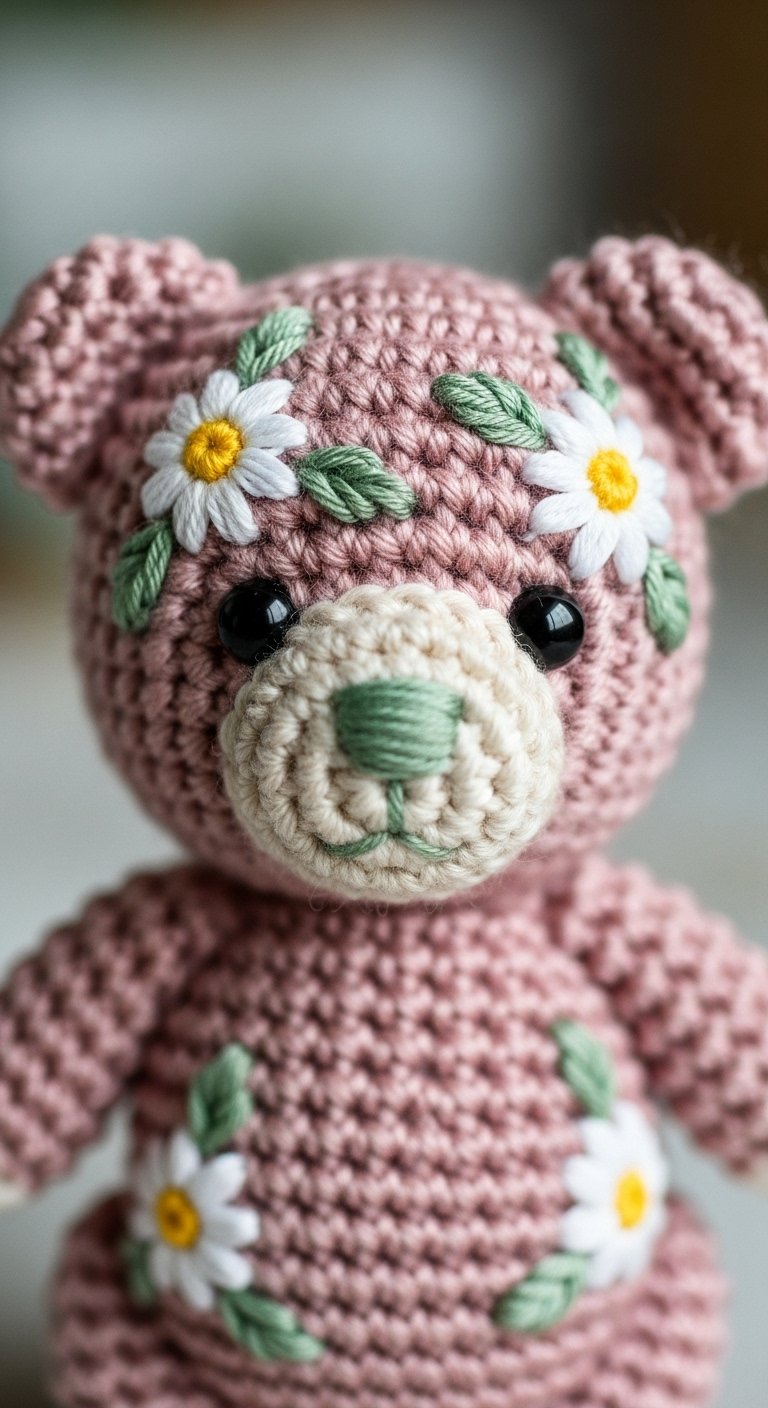
Mini Lucky Bear Amigurumi Crochet

This bear is designed to be a pocket companion or a thoughtful gift for someone needing a bit of luck. The key detail is the embroidery on the tummy. Use a satin stitch to fill in the leaves of the clover, giving it a raised, shiny texture that stands out against the matte yarn.
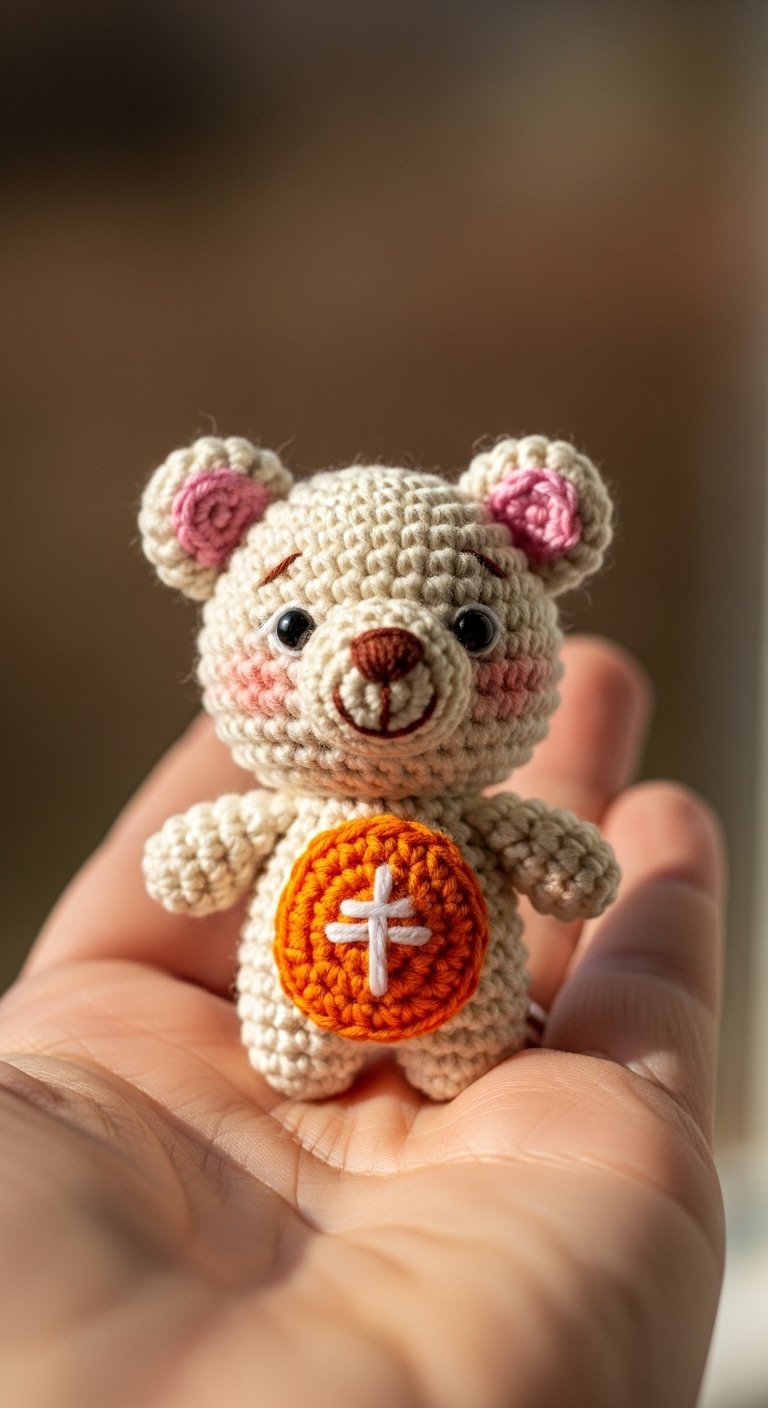
The small scale means you can finish this project in an afternoon. It is a fantastic way to use up green scrap yarn.
Plush Floral Amigurumi Bunny

Chenille yarn is incredibly soft, but it can be tricky to embroider on because standard thread gets lost in the fluff. The trick is to use a lighter weight yarn (like DK cotton) for the embroidery instead of thread. This ensures the flowers pop visually.
The tactile experience of the plush yarn combined with the structured embroidery makes this a sensory delight for young children.
Knit Totoro-Style Amigurumi Plush

This iconic character relies heavily on precise placement of facial features and belly markings. The “arrows” on the chest are best done with a surface slip stitch or a careful backstitch to keep lines sharp. Getting the spacing right is crucial for capturing that recognizable look.
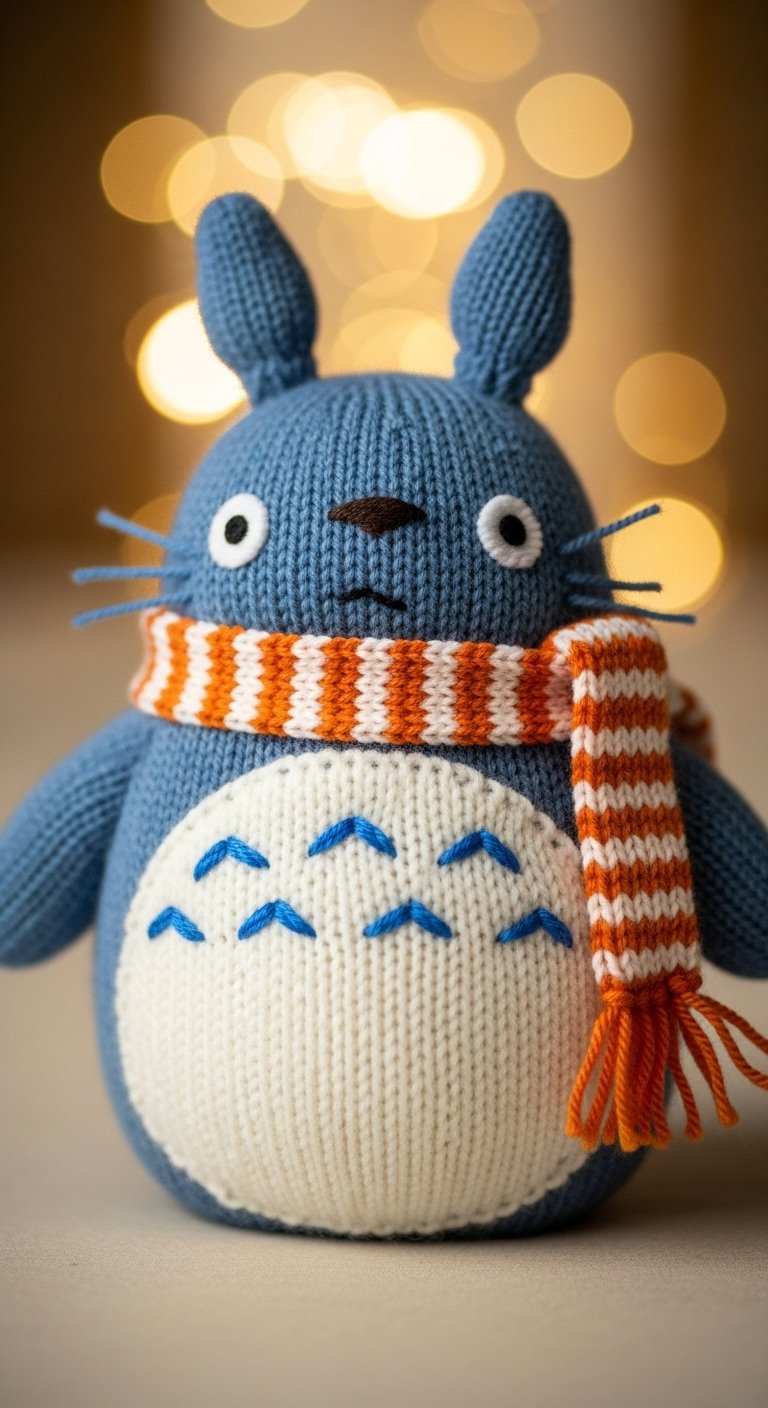
If you are new to character crochet, seeing it done visually helps immensely. Follow a video tutorial if you want extra help: Tutorial Link.
Floral Embroidered Amigurumi Deer
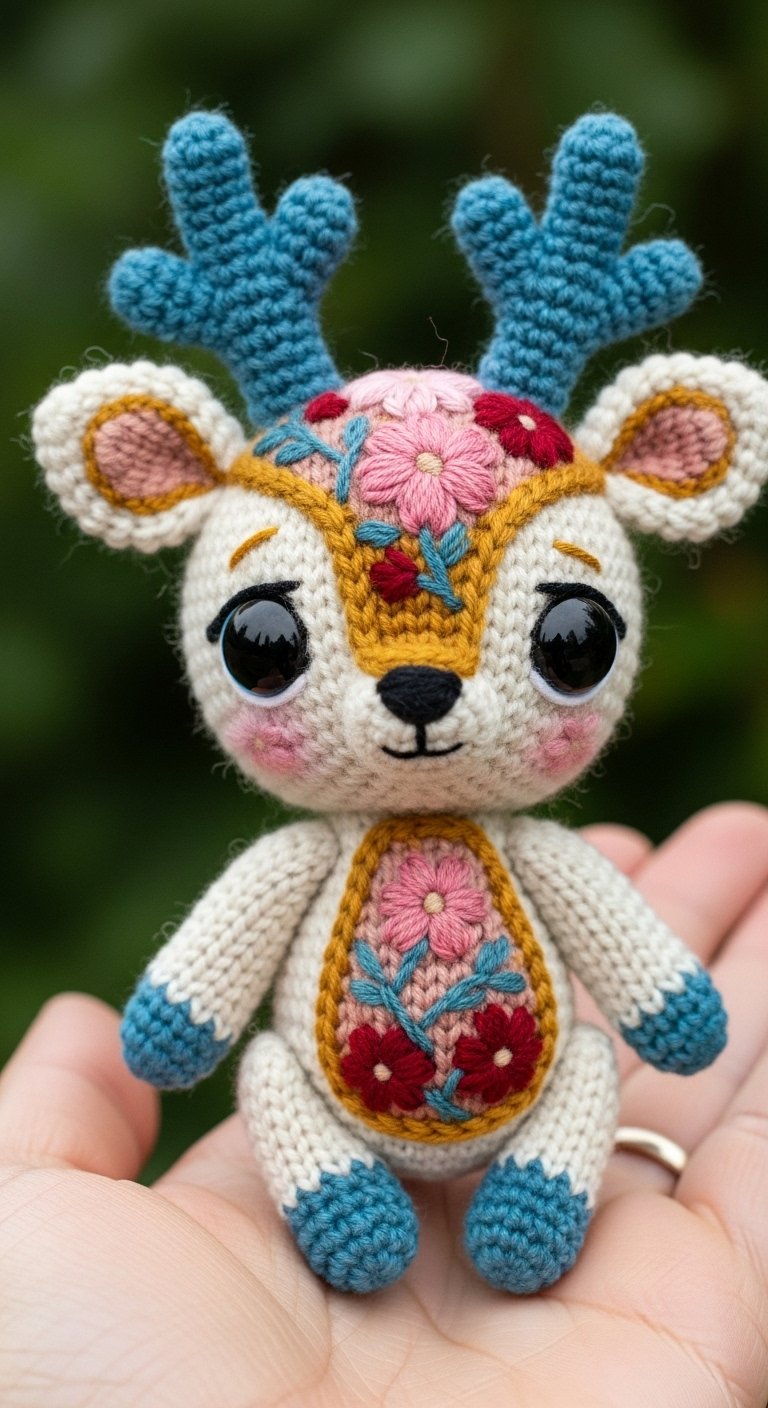
This woodland creature screams fairytale elegance. The white spots on the back are created using French knots, which provide a perfect little bump texture. For the floral crown, combine bullion knots for roses with simple straight stitches for leaves.

The result is an heirloom-quality piece that looks stunning on a nursery shelf. The natural tones bring a sense of calm, similar to the vibe in our post on 15 Green and Brown Kitchen Designs: The Perfect Blend of Nature and Elegance.
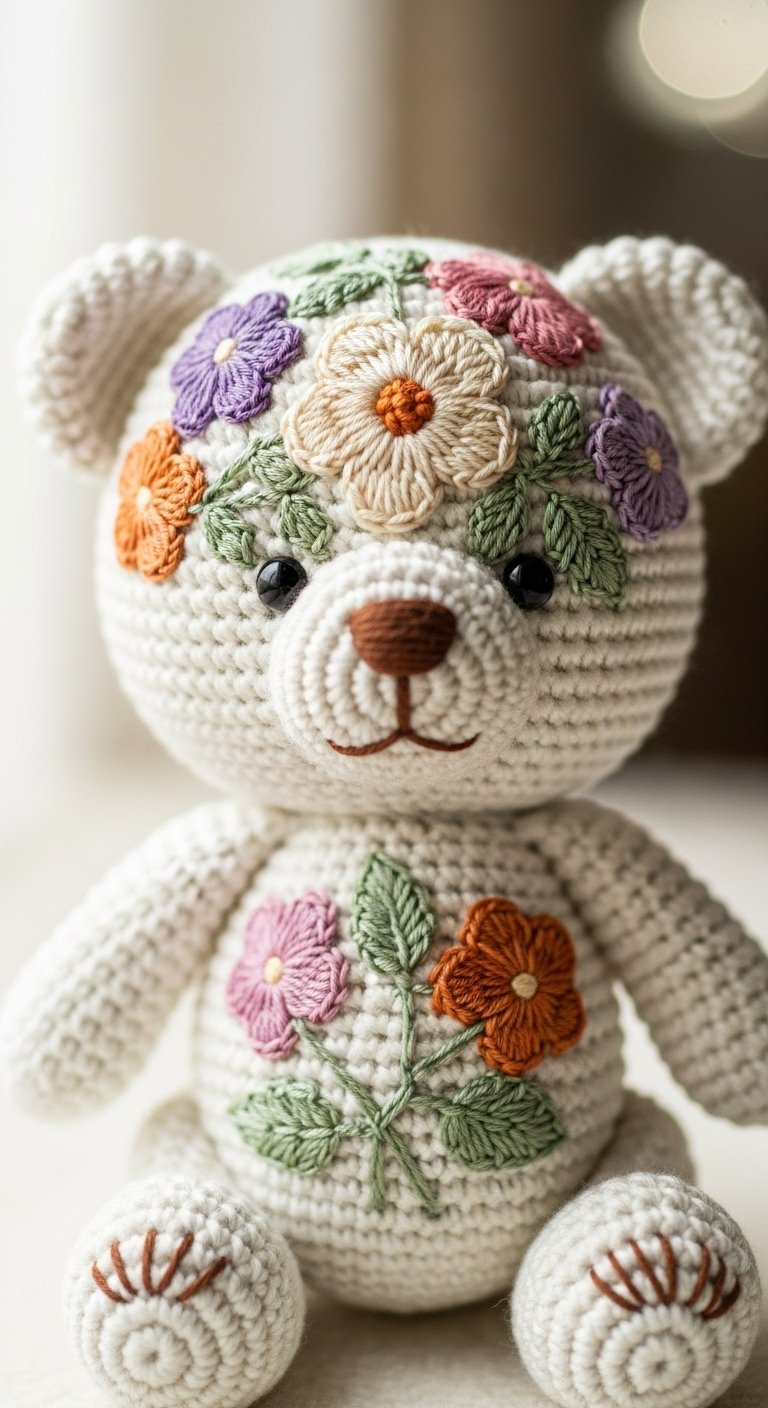
Knit Floral Bear Amigurumi
Knitted fabric provides a smoother grid than crochet, making it ideal for detailed embroidery that resembles a printed fabric. You can sketch your design lightly onto the knit fabric with a water-soluble marker before stitching.
Use a variety of pastel threads to create a meadow effect across the bear’s body. This style mimics the look of vintage porcelain and feels incredibly nostalgic.
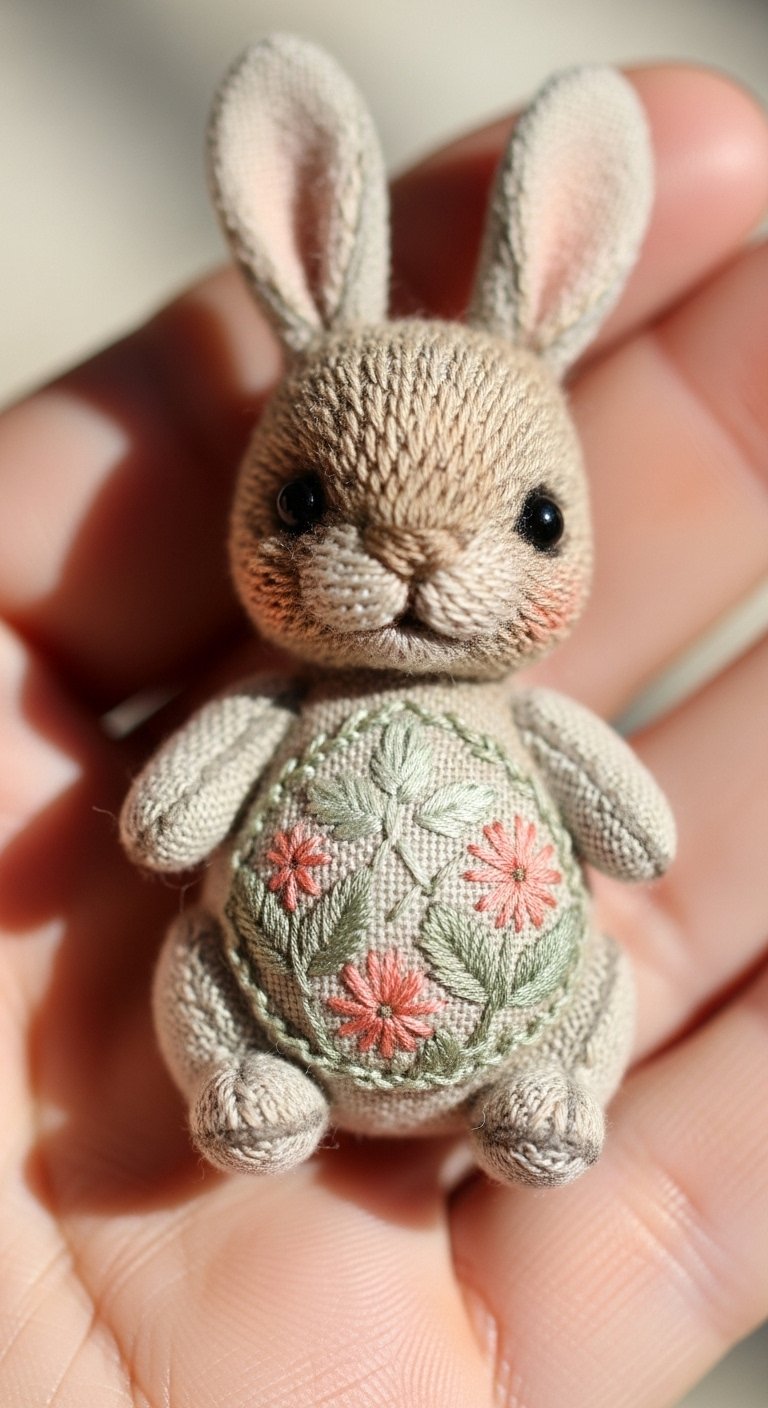
Embroidered Floral Amigurumi Bunny
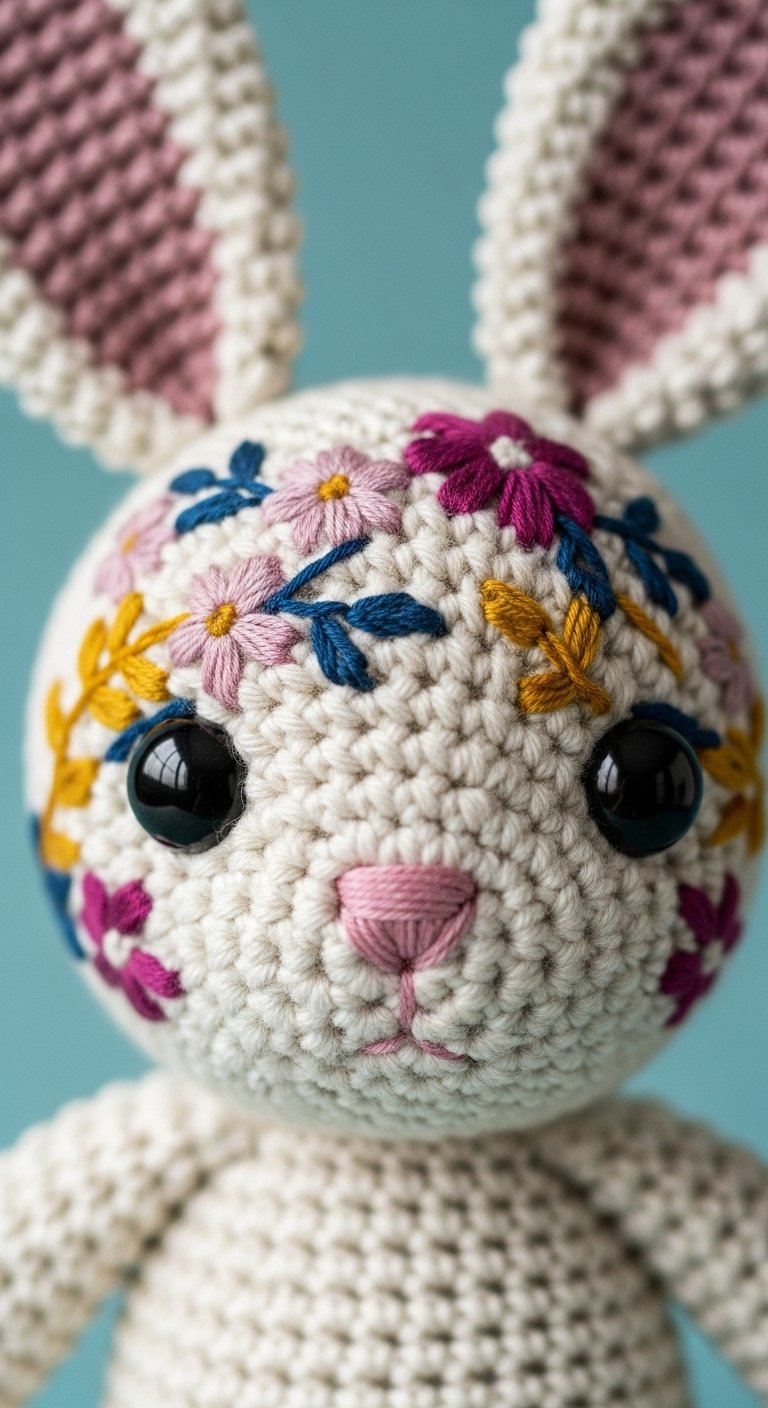
Utilize the long surface area of the bunny’s ears to create a vertical garden. Start with a green stem running up the center and branch out with leaves and small buds.
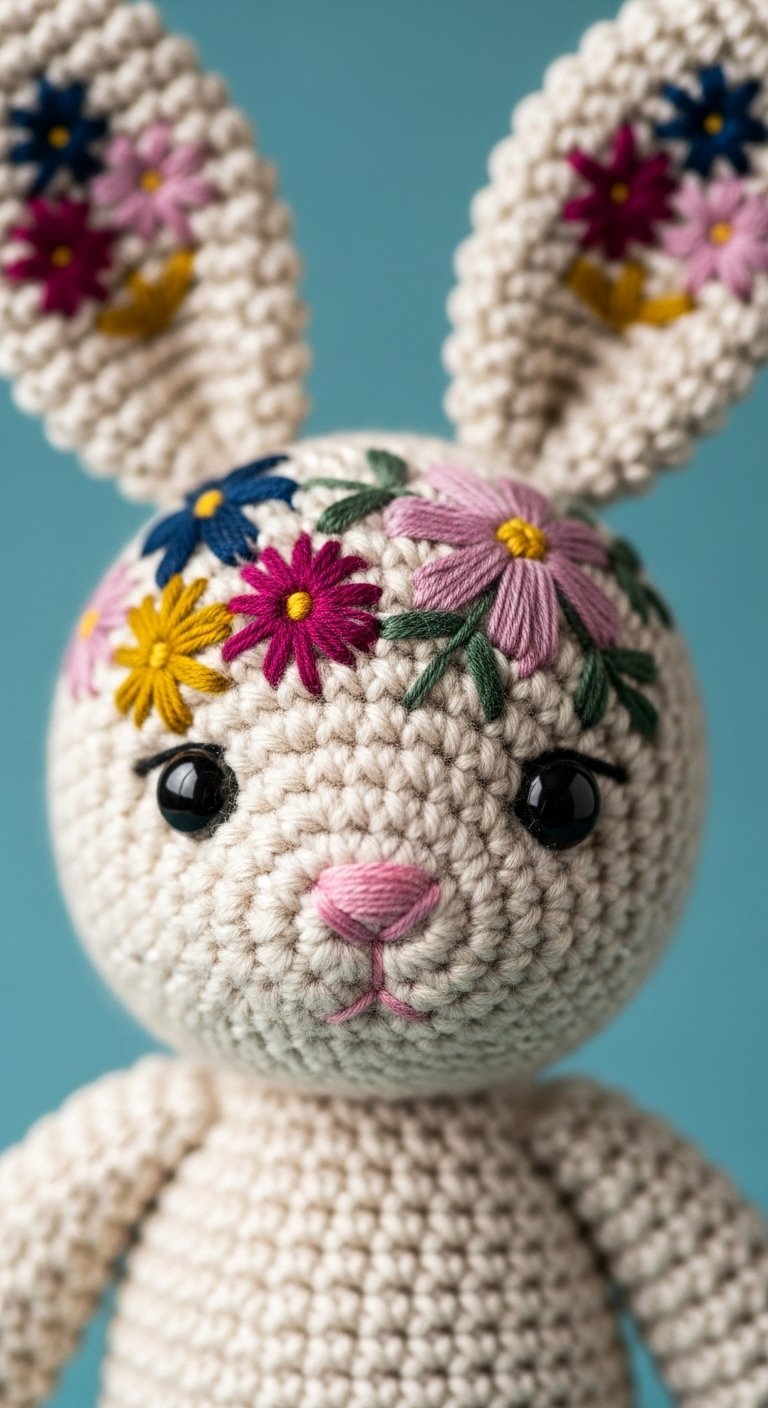
This draws the eye upward and adds a sophisticated touch to an otherwise simple toy. It is a fantastic way to practice your stem stitch and leaf stitch variations.
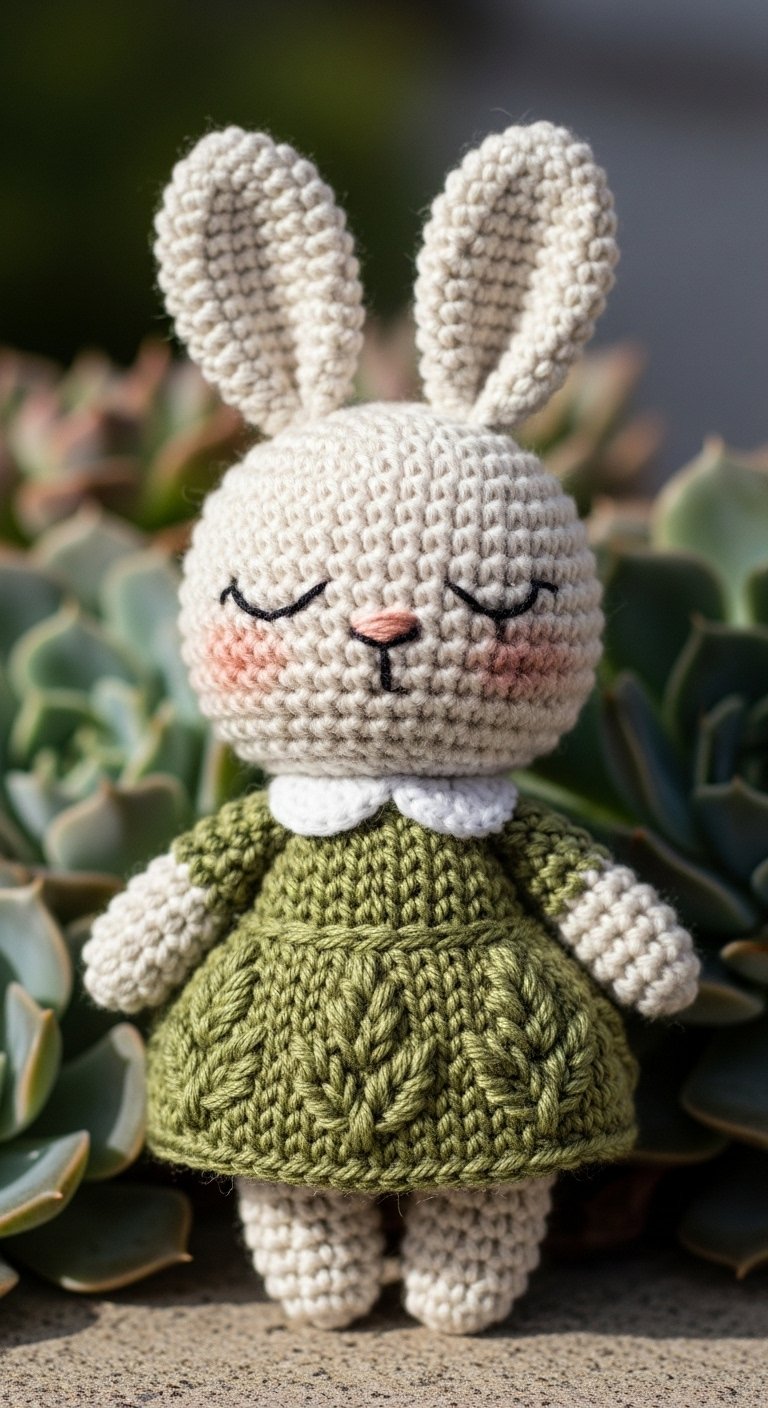
Succulent Amigurumi Doll
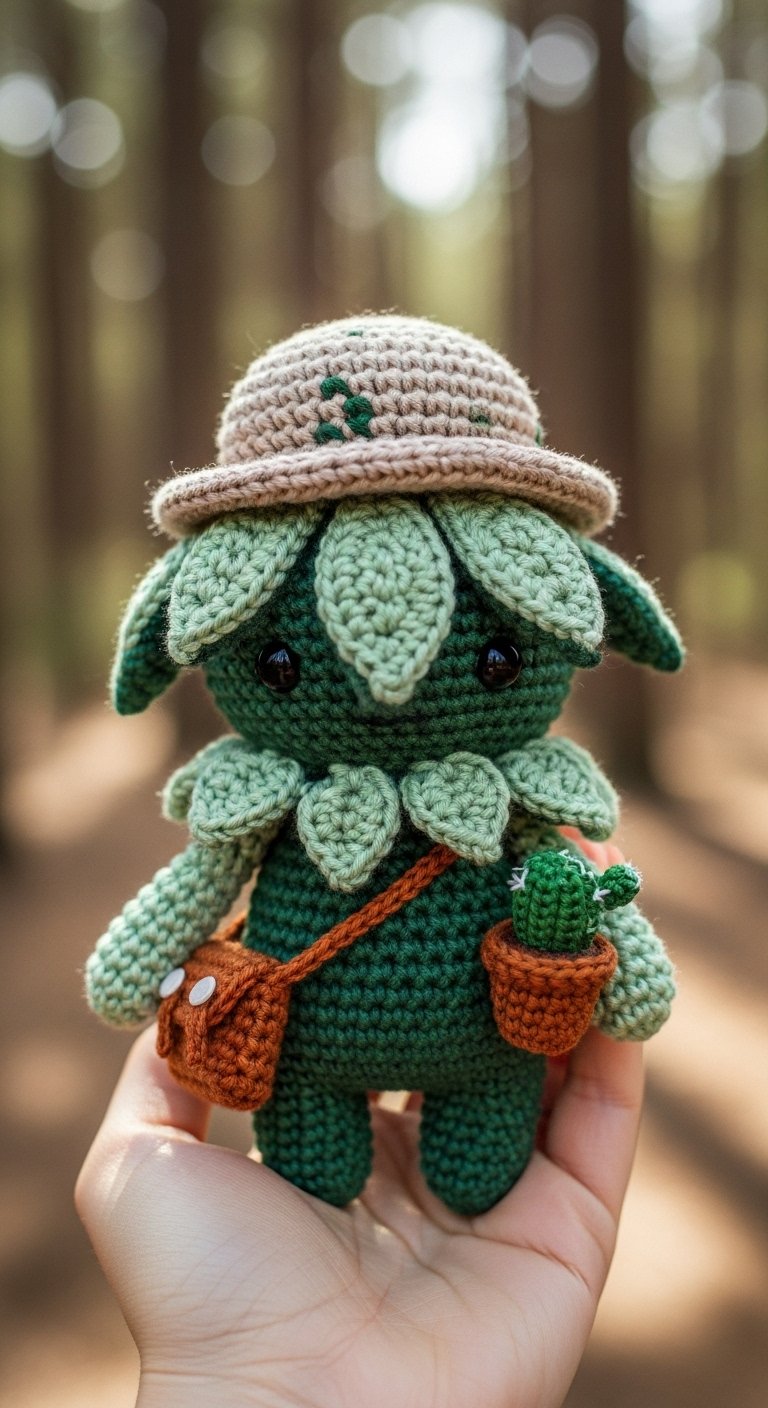
This quirky design combines gardening love with amigurumi. The embroidery here is functional as well as decorative; use small straight stitches in white or pale yellow to mimic the spines or variegation found on real succulents.
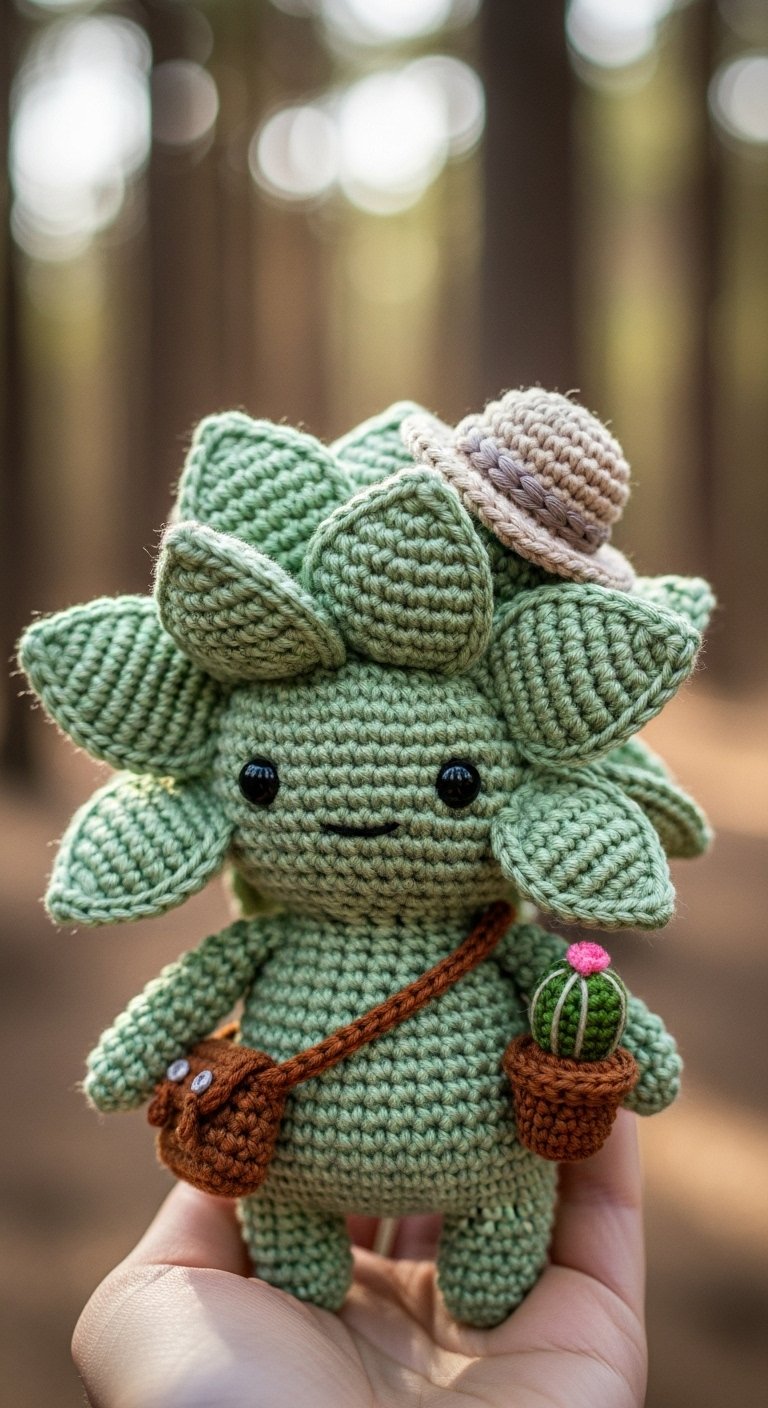
It adds realism and texture to the green leaves. If you love bringing the outdoors in, this doll fits right in with the aesthetic we discuss in 14 Breathtaking Modern Garden Design Ideas to Refresh Your Outdoor Space.
Amigurumi Crochet Bunny with Dress

Cross-stitch on crochet is a match made in heaven because single crochet stitches act as a natural grid. You can plan out a geometric border along the bottom of the dress using graph paper.

This technique gives the toy a folk-art appearance and allows for very precise, symmetrical patterns that are hard to achieve with freehand embroidery.
Amigurumi Bunny Holding Rose
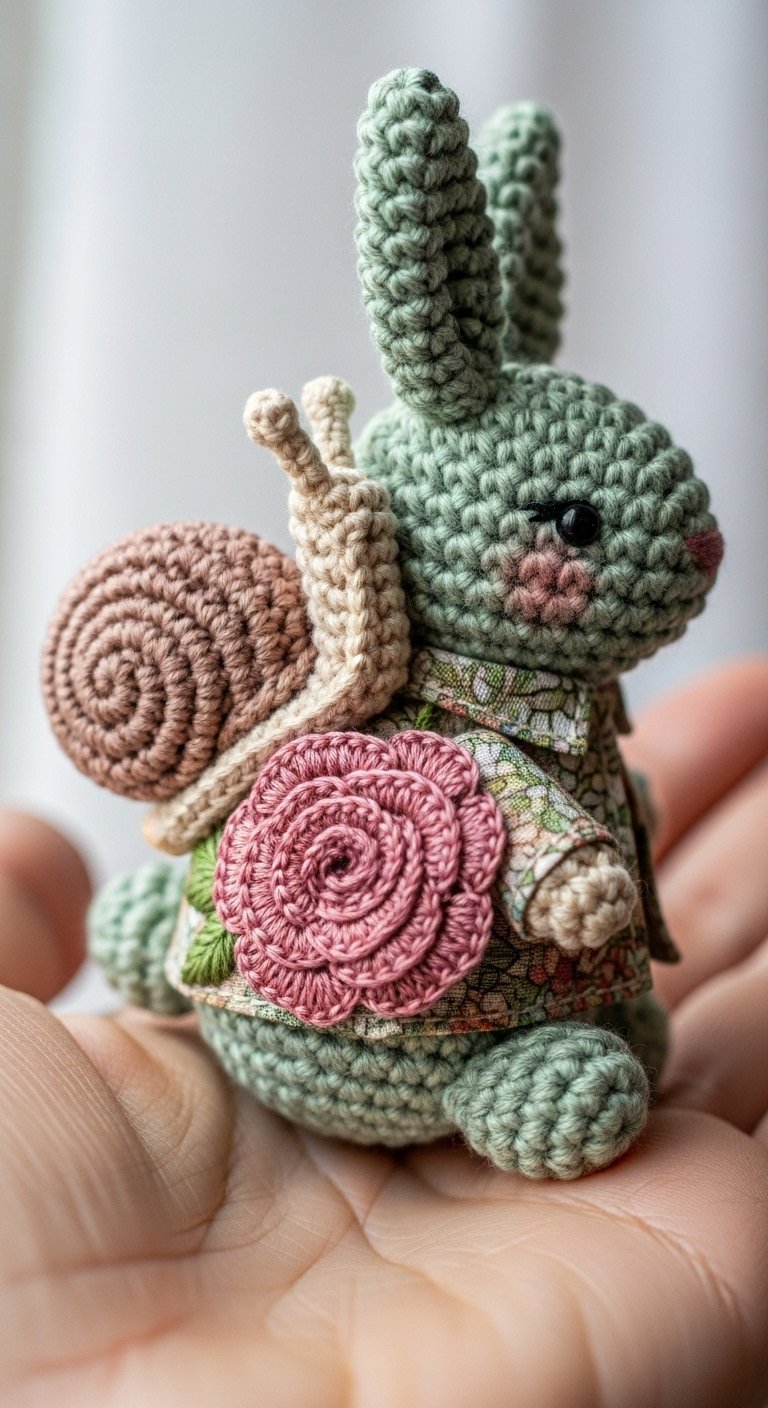
The focus here is on the interaction between the character and the prop. Embroider the stem and thorns directly onto the bunny’s arm to make it look like they are gripping the flower tight.

The rose itself can be a separate piece sewn on, or a complex cluster of bullion knots. For a step-by-step on making the flower itself, follow a video tutorial if you want extra help: Tutorial Link.
Embroidered Amigurumi Cat
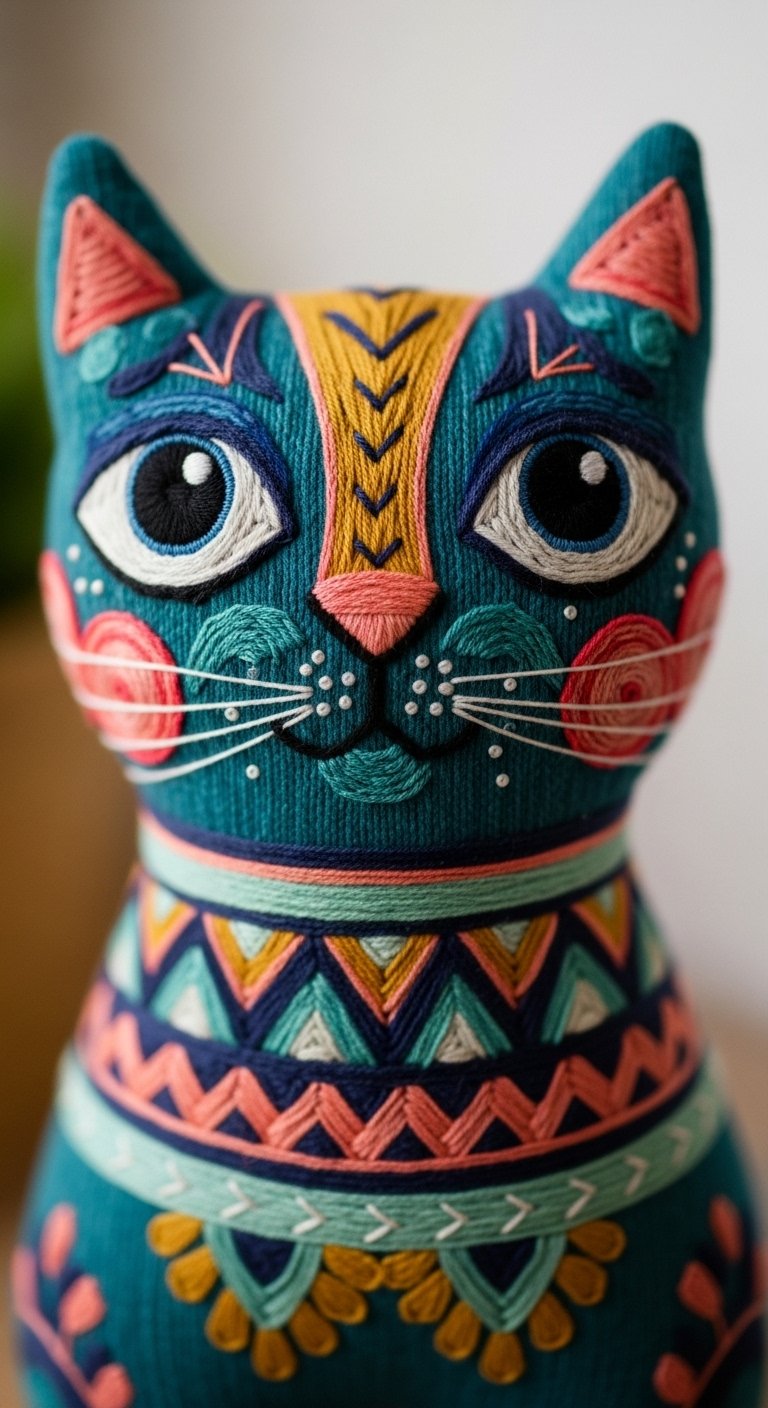
Who says embroidery has to be traditional flowers? Use bright, neon threads against a dark yarn background to create modern, geometric shapes like triangles and diamonds.

This “electric” look makes the toy feel modern and edgy. It is a great design choice for older kids or teenagers who might find traditional florals too babyish.
Garden Bird Amigurumi

Instead of changing yarn colors to create wing details, use the satin stitch to layer different shades of blue thread over the wings. This creates a smooth, feather-like sheen that catches the light.
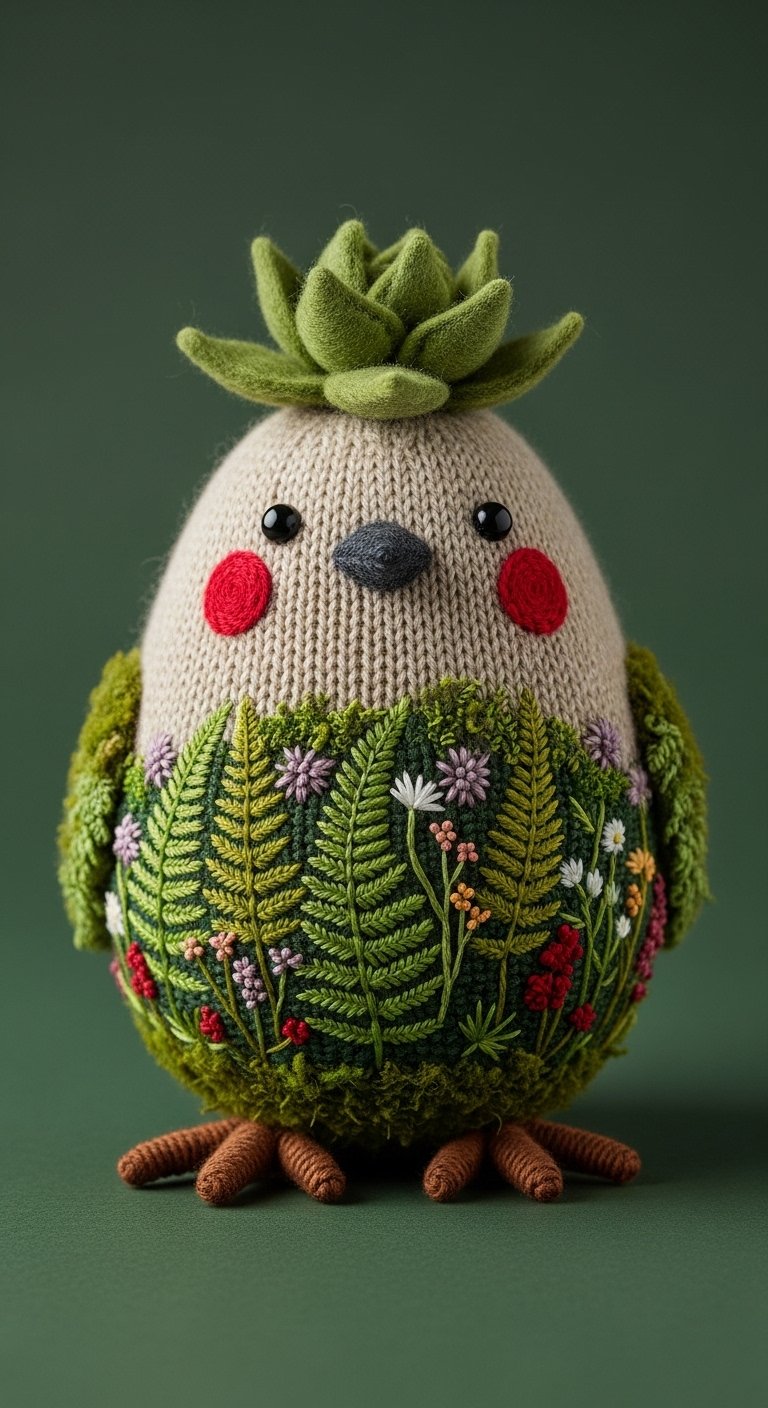
The gradient effect adds depth and realism that is difficult to achieve with crochet color changes alone.
Mini Grey Cat Amigurumi
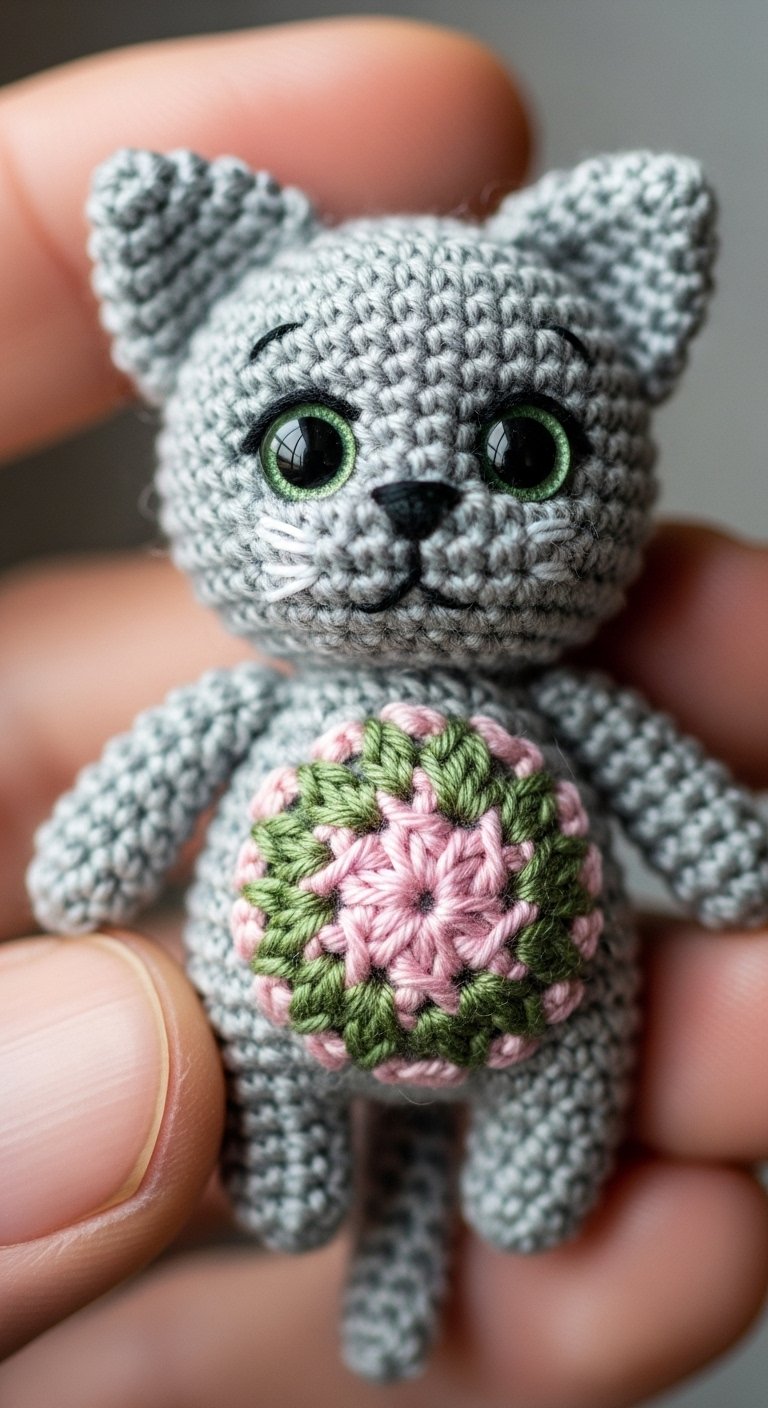
The charm of this piece is its sleepy expression. Use a thin black thread to create two downward curves for eyes, adding tiny eyelashes for sweetness.

The nose should be a small pink triangle filled with satin stitches. This minimalist face is incredibly expressive and peaceful, perfect for a bedtime buddy.
Embroidered Floral Hedgehog Amigurumi
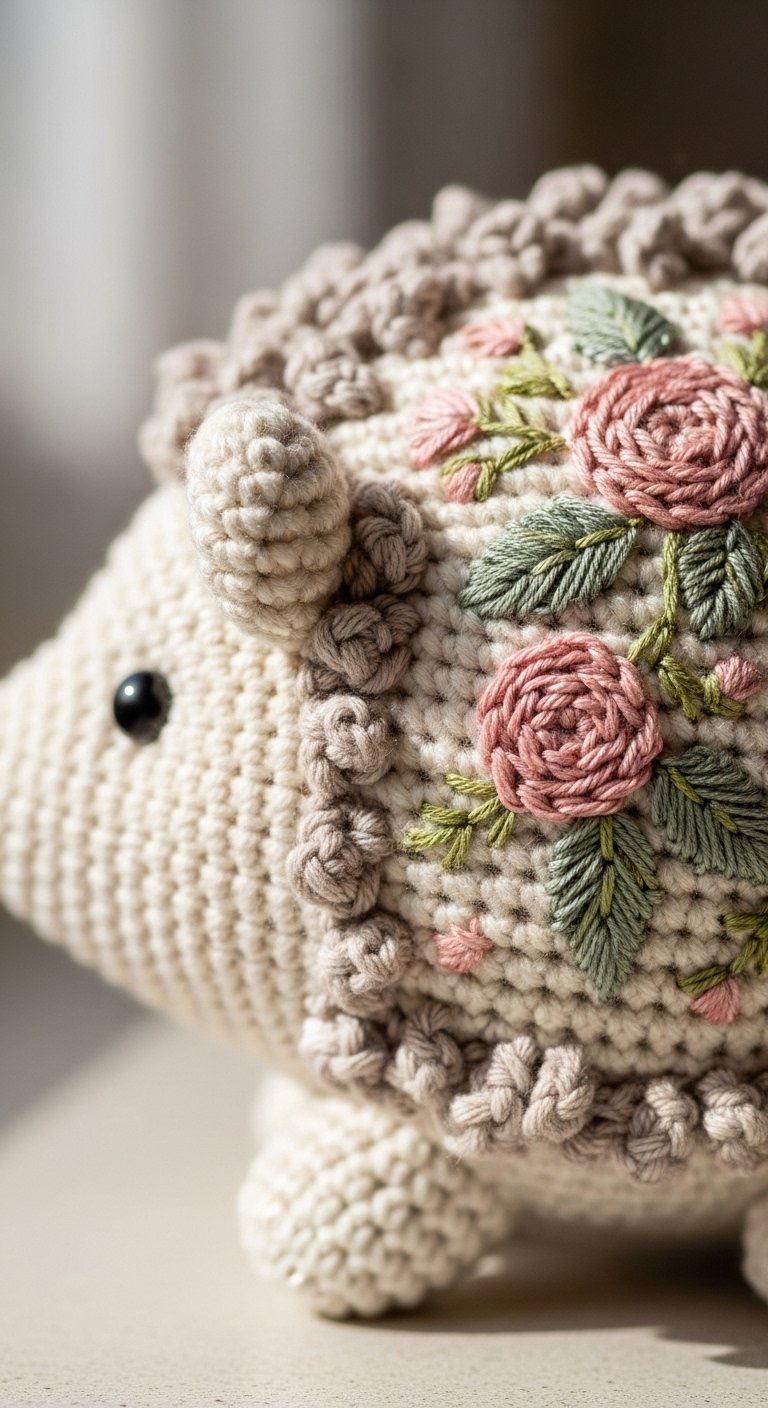
This is a creative twist on the classic hedgehog. Instead of using loop stitches or novelty yarn for the quills, cover the back panel entirely with colorful embroidered flowers.
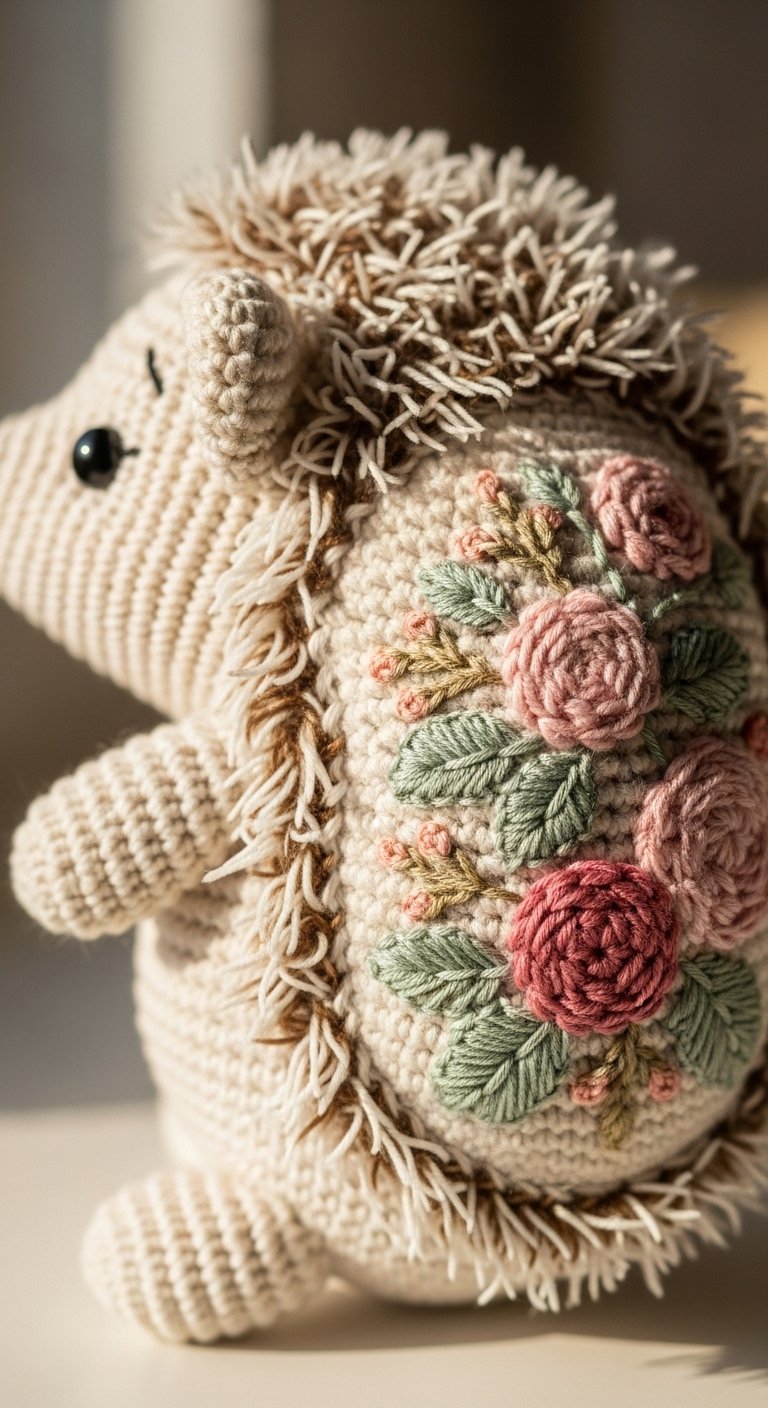
It turns the “prickly” concept into something soft and blooming. It takes time, but the texture is unbelievable.
Embroidered Bunny Amigurumi

Personalization makes a gift unforgettable. Stitching the recipient’s initial onto the foot of the bunny using a bold, contrasting color turns a standard toy into a custom keepsake.

Use a split stitch for the letter to ensure the curves are smooth and legible.
Handheld Totoro-Style Amigurumi Crochet Toy with Flower
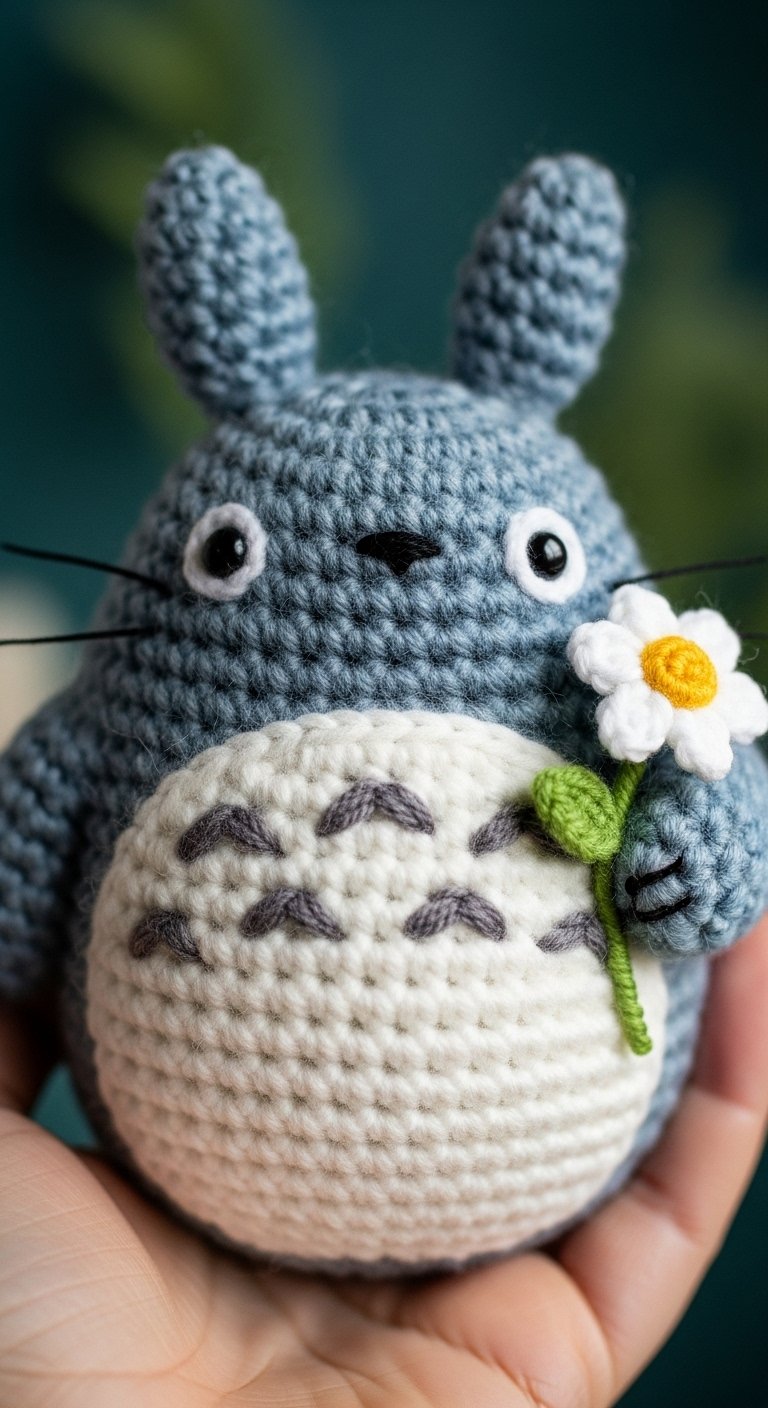
Add storytelling elements to your plush. By embroidering tiny black soot sprites around the base of the toy, you create a scene rather than just a character.

These small black fuzzy dots with two white eyes are simple to make but instantly recognizable to fans.
Amigurumi Girl Doll Pattern

Freckles are the ultimate cute factor for dolls. Use a light brown thread to make random French knots or tiny specks across the nose and cheeks.

For the rosy cheeks, you can use real blush makeup or gently embroider a spiral of pink thread. This attention to facial detail brings the doll to life.
Mini Horned Amigurumi in Yellow Sweater

The “sweater” is just part of the body crochet, but embroidery makes it look like a separate garment. Stitch a small motif like a star, heart, or anchor on the chest.
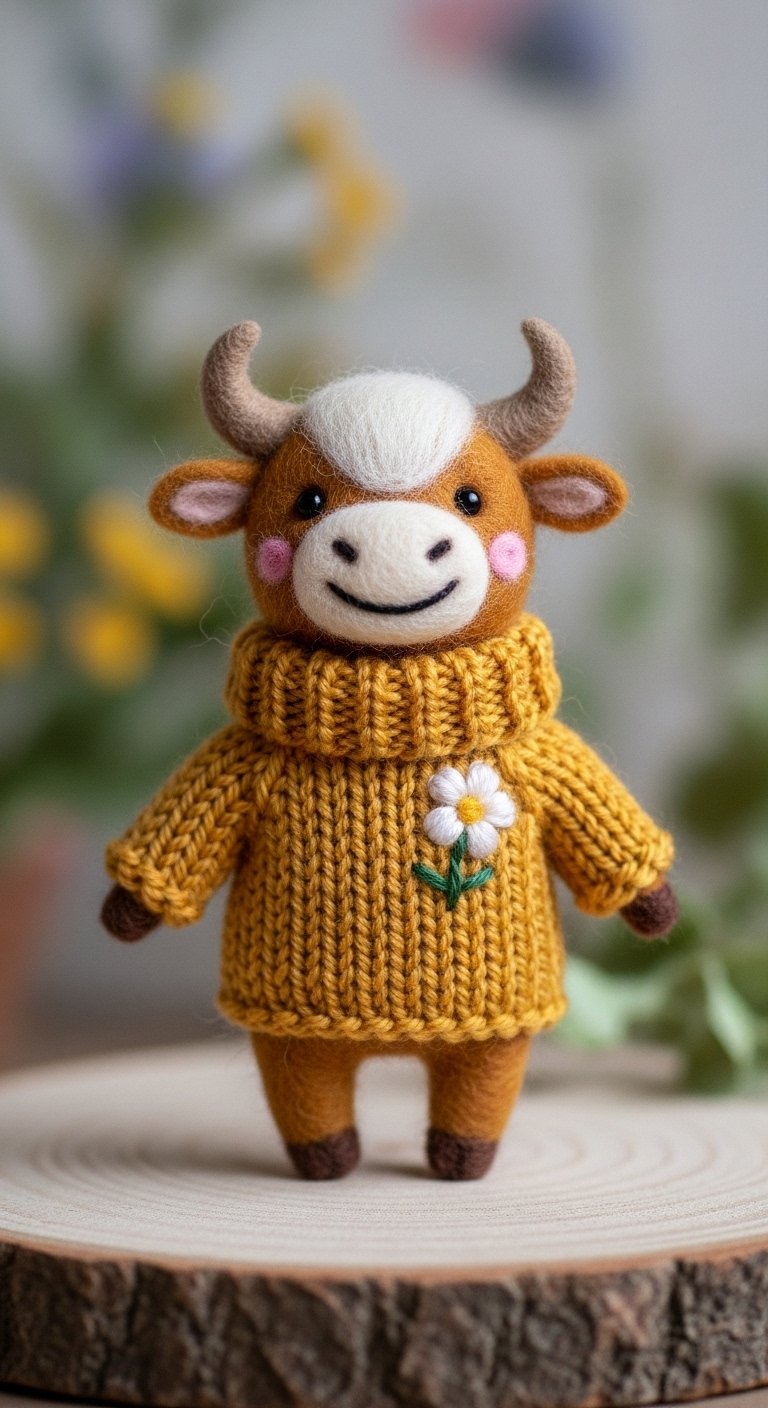
You can also embroider “ribbing” at the waist and cuffs using vertical straight stitches to mimic the texture of a real knit sweater.
Teal Floral Amigurumi Bunny

Teal is a bold choice that pairs beautifully with white embroidery. The high contrast makes the simple daisy stitches pop.

This color combination is fresh and modern, reminiscent of the bold palettes we explore in 15 Breathtaking Colorful Apartment Decor Inspiration Ideas.
Horned Floral Cow Amigurumi
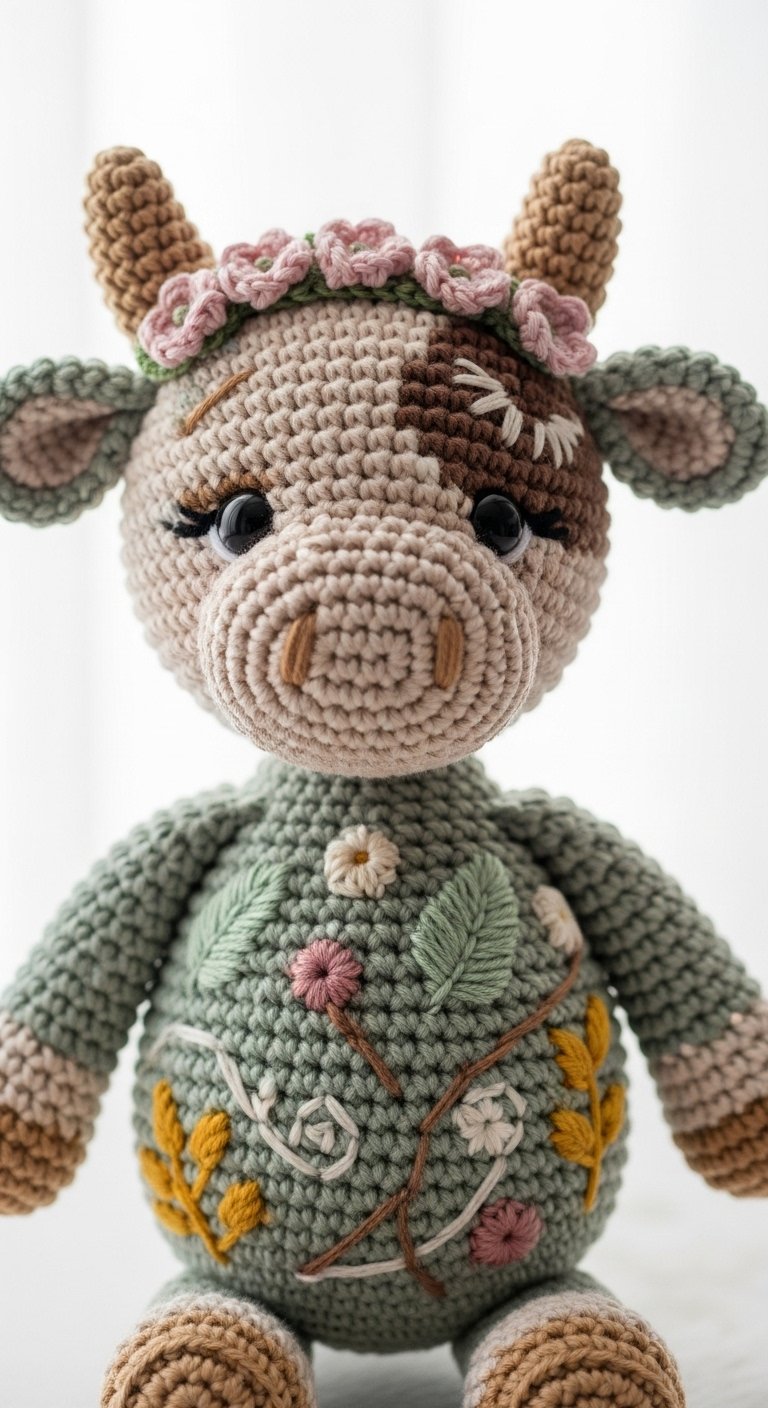
Cows are huge in the amigurumi world right now. Set yours apart by embroidering a wreath of greenery and small buds right where the horns meet the head.

It gives a “pastoral princess” vibe that is irresistible.
Mini Crochet Frog Amigurumi with Floral Crown

Frogs are naturally cute, but a frog with a flower crown is next-level adorable.
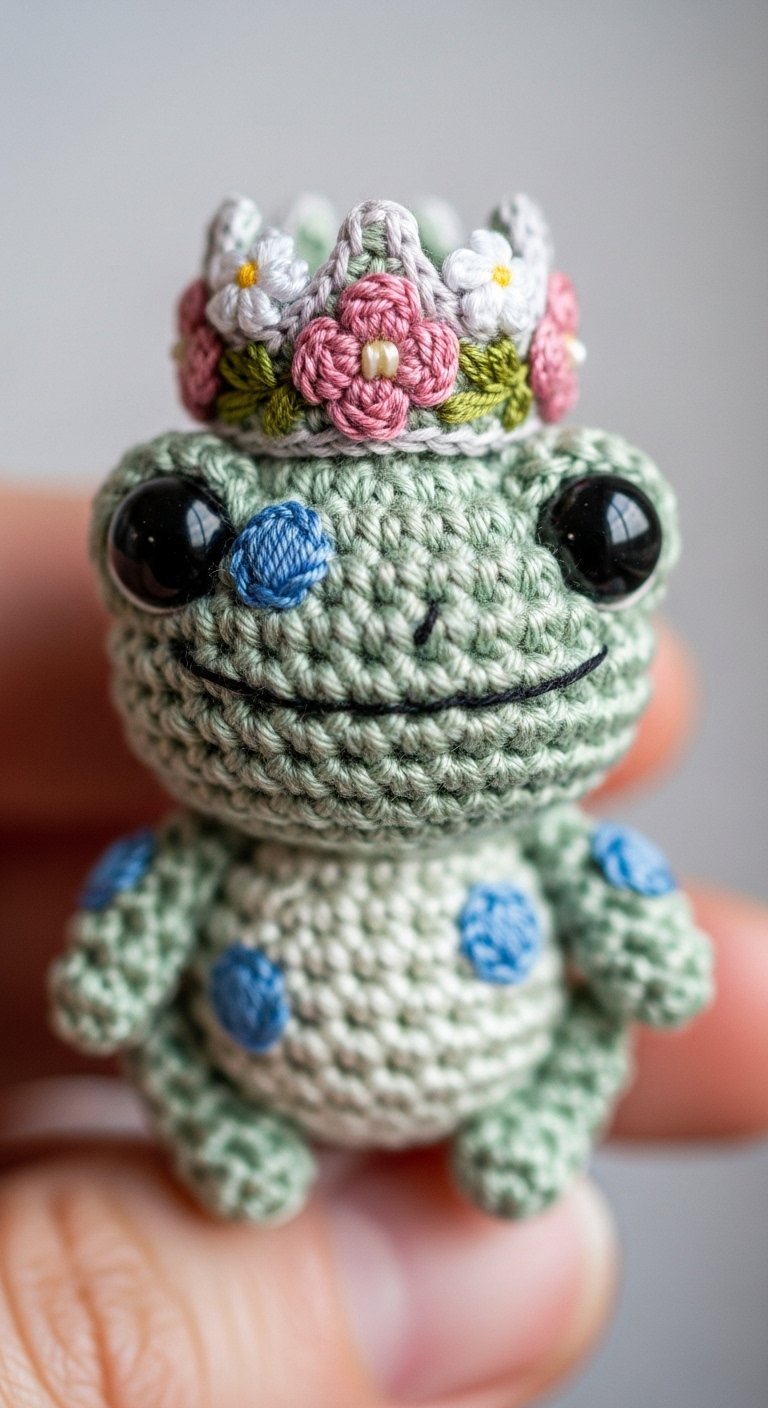
Because the head is usually round and green, it acts as the perfect grassy hill for your flowers. Use varied heights in your stitches to give the crown dimension.
Amigurumi Bunny with Leafy Carrot

This creates a 3D effect where the prop interacts with the main body.
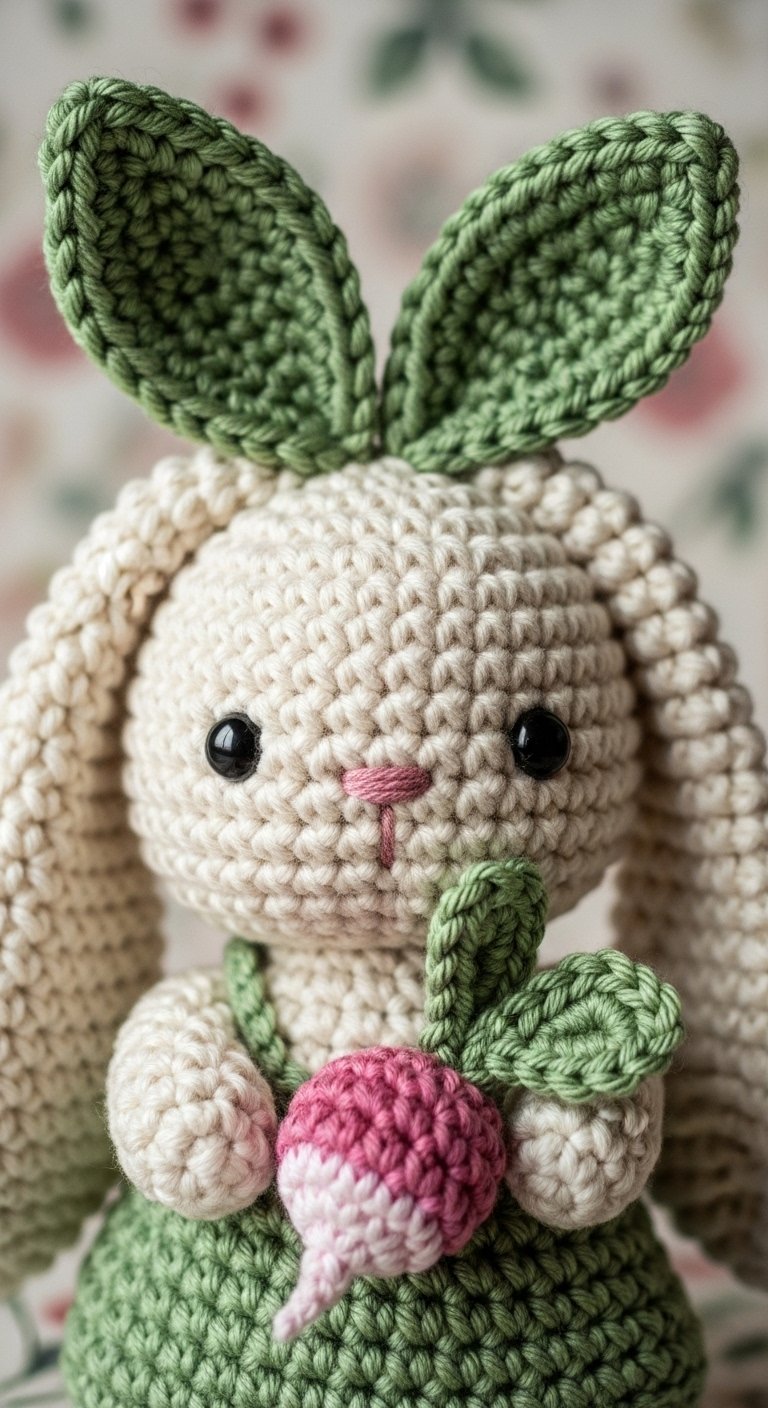
The orange carrot can be crocheted, but the leafy greens can be embroidered flowing down the bunny’s front, integrating the object into the design.
Kawaii Ghost Amigurumi
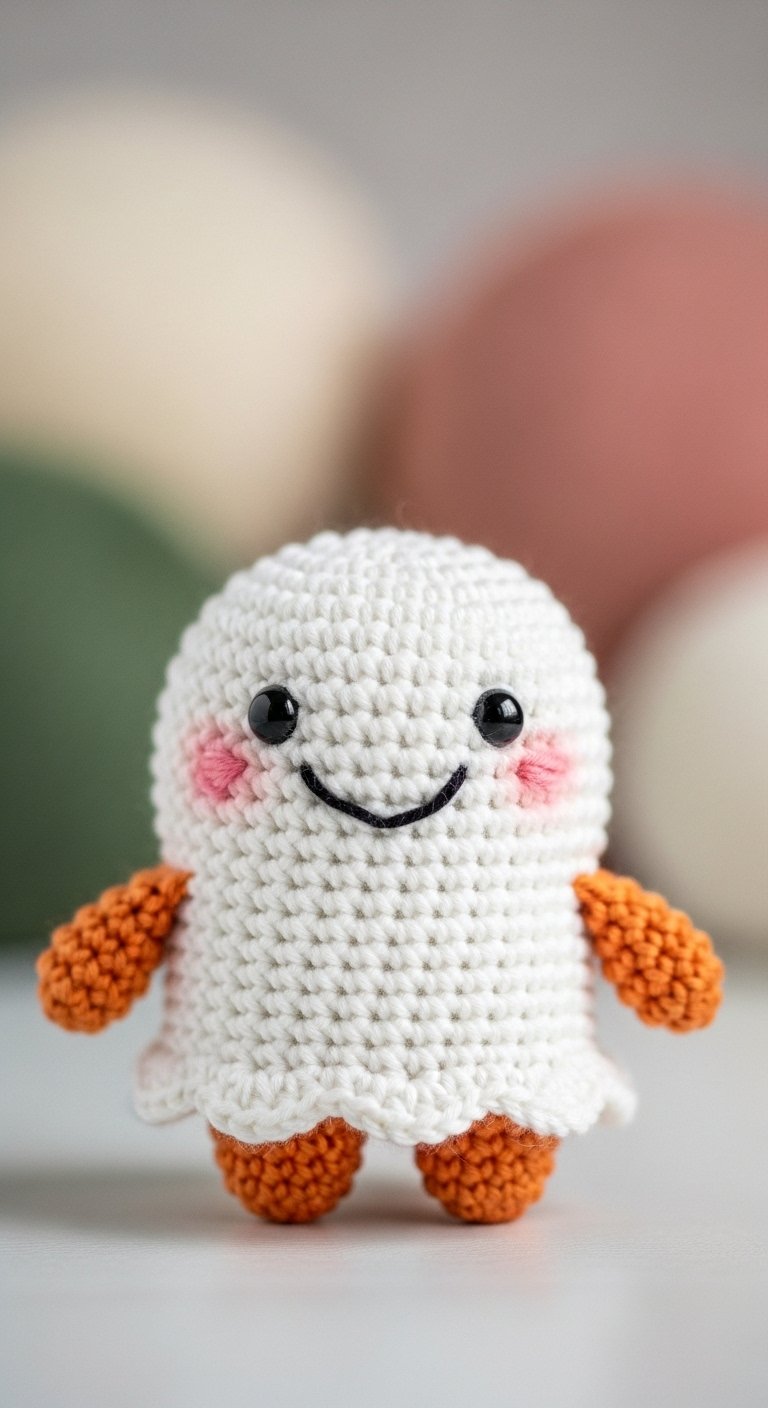
Ghosts do not have to be scary. By adding pink embroidered cheeks and a smile, you make it “kawaii.”
The embroidery here is minimal but essential for setting the mood. This fits perfectly with the playful vibe found in 15 Playful & Bright Corner Shelf Decor for Kids’ Rooms.
Mini Embroidered Amigurumi Bunny

On a tiny canvas, one large, detailed element often looks better than many small ones. A large sunflower covering the back of a mini bunny creates a stunning focal point.
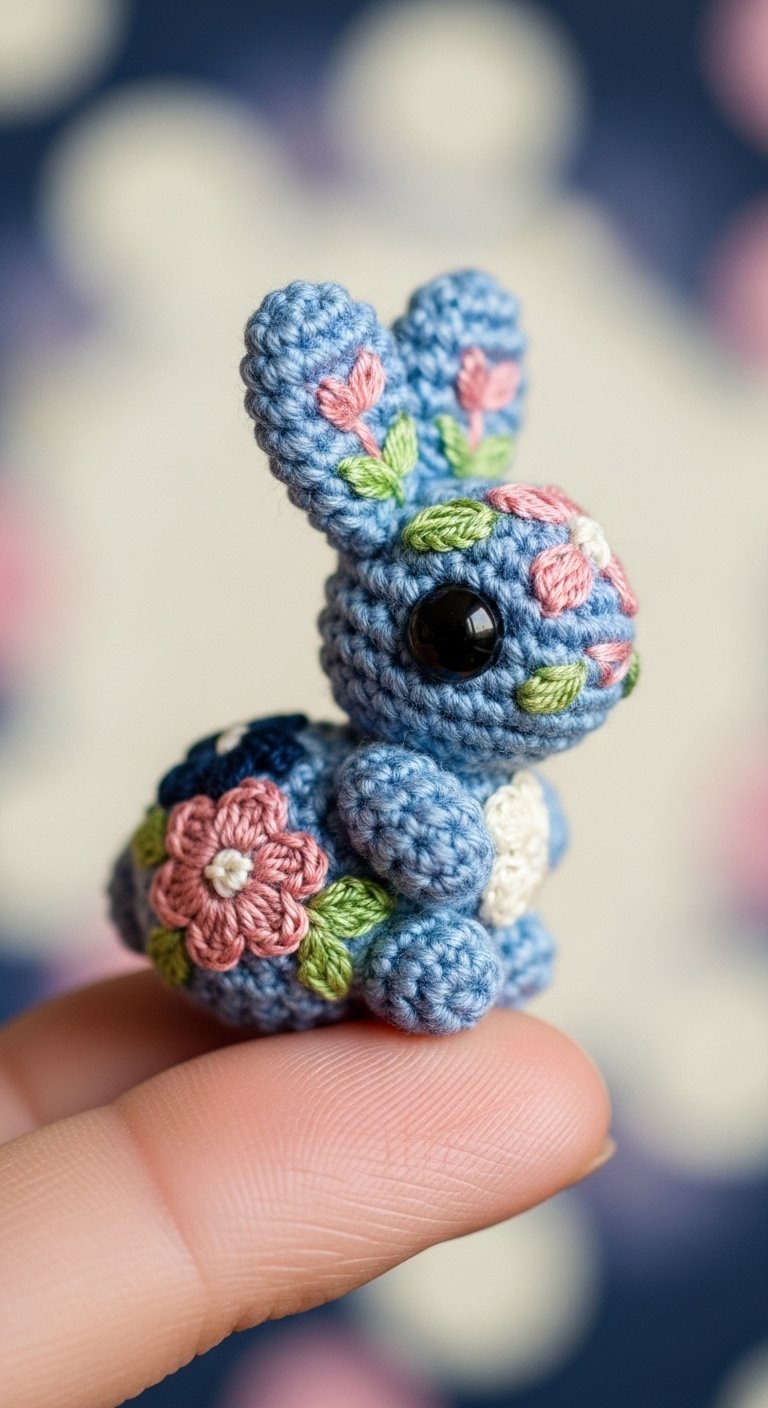
Use yellow loop stitches for petals to give it a 3D texture.
Mini Sheep Amigurumi Crochet Pattern with Rainbow
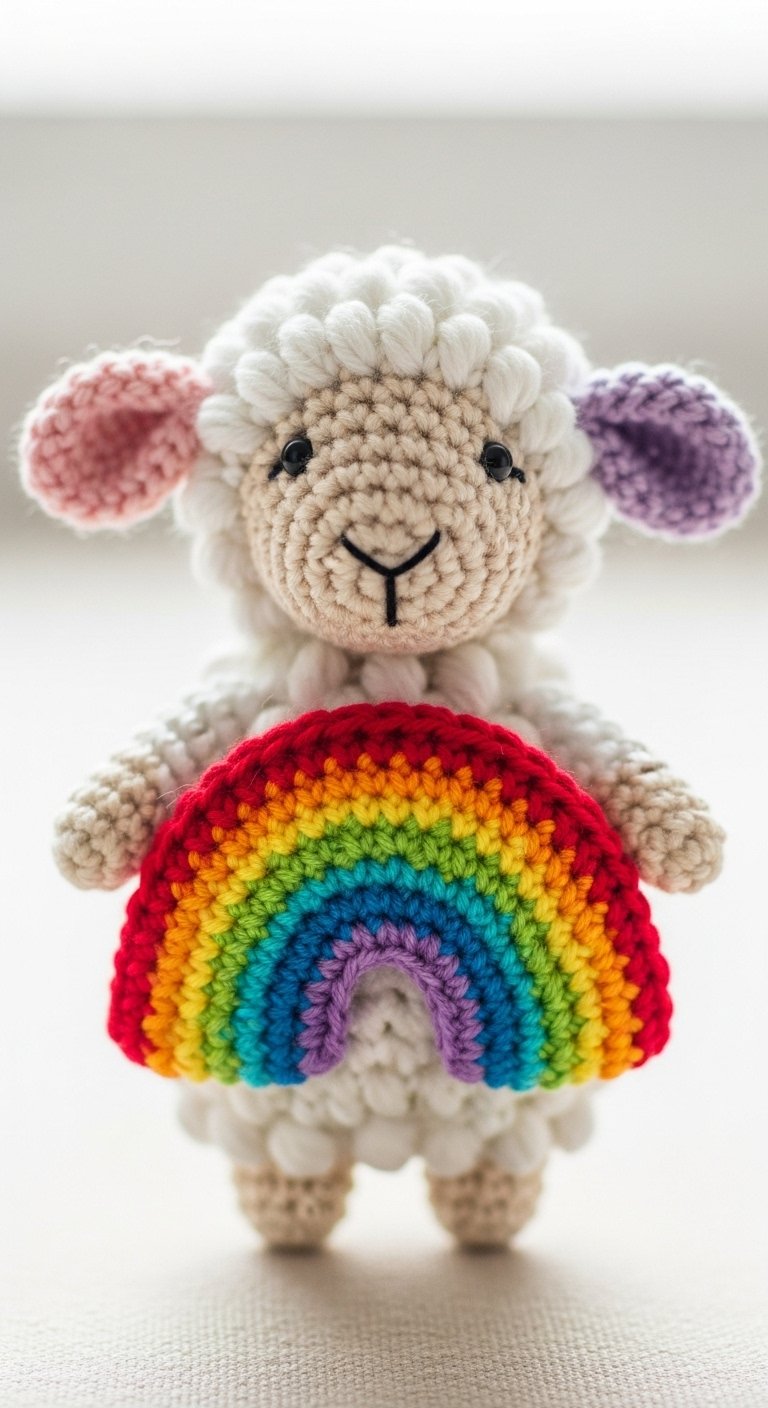
Celebrate color by stitching tiny rainbows (three curved lines in red, yellow, blue) amongst the textured bobble stitches of the sheep.
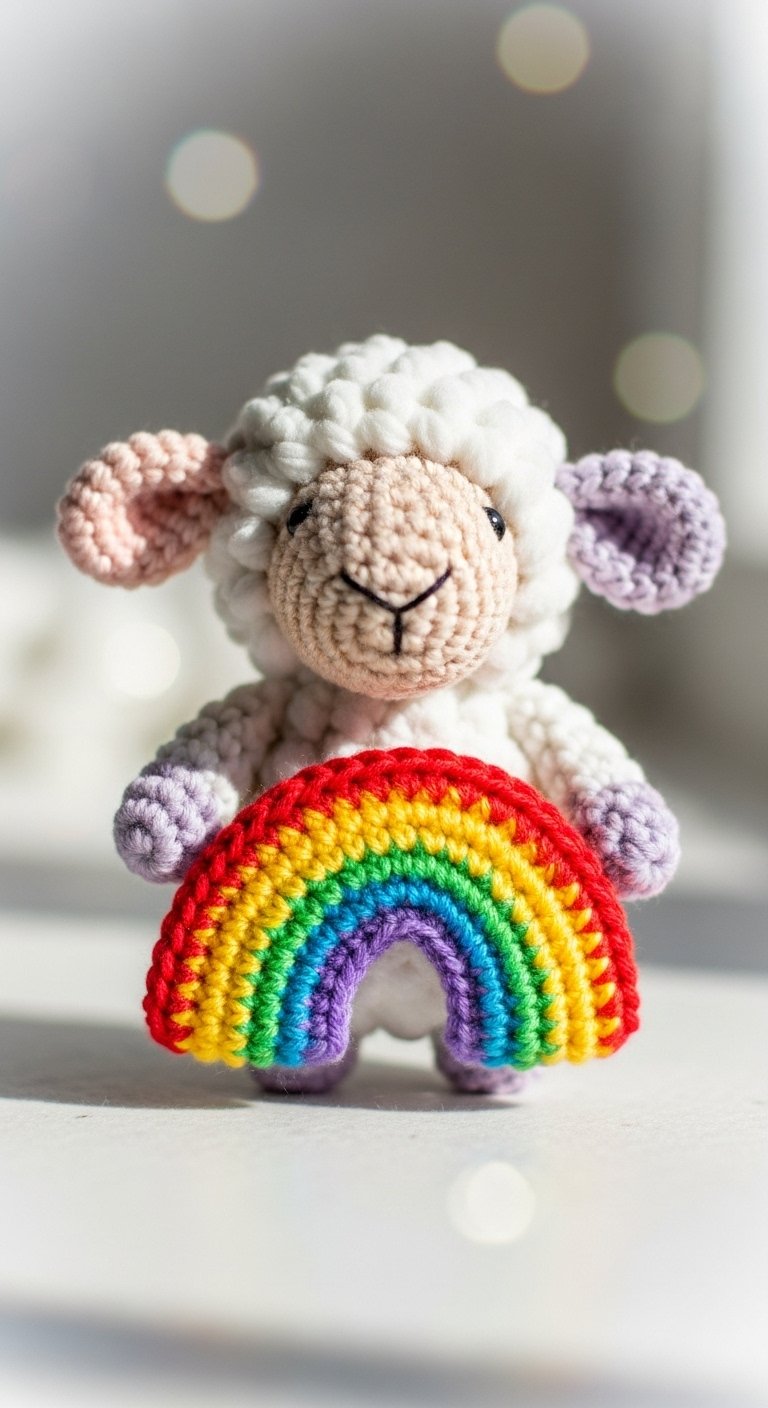
It is a cheerful, happy design that works great for baby mobiles.
Mini Bunny Amigurumi Handheld Knit Plush
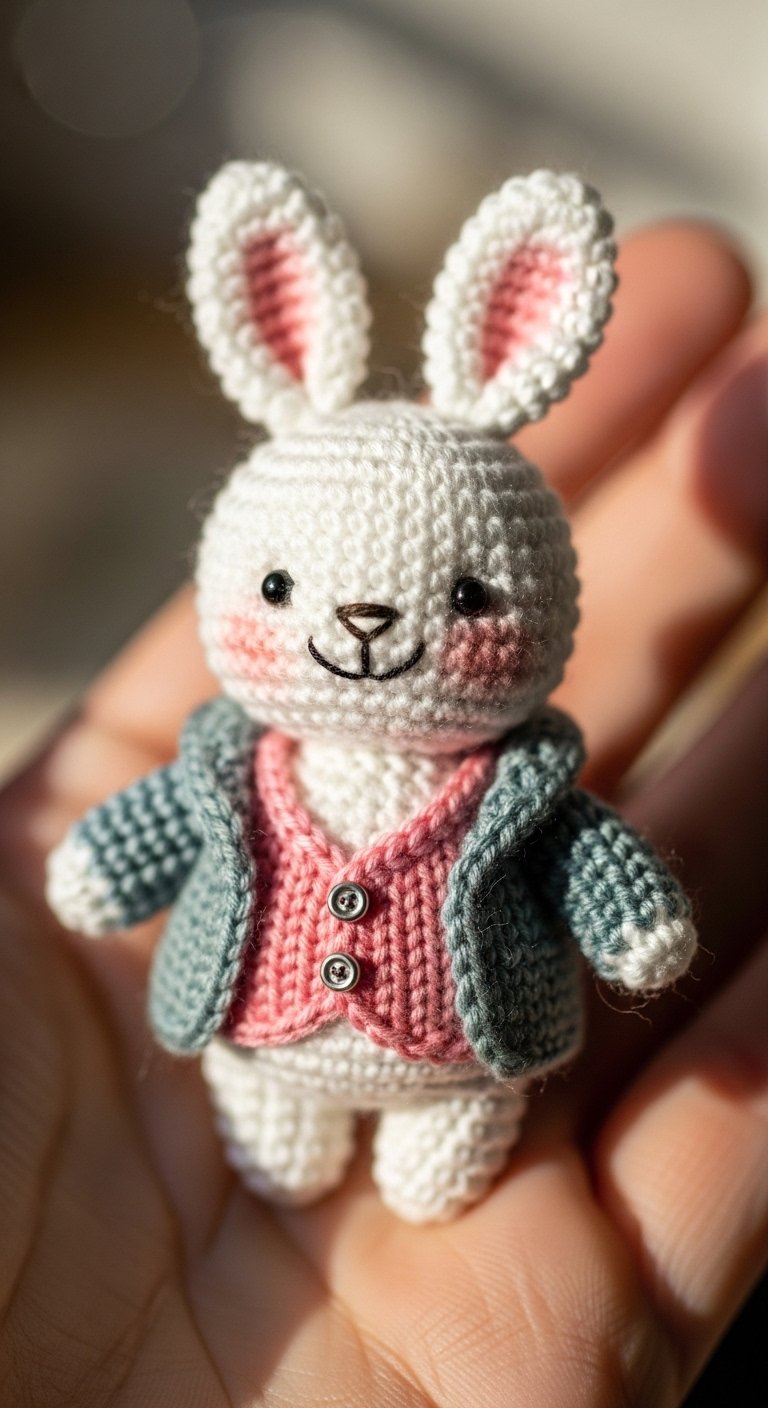
Knit fabric allows for much finer detail. Use a single strand of sewing thread (not floss) to create whisper-thin whiskers and expressive eyebrows.

This gives the toy a delicate, vintage feel.
Mini Amigurumi Elephant
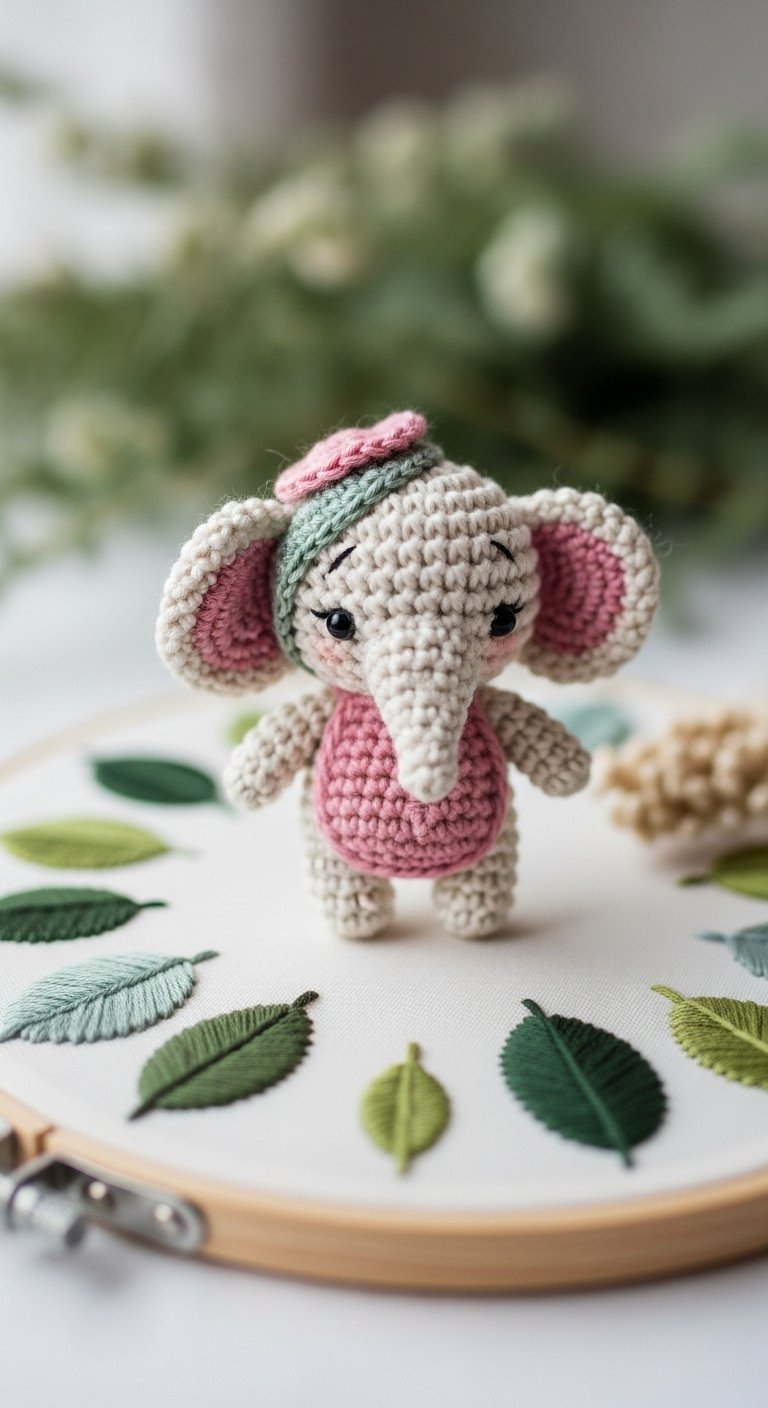
Elephant ears are large, flat surfaces begging for decoration. Use a symmetrical mandala or paisley design on the inner ear.
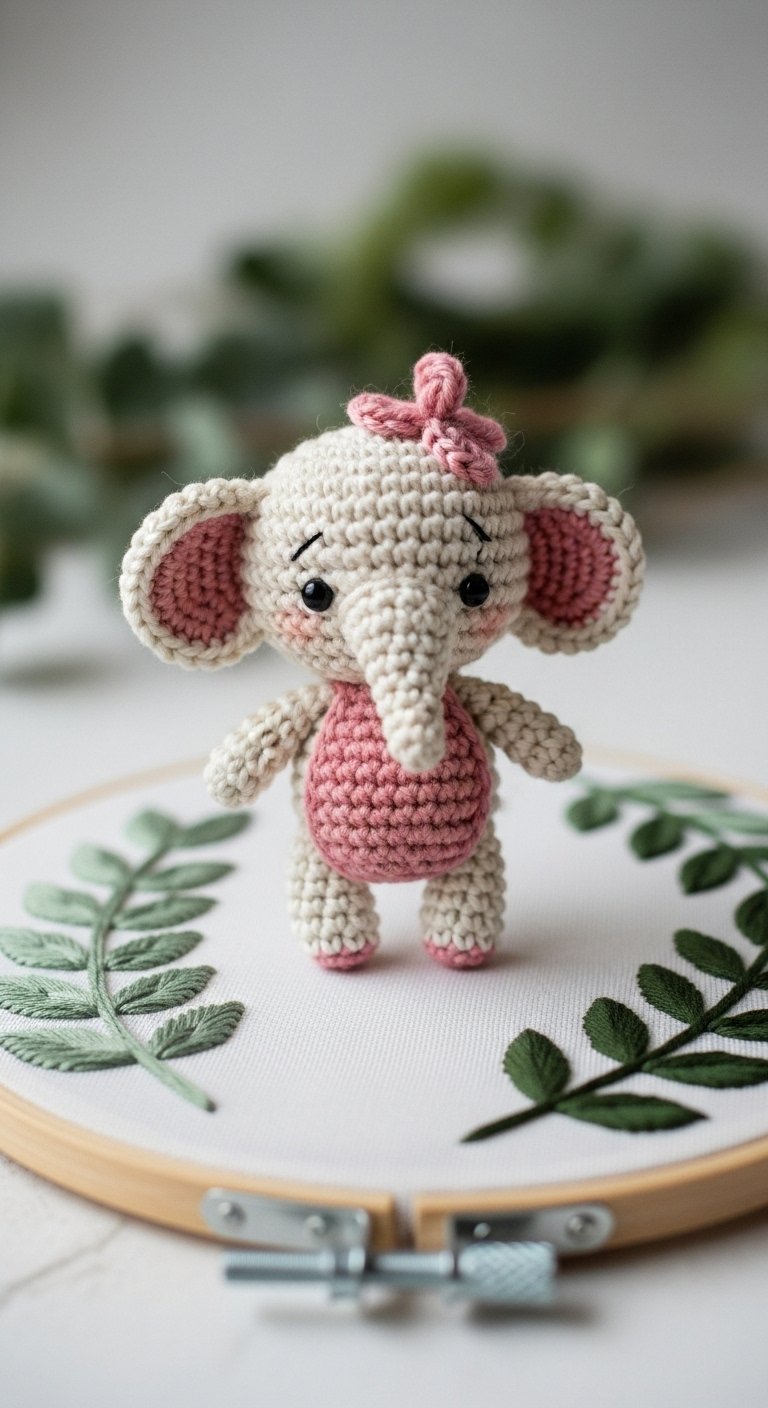
This adds a bohemian touch and makes the elephant look wise and well-traveled. If you love the boho look, you will find similar aesthetic principles in 14 Dreamy Steps to Create a Cozy Boho Bedroom.

The Secret Tools You Actually Need
You might think you need a fancy embroidery hoop and expensive silks to get started, but embroidering on amigurumi is a different beast than embroidering on fabric. Since your “fabric” is a 3D stuffed object, hoops are useless. Here is the toolkit that will actually make your life easier.
1. The Right Needles
Ditch the blunt tapestry needle you use for weaving in yarn ends. It is too thick and will distort your stitches. You need Chenille Needles (size 18-22) or Embroidery Needles with a sharp point. The sharp point allows you to pierce through the yarn strands rather than just going between the holes. This is critical for placing eyes and mouths exactly where you want them, not just where the crochet grid dictates.
2. Thread vs. Yarn
- Embroidery Floss: The gold standard. It comes in 6 strands. For delicate features on cotton yarn, separate it and use 2-3 strands. For chunky plush yarn, use all 6 strands or even double it up.
- Thin Cotton Yarn (Sport/Fingering): Great for larger details like flowers on a dress. It knits together visually with the base toy better than shiny floss.
3. The “Invisible” Knot Technique
One of the biggest struggles is starting and stopping without ugly knots showing.
- The Start: Insert your needle from a hidden spot (like the back of the neck), pull it through to where you want to start embroidering, leaving a tail at the neck.
- The Finish: When done, exit the needle back out at the exact same hole in the neck. Tie the two tails together, trim them short, and use the blunt end of a needle to stuff the knot inside the toy. It vanishes like magic.
4. Water Soluble Pens
Do not guess your placement. Use a water-soluble fabric marker to draw the face directly onto the crochet. If you mess up, dab it with a wet cloth and try again. This ensures your eyes are symmetrical before you commit to stitching.
Popular Asked Questions
How do you hide knots in amigurumi embroidery?
The best method is to start your needle from a different part of the toy (like the back of the head) and pull it through to the face, leaving a long tail hanging out the back. Do your embroidery, then bring the needle back out through that same starting hole. Tie the starting and ending tails together in a knot, trim them, and push the knot inside the stuffing using your needle.
Do you embroider before or after stuffing?
It depends on the detail. For facial features like eyes and mouths, it is often easier to embroider before stuffing and closing the head, so you can secure knots on the inside. However, for surface decoration like flowers on a dress or belly, it is better to embroider after stuffing so you can see how the fabric stretches and curves.
What is the best thread for amigurumi eyes?
For a matte, natural look, use black cotton embroidery floss (using all 6 strands for visibility). If you want a bit of shine, mercerized cotton yarn works well. Avoid regular sewing thread as it is too thin and will disappear into the crochet stitches.
Can I embroider on plush/chenille yarn?
Yes, but it is tricky. Standard embroidery floss often sinks into the fluff and becomes invisible. Instead, use a thinner weight acrylic or cotton yarn (like DK or sport weight) for the embroidery details. The different texture helps the details stand out against the fuzzy background.
Conclusion
Adding embroidery to your crochet toys is the difference between making a pattern and creating a personality. Whether you are stitching a sleepy face on a mini bunny or a garden of flowers on a deer, these small details carry your unique artistic signature.
Don’t be afraid to experiment. Snip that thread, grab your sharpest needle, and start doodling with yarn. Your amigurumi will thank you for it.
If you found these ideas inspiring, please share this post on Pinterest!
(Note: While we strive for accuracy, please ensure all attached parts and embroidery are secure before giving toys to small children/babies to prevent choking hazards.)


Leave a Comment