
You invested in a travel trailer or fifth wheel to escape the daily grind. You park at a scenic site. You step outside. The ground is uneven. Dirt tracks inside. The transition between your cozy interior and the great outdoors feels clumsy. You need a dedicated porch. A well-designed deck extends your square footage. It creates a seamless flow. It keeps your interior clean.
This guide explores specific camper porch designs. We cover everything from portable modular systems for weekend warriors to permanent seasonal decks for long-term stays. You will find budget-friendly DIY pallet projects. You will see high-end screened enclosures. We analyze the materials. We discuss the setup. You will build the outdoor living room you deserve.
Key Takeaways
- Modular systems offer the best flexibility for travelers who move locations frequently.
- Floating decks remove the need for digging and protect the campsite ground.
- Screened enclosures extend usable hours by blocking insects and dampening wind.
- Toy hauler ramps convert easily into elevated patios with the right railing kits.
- Lighting and textiles define the zone and create a cohesive visual aesthetic.
Table of Contents
- Portable Modular Deck Systems for Easy Setup
- Ground-Level Floating Deck Designs for Seamless Entry
- Multi-Level Deck Ideas with Built-in Storage
- Screened-In Porch Additions for Bug Protection
- Wrap-Around Deck Designs for Maximum Space
- DIY Pallet Deck Solutions on a Budget
- Toy Hauler Rear Deck Conversion Ideas
- Permanent Seasonal Site Deck Construction
- Portable Steps and Entry Platform Options
- Deck Accessories and Furnishing Ideas
- Popular Asked Questions
- Conclusion
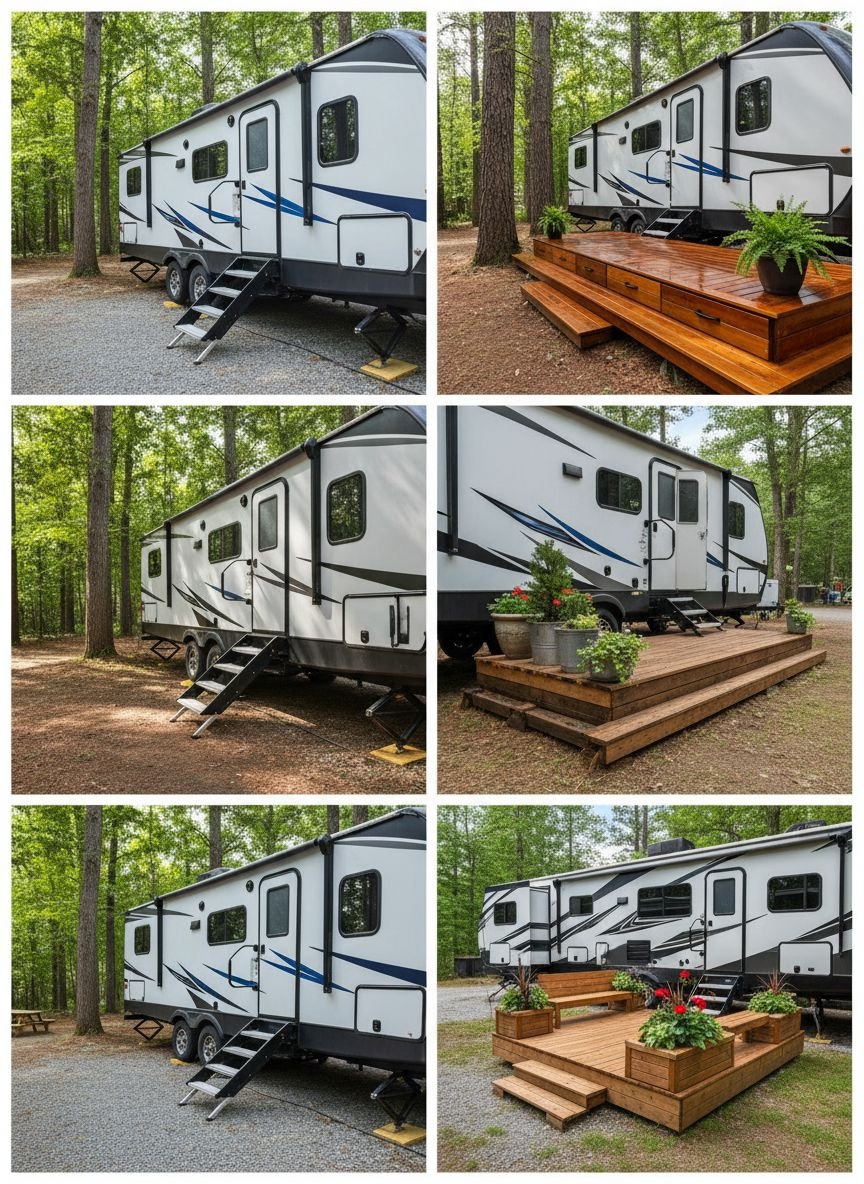
Portable Modular Deck Systems for Easy Setup
Frequent travelers demand speed. You arrive at a campsite late. You want to relax. A portable modular deck system solves this. These units consist of interlocking squares or rectangles. Manufacturers design them using lightweight materials like polypropylene or aluminum. You stack the pieces in your pass-through storage. You lay them out in minutes.
The visual appeal lies in the geometric patterns. Many brands offer faux wood grain textures. Others use a perforated grid design. The grid allows sand and water to fall through. Your surface stays dry. The modular nature lets you customize the shape. You build a square patio one weekend. You create a long runner the next. The flexibility matches your changing campsite footprint.
Pro Tip
Place a weed barrier or heavy-duty tarp under your modular tiles. This prevents grass from growing through the grid and keeps the underside of your tiles clean for storage.
Ground-Level Floating Deck Designs for Seamless Entry
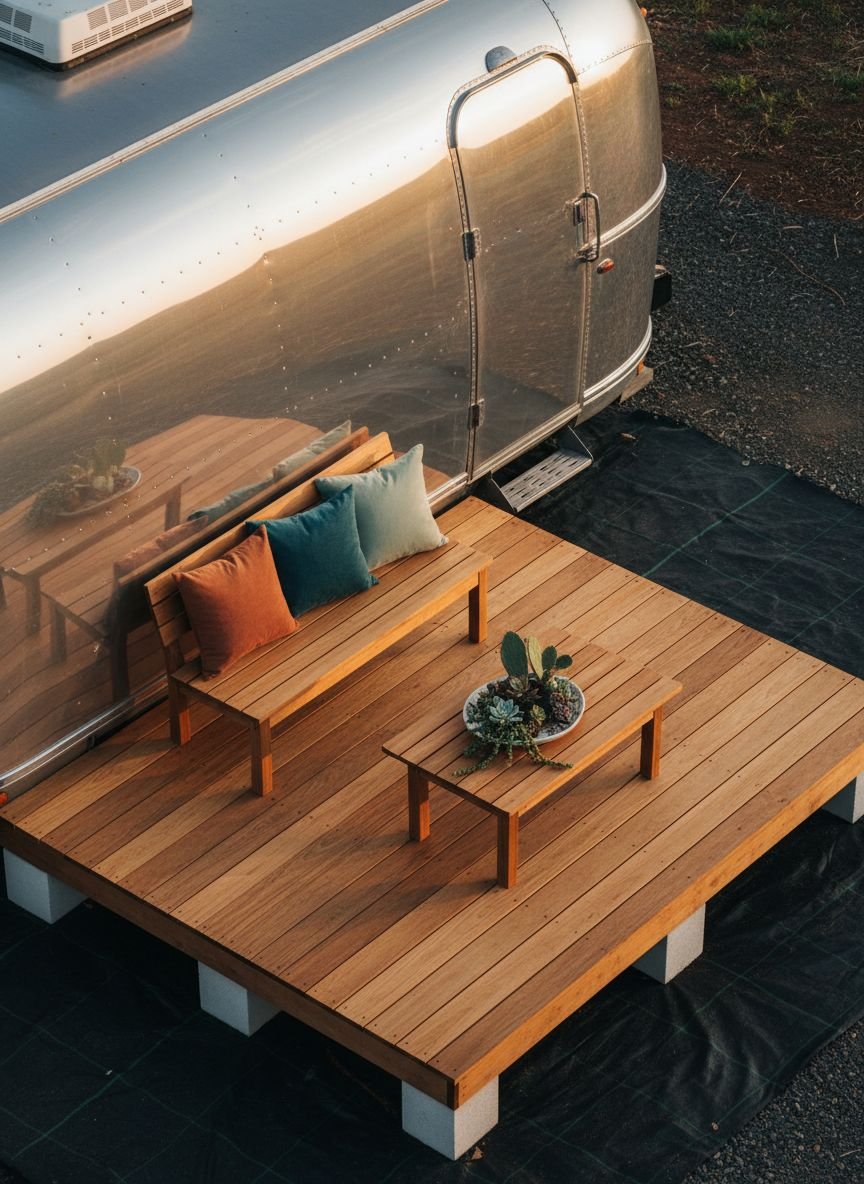
Floating decks sit directly on the ground. They rest on concrete blocks or pressure-treated skids. You do not dig holes. You do not pour concrete footings. This design suits seasonal campers who rent a spot for a few months. The low profile creates a modern aesthetic. It feels less like a temporary structure and more like a permanent patio.
The design eliminates the need for railings. The drop-off is minimal. This opens up the view. Your eye travels from the RV door to the horizon without obstruction. Use composite decking boards for a sleek look. Composite resists rot and fading. Choose a color that complements your RV graphics. Dark grey boards contrast well with white fiberglass exteriors. The lack of stairs makes this accessible for pets and children.
Save this idea to your Pinterest.
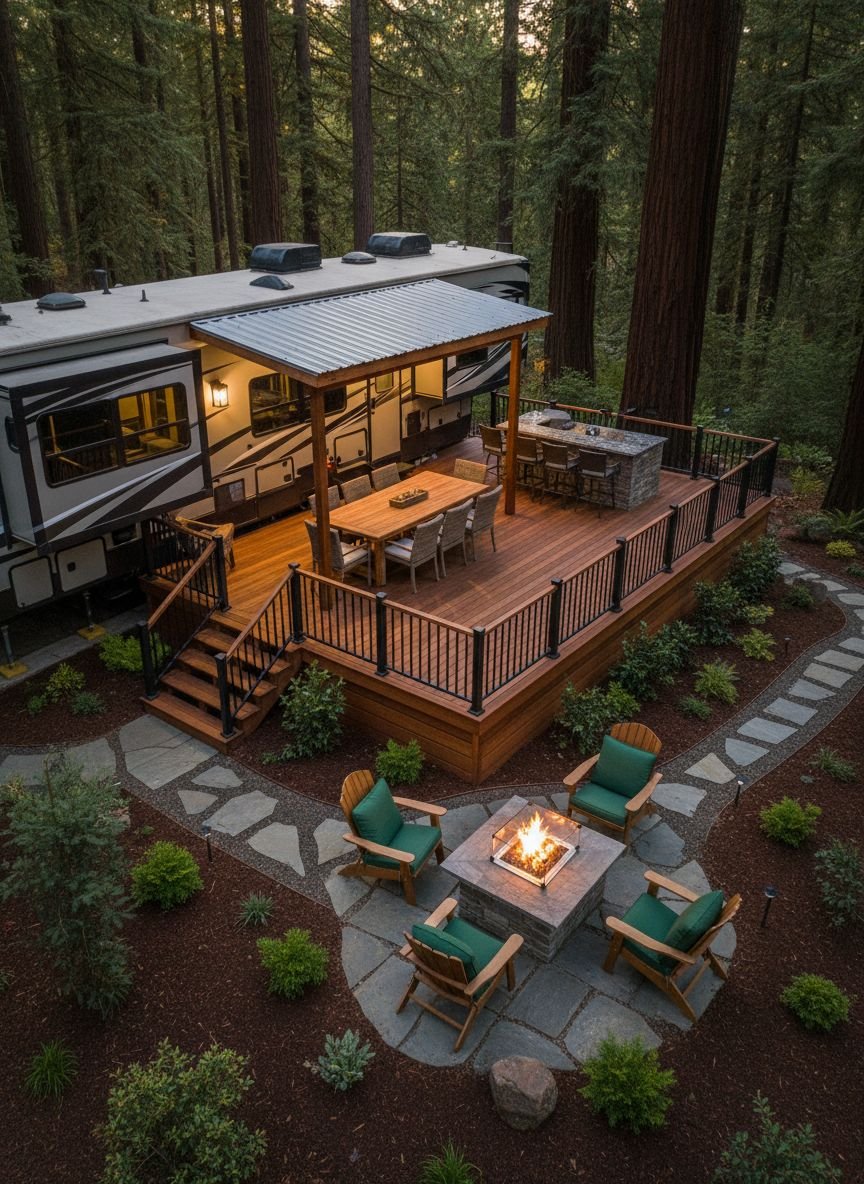
Multi-Level Deck Ideas with Built-in Storage

Sloped campsites present a challenge. A multi-level deck turns that challenge into a feature. You build the upper level flush with your RV door. This serves as your entry landing. You build the lower level to match the terrain. Steps connect the two zones. This separation creates distinct “rooms” outdoors. Use the top tier for grilling. Use the lower tier for lounging.
The space between the levels offers storage potential. You skirt the sides with lattice or horizontal slats. You install hinged doors. This hidden area houses your sewer hoses. It stores your camping chairs. It keeps your site looking tidy. The visual depth of a tiered deck adds architectural interest. It breaks up the boxy look of the trailer.
Pro Tip
Install solar puck lights on the risers of the stairs connecting your levels. This ensures safety during late-night returns to the camper.
Screened-In Porch Additions for Bug Protection
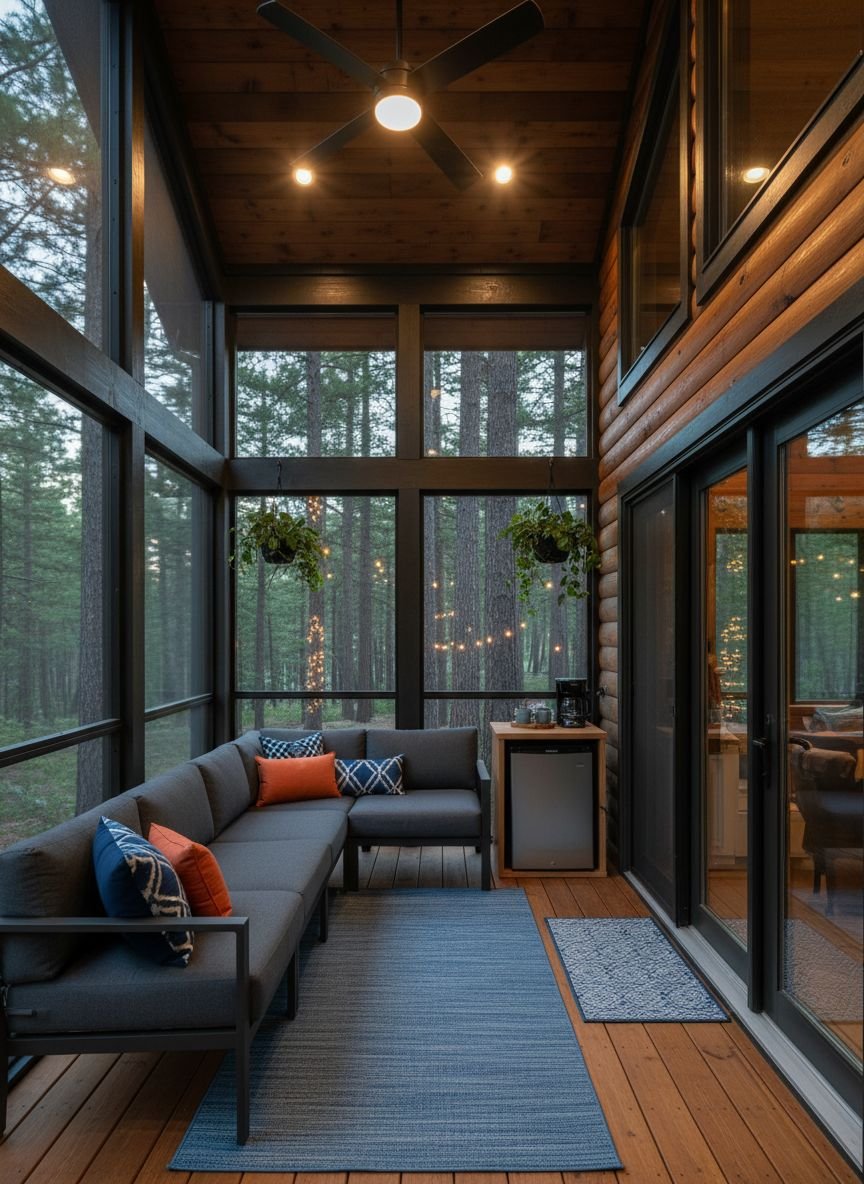
Mosquitoes ruin evenings. A screened-in porch reclaims the night. You attach a screen room to your awning. Or you build a hard-sided structure on your deck. The enclosure acts as a transition zone. It functions as a mudroom. It serves as a dining area. The mesh walls maintain airflow. You smell the campfire. You feel the breeze. You avoid the bites.
The aesthetic mimics a traditional “Florida room.” Use aluminum framing for a lightweight look. Use timber framing for a rustic cabin vibe. The roof of the porch protects your deck furniture from rain. You leave cushions out without worry. This extension effectively doubles your living area. It provides a safe space for indoor cats to experience the outdoors.
| Feature | Screen Tent Attachment | Hard-Sided Wood Build |
|---|---|---|
| Durability | Low (Wind damage risk) | High (Withstands storms) |
| Cost | $200 – $800 | $1,500 – $4,000+ |
| Portability | High (Packs away) | None (Permanent) |
| Setup Time | 30 Minutes | 3-5 Days |
Wrap-Around Deck Designs for Maximum Space
Standard RV decks sit on the door side. A wrap-around deck defies convention. You extend the platform around the rear or front of the camper. This design works best for fifth wheels with rear living rooms. It also suits travel trailers with dual entries. You gain access to storage bays from the outside. You clean windows easily.
The visual impact is massive. The deck cradles the RV. It integrates the vehicle into the landscape. You create multiple vantage points. You watch the sunrise from the east side. You watch the sunset from the west side. Construct the corners with 45-degree angles. This softens the sharp edges. It improves traffic flow around the perimeter.
Save this idea to your Pinterest.
Related posts :
- 15 Stunning Living Room Designs for Small Spaces That Maximize Every Inch
- 15 Best Corner Plant Stand Ideas for Cozy and Stylish Spaces That Maximize Every Inch
- 13 Chic Ways to Create a Vanity Nook in a Small Bedroom (Zero Clutter)
DIY Pallet Deck Solutions on a Budget
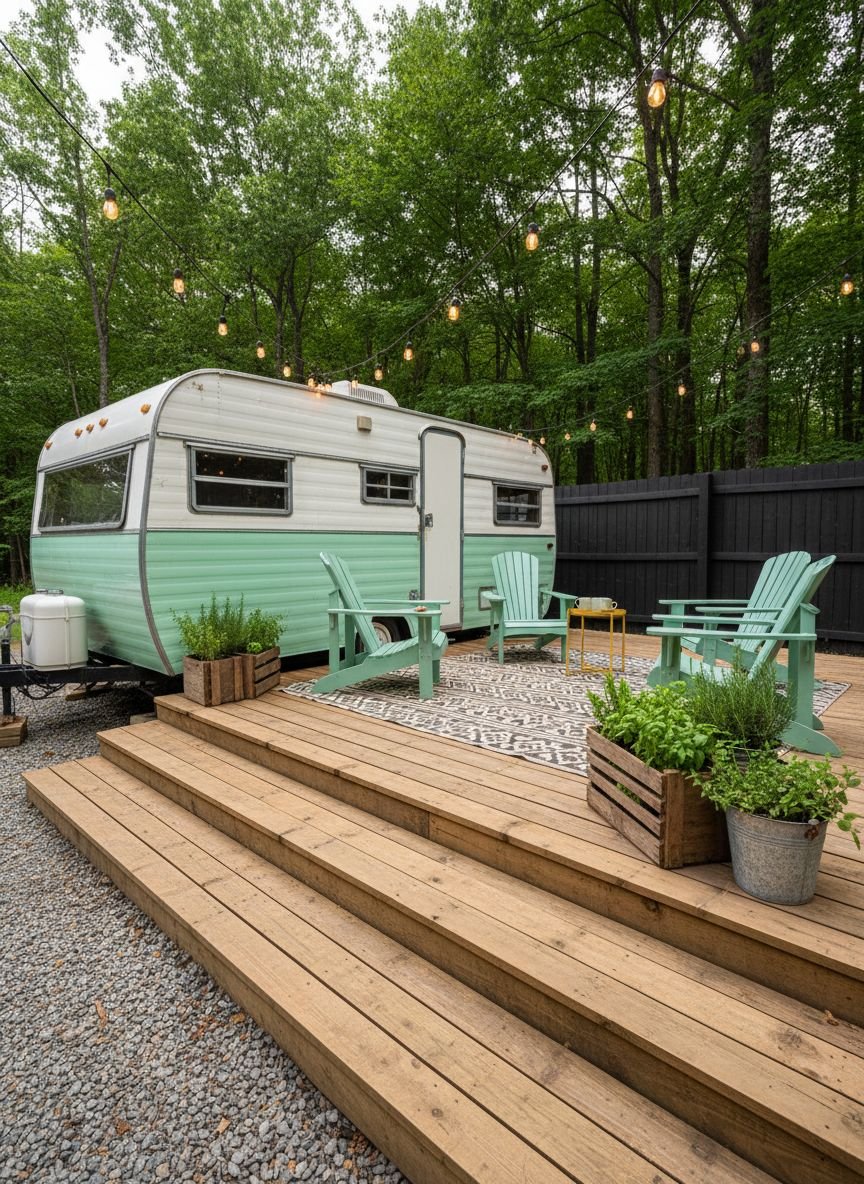
Lumber prices fluctuate. Pallets remain cheap or free. A pallet deck offers a rustic, bohemian charm. You source uniform pallets. You sand them down heavily. You arrange them in a grid. The gaps between slats allow drainage. The weathered wood matches the outdoor setting. This project suits DIY beginners.
You must choose the right pallets. Look for the “HT” stamp. This stands for Heat Treated. Avoid “MB” stamps. Those contain chemicals. Level the ground first. Place concrete pavers at the corners of each pallet. Connect the units with mending plates. Finish the surface with an outdoor sealant. A dark walnut stain hides imperfections. A clear coat highlights the natural grain.
Pro Tip
Fill the large gaps between pallet slats with gravel or plant low-growing moss for an integrated garden look that softens the wood.
Toy Hauler Rear Deck Conversion Ideas
Toy haulers possess a secret weapon. The rear ramp door converts into a patio. Most modern toy haulers include a cable support system. The ramp holds level with the floor. You deploy the fence kit. You instantly gain 60 to 80 square feet of deck space. This area sits high off the ground. It offers superior views compared to ground-level patios.
The industrial look of the ramp requires softening. Add an outdoor rug. The rug covers the non-slip grit tape. It protects bare feet. Add folding directors chairs. They stow away easily when you need to close the ramp. This deck is secure. The railing keeps toddlers and dogs safe. It utilizes space you already own.
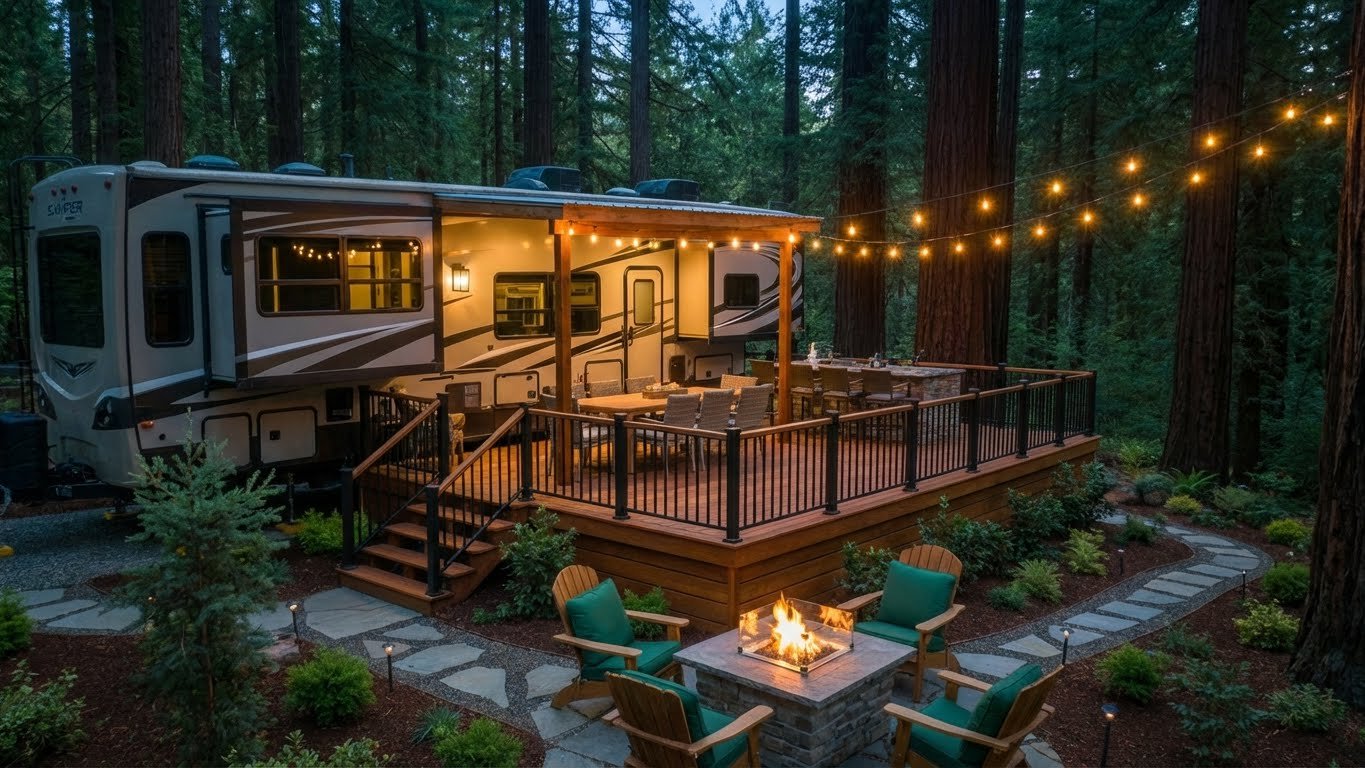
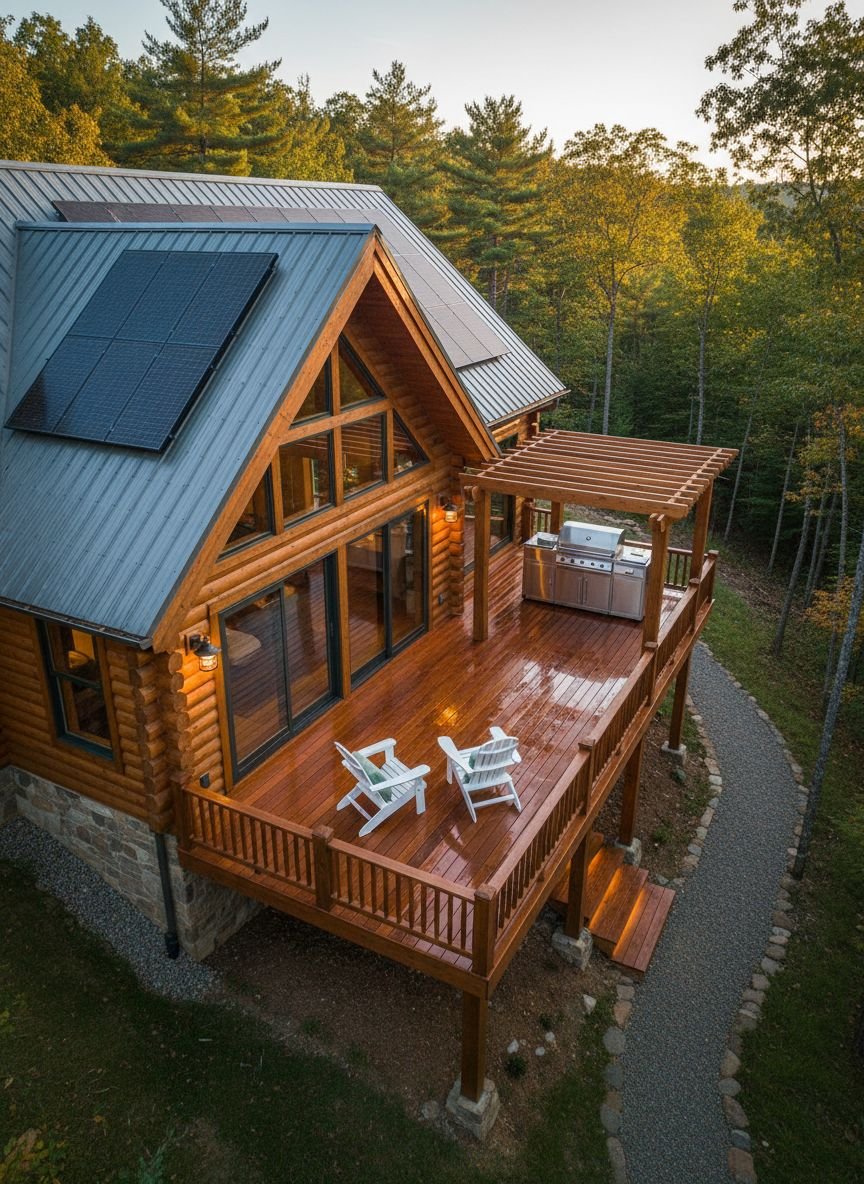
Permanent Seasonal Site Deck Construction
You leased a site for the year. You want stability. A permanent deck uses pressure-treated lumber. You sink posts below the frost line. You frame with 2×6 or 2×8 joists. This structure handles heavy loads. You host parties. You install a heavy grill. The deck does not wobble.
The design options expand with permanence. You add skirting around the base. The skirting hides the RV wheels. It insulates the underbelly. You integrate steps with proper rise and run. The stairs feel like a residential home. You stain the wood to match the campground trees. Cedar tones blend well. Redwood tones pop against green foliage.
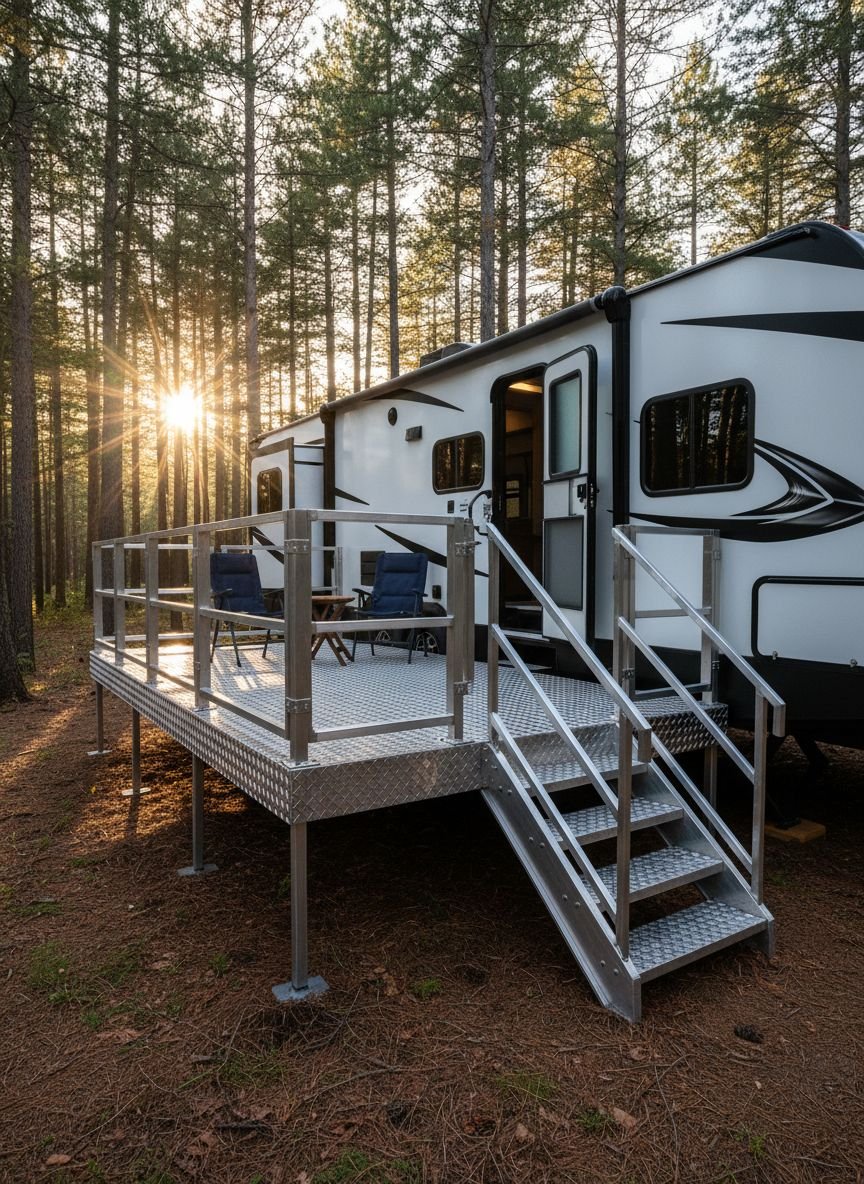
Portable Steps and Entry Platform Options
Maybe a full deck is too much. You still need safe entry. Factory RV steps bounce. They feel narrow. A portable entry platform bridges the gap. These units feature a wide top landing. They have adjustable legs for uneven terrain. The platform provides a stable place to set down groceries.
Choose aluminum for weight savings. Choose steel for maximum stability. Some models fold flat. Others require disassembly. Look for glow-in-the-dark tread strips. They prevent trips. The platform creates a designated “shoe zone.” You leave muddy boots outside. Your RV floor stays cleaner. The aesthetic is utilitarian but neat.
Save this idea to your Pinterest.
Deck Accessories and Furnishing Ideas
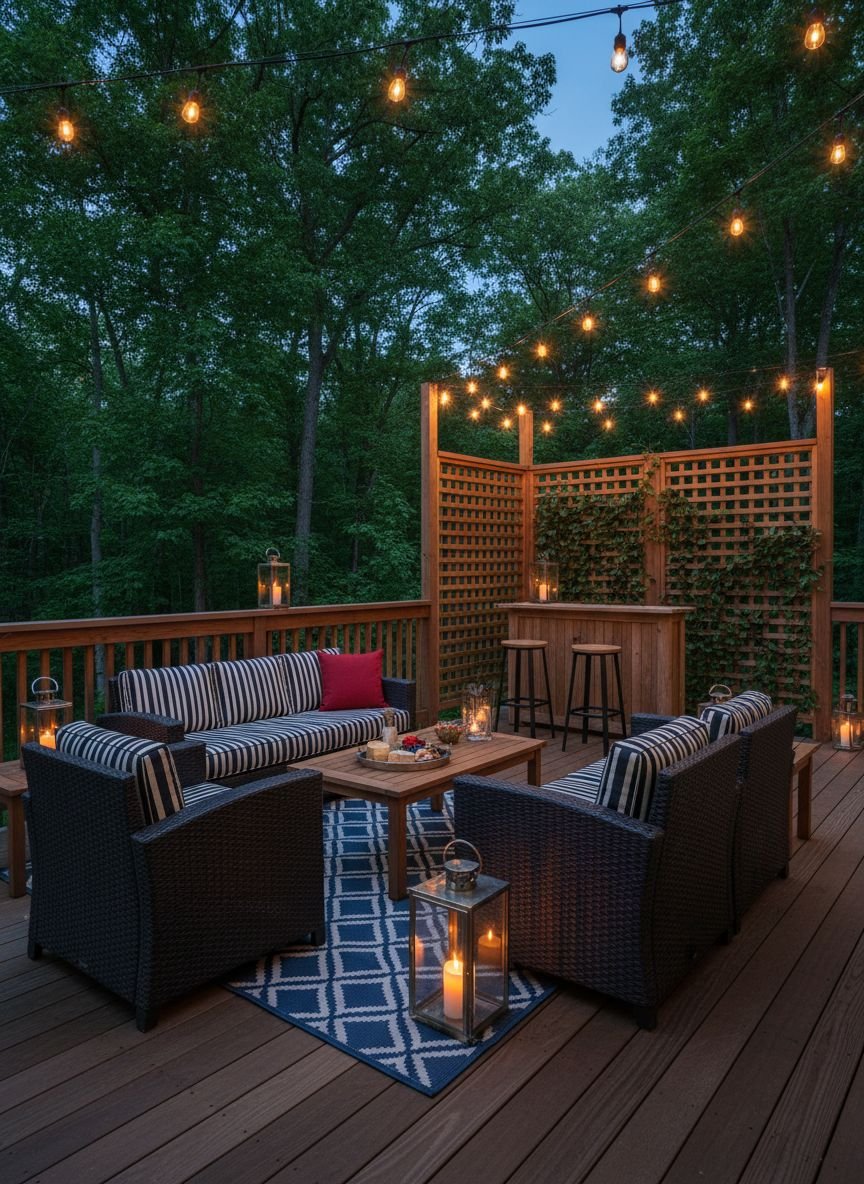
The structure is the canvas. The accessories are the art. You must scale furniture to the space. Huge sectionals overwhelm an RV deck. Bistro sets fit perfectly. Use multi-functional pieces. A storage ottoman serves as a seat and a table.
Lighting sets the mood. String lights along the awning arms. Wrap rope lights around the deck perimeter. Use solar post caps for wire-free illumination. Textiles add warmth. Outdoor rugs define the seating area. Throw pillows introduce color. Choose sun-resistant fabrics like Sunbrella. Hang hanging planters from the awning roller tube. Greenery connects the deck to the forest.
Popular Asked Questions
Do I need a permit to build a deck for my RV?
Most permanent campsites require approval for any structure. You check with the campground management first. They have rules about size and materials. Some counties require building permits for decks over a certain height. Portable decks rarely need permits.
What is the best material for an RV deck?
Pressure-treated pine offers the best value. It resists rot and bugs. Composite decking costs more but requires zero staining. Pallets work for tight budgets. Modular plastic tiles work for frequent travelers.
Can I move my RV deck?
You can move modular and floating decks. You disassemble them in sections. You load them into a truck or toy hauler. Permanent post-in-ground decks stay behind.
How do I stabilize a portable RV deck?
You use concrete deck blocks. You use adjustable screw jacks. You place the deck on a bed of gravel. The goal is to stop the wobble.
Conclusion
Your RV porch sets the stage for your outdoor memories. It serves as your dining room. It acts as your lounge. It keeps the dirt out. You choose a modular system for travel. You build a permanent deck for seasonal stays. The right design extends your living space.


Leave a Comment